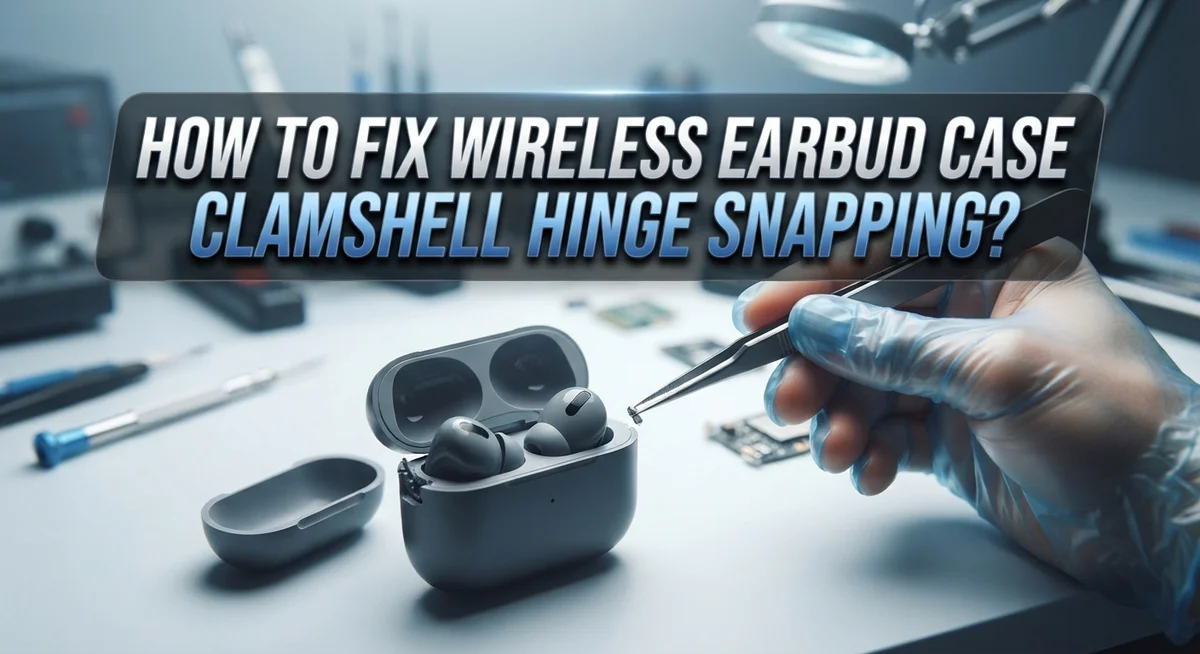
How To Fix Wireless Earbud Case Clamshell Hinge Snapping?
Your wireless earbud case snaps shut every time you use it. Then one day, the clamshell hinge gives up. It feels loose, wobbly, or worse, it snaps completely.
This is a common problem for many earbud users. The hinge takes a lot of daily stress. It opens and closes hundreds of times each month.
Don’t panic if this happens to you. Many hinge problems have simple fixes. You don’t always need a brand new case.
In a Nutshell
- Check the hinge pin first. Most snapping issues happen when the pin slips out of its notch. Use tweezers to gently guide it back into place.
- Look for a fallen spring inside the case. This tiny part often causes clamshell problems when it shifts during normal use.
- Try Blu Tack as a quick fix. Apply small amounts to both sides of the silver hinge to add grip and stability.
- Use strong adhesive for cracked notches. This works well for minor damage but will not fix severe breaks.
- Consider plastic welding for deeper cracks. This method offers a more permanent solution than glue alone.
- Avoid forcing the hinge shut. Forcing it without proper alignment can cause more damage to the plastic.
- Know when to stop repairing. If the hinge pin notch is destroyed or the case has multiple failures, a full case replacement makes more sense than continued fixes.
Understanding Why Earbud Case Hinges Snap or Loosen
Your earbud case hinge fails for specific reasons. Understanding these causes helps you fix the problem correctly and prevents future damage.
Repeated opening and closing weakens the hinge over time. Each time you snap the case open, tiny stress points develop in the plastic. After months of use, these stress points become cracks. The hinge loses its strength and eventually snaps.
Material fatigue is another major culprit. Plastic becomes brittle as it ages. Temperature changes make this worse. Cold temperatures make plastic more fragile. Heat softens it slightly. This constant expansion and contraction causes the hinge to weaken gradually.
Manufacturing defects sometimes cause hinges to fail early. A hinge pin might sit too loosely in its notch from the factory. The internal spring could be positioned incorrectly. These small errors create weak points that snap under normal use.
Impact damage accelerates hinge failure. Dropping your case or sitting on it puts sudden force on the hinge. Even small falls can crack the plastic or knock the hinge pin out of alignment. This damage compounds over time.
Loose hinge pins cause the hinge to flop around. When a pin shifts, the two case halves no longer align properly. This misalignment puts uneven pressure on the hinge. The stress concentrates in one spot, causing faster deterioration.
Internal spring displacement happens when the spring inside the hinge loses its position. A fallen spring no longer supports the hinge properly. The case feels loose and unstable. This instability leads to cracking.
Worn notches develop where the hinge pin sits. Constant movement wears away the plastic notch. Eventually, the pin has nowhere secure to rest. The hinge becomes unable to hold its position.
Diagnosing the Damage: Pins, Springs, and Cracks
When your earbud case hinge snaps, you need to understand what actually broke inside. The hinge contains several small parts working together. A broken hinge usually involves the hinge pin, the spring mechanism, or the plastic notch where they connect.
Start by opening your case slowly and looking at the hinge from the side. The hinge pin is a small metal rod that holds the two halves together. If this pin slipped out or bent, the hinge will feel loose or flop around. You can often see the pin sitting at an odd angle or missing entirely.
Next, check for cracks in the plastic hinge component itself. Small cracks appear as thin lines along the hinge edge. Larger cracks might show white stress marks or pieces of plastic that feel separated. These cracks usually develop where the hinge connects to the case shell.
Look inside the case for a fallen spring. When you carefully open the case, a tiny spring might drop out. This spring keeps tension on the hinge. Without it, the hinge loses its grip and snaps shut too easily or won’t stay closed.
Examine the notch where the hinge pin sits. This notch can wear down or chip away from repeated use. A damaged notch prevents the pin from staying in place properly.
Pay attention to whether the damage is on one side or both sides of the hinge. Single side damage is often easier to fix than damage affecting both hinge components.
Take photos of the damage before attempting any repair. This helps you remember how pieces fit together and lets you compare your case to others online for reference.
Quick Temporary Fixes to Stabilize a Loose Hinge
A loose hinge needs immediate attention before it gets worse. The good news is that several quick fixes can stabilize your case while you decide on a permanent solution.
Blu Tack is your first line of defense. This putty like material works by adding friction to the hinge joint. Open your case and locate the silver hinge inside. Apply small amounts of Blu Tack to both sides of the hinge where it connects. Press the case shut gently and let it sit for a few minutes. The putty hardens and prevents the hinge from flopping around. This fix typically lasts several weeks before you need to reapply it.
Check for a displaced hinge pin next. Sometimes the small metal pin slips out of its notch during normal use. Open your case and look at the hinge carefully. Use tweezers or a small tool to gently push the pin back into its proper position. You should hear or feel a slight click when it seats correctly. This realignment often restores stability immediately.
Inspect the interior for fallen springs. When you open your case, look inside the hinge area. A tiny spring may have popped out of place. If you spot a spring lying loose, carefully position it back where it belongs using tweezers. Springs control the tension in your hinge, so replacing it can make a huge difference.
Avoid forcing the hinge closed. Pressure on a loose hinge causes more damage. Close your case gently and smoothly. Rough handling accelerates the breakdown of the plastic notch where the pin sits.
These temporary fixes buy you time. They work best when the hinge is loose but not cracked or broken.
Step-by-Step Guide to Realigning and Repairing the Hinge Pin
When your hinge pin needs realignment, precision matters. The hinge pin is a tiny metal rod that holds your case together. If it slips out of position, your case won’t close properly.
Start by gathering your tools. You need tweezers or a small flathead tool to manipulate the pin. A magnifying glass helps you see the small notch clearly. Good lighting is essential for this work.
Open your case gently. Look at the hinge from the side to see where the pin sits. The pin should rest in a small notch on both the case body and lid. If it’s misaligned, you’ll notice it doesn’t sit flush in the notch.
Use your tweezers to carefully guide the pin back into its notch. Work slowly and apply gentle pressure. Don’t force the pin or you’ll damage the notch further. The pin should slide smoothly into place when properly aligned.
Test the alignment by opening and closing your case slowly. The hinge should feel stable and move smoothly. If the pin keeps slipping out, the notch may be damaged.
For damaged notches, strong adhesive can help restore the holding power. Apply a small amount around the notch area. Let it cure completely before using your case. This fills gaps and prevents the pin from shifting.
If realignment doesn’t work, the notch may be too worn. Plastic welding offers a more permanent solution for structural damage. This process fuses the plastic back together and creates a stronger notch.
Check both sides of the hinge. Sometimes one side aligns perfectly while the other side is damaged. Address both sides for balanced stability.
Permanent Repair Methods: Adhesives and Plastic Welding
Permanent repair methods work best when temporary fixes fail. You have two main approaches: adhesive bonding and plastic welding. Both techniques seal damaged hinge components and restore structural integrity.
Strong adhesive application targets worn notches and small cracks in the hinge plastic. Clean the damaged area thoroughly before applying any adhesive. Remove dust, debris, and old residue using a dry cloth or soft brush. Let the surface air dry completely for several minutes.
Apply a small amount of adhesive directly into the notch or crack. Use a toothpick or applicator stick for precise placement. Avoid excess adhesive, which can harden inside the hinge joint and prevent smooth operation. Press the hinge components together gently and hold them for the time specified by the adhesive instructions.
Plastic welding offers a stronger solution for larger cracks or severe structural damage. This method uses heat to fuse broken plastic pieces together. The welded joint becomes one solid piece rather than two separate parts held by adhesive. Plastic welding requires careful temperature control to avoid melting surrounding components.
Let adhesive cures fully before using your case. This typically takes 24 hours, though some formulas work faster. Test the hinge slowly after curing. Open and close your case gently several times to check stability.
If adhesive or welding fails, your hinge may have damage too severe to repair. Multiple structural failures, irreparably damaged notches, or cracked hinge pins often require case replacement instead. Attempting additional repairs on severely compromised hinges risks permanent case damage and wasted time.
Common Mistakes That Worsen Hinge Damage
Many people accidentally make their hinge problems worse by rushing into repairs. Understanding these mistakes helps you avoid causing additional damage to your case.
Forcing the hinge closed is the biggest mistake you can make. When you feel resistance, stop immediately. Pushing harder damages the hinge pin, cracks the plastic notch, and may snap internal springs. Your case needs gentle handling, not force.
Another common error is attempting repairs without checking inside the case first. A fallen spring or displaced hinge pin causes the hinge to feel broken when it actually just needs realignment. You should inspect the interior before applying any adhesive or attempting fixes. Take time to look inside with a flashlight.
Skipping the temporary stabilization step leads to faster deterioration. Many people jump straight to permanent repairs without using Blu Tack or other quick fixes first. These temporary solutions buy you time to plan your next step and prevent the hinge from getting worse during daily use.
Applying adhesive or attempting plastic welding without proper surface preparation wastes your effort. Dirt, dust, and moisture prevent adhesives from bonding correctly. You must clean the hinge area thoroughly before any permanent repair method.
Ignoring structural cracks is also problematic. Small cracks grow larger with each use. Addressing them early with appropriate repair methods stops the damage from spreading. Waiting until the hinge completely fails leaves you with no repair options.
Finally, many people don’t test their repairs properly before returning to normal use. After applying adhesive or realigning components, open and close your case slowly several times. This reveals whether your repair actually worked before you risk dropping or stressing the hinge again.
Troubleshooting Persistent Hinge or Case Issues
When your earbud case hinge continues to fail despite your repair attempts, you’re facing a persistent issue that requires a different approach. Persistent problems signal that temporary fixes alone won’t solve your situation.
The first step is to identify whether your hinge has multiple types of damage. Open your case and inspect the entire hinge assembly carefully. Look for cracks in the plastic, worn notches, and any missing components. Sometimes the hinge pin sits correctly, but the plastic around it has fractured in several places. This kind of damage means you need a more aggressive repair strategy.
If you’ve already tried realignment and adhesive without success, plastic welding becomes your next option. This method bonds broken plastic pieces together more permanently than standard adhesive. The process requires heat application, so research proper techniques before attempting this yourself.
Check for internal spring displacement during inspection. Springs sometimes fall out during the initial break. A missing or misaligned spring causes the hinge to feel loose even after you’ve repaired the visible damage. Reposition any springs you find, then test your case again.
When adhesive and plastic welding both fail, your hinge likely has damage too severe to repair. Structural failures at the hinge base or multiple cracked sections mean replacement becomes your best option. A new case shell solves the problem permanently rather than creating a cycle of repeated failures.
Before you decide on replacement, perform one final test. Close your case gently and hold it closed for several seconds. If it springs open or feels unstable, the internal structure is compromised beyond repair. Accept that replacement is often the most practical solution for persistent hinge problems.
Knowing When the Hinge Is Beyond Repair
Your wireless earbud case hinge reaches a point where repair becomes impossible. Understanding this limit saves you time and frustration.
Severe plastic fractures indicate irreparable damage. If the hinge plastic has shattered into multiple pieces or shows deep cracks that extend beyond the hinge area, repair attempts will fail. The structural integrity is simply gone.
A damaged hinge pin notch that’s been worn smooth or crushed flat cannot hold the pin securely. When the notch loses its shape completely, adhesive and plastic welding cannot restore the original function. The pin will continue slipping out of place.
Multiple structural failures mean your case has too much damage. If you discover a broken hinge pin AND a cracked hinge component AND internal spring displacement all at once, attempting piecemeal repairs wastes your effort. These combined issues suggest the case experienced significant trauma.
Test your repair by opening and closing the case gently 10 times. If the hinge feels loose, makes clicking sounds, or fails to stay closed, the repair didn’t work. This tells you the damage exceeds what temporary or permanent fixes can handle.
Pay attention to repeated failures. If adhesive held for only a few days or plastic welding cracked again within a week, your hinge has hidden damage you cannot see. Continuing to repair means you’re treating symptoms, not the root problem.
When you reach this point, replacement becomes the practical choice. A new case costs less than your continued repair attempts and frustration. Your earbuds deserve a case that functions reliably, and sometimes accepting when repair is impossible is the smartest decision you can make.
Final Thoughts
Fixing a snapped clamshell hinge takes patience and the right approach. Start with small, careful steps before jumping into permanent fixes.
Check for loose springs first. Realign the hinge pin gently. These simple actions solve many cases without extra tools or materials.
If quick fixes don’t work, move to adhesive or plastic welding. Both methods need clean, dry surfaces to work properly. Give the bond enough time to cure fully.
Never rush this process. A hinge that seems fixed but hasn’t cured completely will fail again soon. Testing your repair matters just as much as the repair itself.
Sometimes, despite your best efforts, the case simply won’t hold. Severe cracks and worn pin notches often signal the end of repair options. This isn’t a failure on your part. Plastic has limits, and hinges take constant stress.
When you reach that point, replacing the case is the smart move. A new case costs less than losing your earbuds to a broken clamshell that won’t close properly.
Think about prevention going forward. Handle your case gently. Avoid overstuffing it in bags or pockets. Small habits protect the hinge from future stress.
Wireless earbud cases go through a lot of daily wear. Hinges are small parts, but they matter a lot for keeping your earbuds safe and charged.
Whether you fix the hinge yourself or replace the case, your goal stays the same: keeping your earbuds protected and ready to use. Take the time to do the repair right, and your case will serve you well for a long time.
Frequently Asked Questions
Can I fix a snapped hinge without opening the case?
Yes, you can try a quick fix without disassembly. Apply adhesive putty to both sides of the silver hinge inside your case. This works best for loose hinges that haven’t fully broken yet. Press the hinge firmly and let it cure for the time recommended on the package.
If the hinge still feels weak after curing, you’ll need to open the case to check for deeper damage.
What should I look for when I open the case?
When you disassemble your case, check three things: the hinge pin itself, the notch where the pin sits, and any small springs inside. Springs sometimes fall out during the initial break, so look carefully at the bottom of the case.
If you find a displaced spring, gently reposition it using tweezers. This alone may solve your problem.
Why does my repaired hinge fail after a few days?
Your repair likely didn’t fully cure before you started using the case again. Adhesive and plastic welding need time to harden completely. Opening and closing the case too soon can break the bond before it sets.
Give adhesive repairs at least 24 hours before regular use. Never rush this process. A hinge that seems fixed but hasn’t cured will fail again quickly.
When should I replace the case instead of repairing it?
Replace your case when multiple structural failures exist or when the hinge pin notch is crushed flat. If adhesive held for only a few days or plastic welding cracked again within weeks, the damage is too severe.
Test your repair by opening and closing gently 10 times. Pay attention to repeated failures. When repairs stop working, replacement becomes the practical choice.

Hi, I’m Pearl Standen, the voice behind The Web Utility. I’m a passionate tech enthusiast who loves exploring the latest gadgets, smart devices, and electronics that make everyday life easier. Through my website, I share honest, well-researched reviews of trending Amazon products to help you make smarter buying decisions.