How To Fix Ribbon Microphone Element Sagging?
Does your ribbon microphone sound weak or muddy? A sagging ribbon element could be the reason. This common issue affects many ribbon mics over time.
Ribbon sagging happens when the thin metal strip inside your microphone loses tension. Gravity and age slowly pull the ribbon out of its ideal shape. This changes how your mic captures sound.
The good news? You can often fix this problem at home. Fixing a sagging ribbon requires patience and a steady hand. It is not impossible, even for beginners with basic tools.
In a Nutshell
- Check the sag first. A tiny gap of about 0.5mm is normal when the mic sits horizontal. Anything more means the ribbon lost its tension.
- Loosen the clamps. Gently remove one or both clamps holding the ribbon in place. Move slowly to avoid tearing the thin metal strip.
- Free the ribbon. Carefully pry it away from the lower clamp surface. Use light pressure and steady hands during this step.
- Retension with care. Adjust the ribbon until it sags just slightly at the horizontal position. Precision matters here since too tight or too loose both hurt sound quality.
- Tap to set tension. Lightly tap the motor or tensioning mechanism. This helps the ribbon settle into its correct position.
- Test with headphones. Listen closely while you adjust. This helps you catch problems before you close the mic back up.
Understanding Ribbon Sag and Why It Happens
A ribbon microphone works by suspending a thin metal strip between two magnetic poles. This ribbon vibrates when sound waves hit it, creating electrical signals that become audio. The ribbon must stay tight and centered to work correctly.
Ribbon sagging happens when this metal strip loses its tension over time. The ribbon slowly droops downward, moving closer to the lower clamp or pole piece. This sagging changes how the ribbon vibrates and affects your microphone’s sound quality.
Several factors cause ribbon sag. Age and use are the biggest culprits. Every time you use your microphone, the ribbon experiences vibrations and stress. Over months or years, the metal fatigues and stretches slightly. Temperature changes also play a role. Heat makes metal expand, while cold makes it contract. These shifts gradually loosen the ribbon’s grip.
Humidity affects ribbon tension too. Moisture in the air can interact with the metal and clamps, causing them to shift position. Rough handling during setup or transport speeds up the sagging process significantly.
You might notice sagging through your ears first. A sagging ribbon produces muddy or weak sound. The frequency response changes noticeably. High frequencies may sound dull or distant. The microphone might pick up unwanted rumble or hum as the ribbon moves too freely.
A tiny sag of about 0.5mm is actually normal and acceptable when your microphone sits in its horizontal position. This small gap allows the ribbon to vibrate freely without touching the poles. Anything beyond this creates problems.
The good news? Ribbon sag is fixable at home with patience and steady hands. Understanding why it happens helps you prevent future issues and recognize when your microphone needs attention.
Tools and Setup Needed Before You Begin
Before you start fixing your ribbon microphone, gather the right tools and set up a clean workspace. This preparation prevents damage and makes the job much easier.
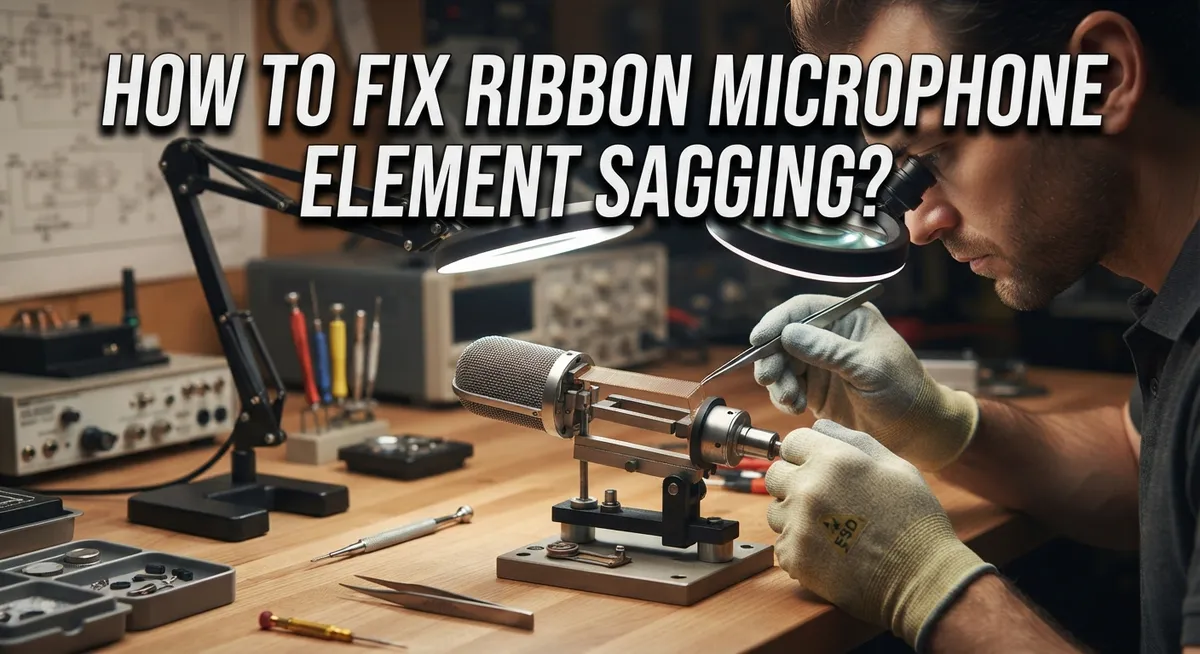
You will need a few basic items. A small flathead screwdriver helps you loosen clamps without slipping. Tweezers or a small pry tool lets you gently lift the ribbon away from the lower clamp surface. Many people use a wooden or plastic shim to carefully separate components without scratching metal parts.
A steady work surface is essential. Find a clean table or workbench where vibrations won’t disturb your microphone. Lay down a soft cloth or foam pad to protect the microphone body from scratches during handling. Good lighting helps you see the ribbon element clearly as you work.
Consider having headphones nearby. You will want to test the microphone’s sound while adjusting tension. Headphones let you hear changes in frequency response as you make small adjustments. This real time feedback prevents over tensioning or under tensioning the ribbon.
Keep a reference guide handy. Write down or remember that 0.5mm sag is your target when the microphone sits horizontal. This measurement helps you know when to stop adjusting.
Wear clean hands or cotton gloves. Oils from your skin can affect the ribbon element over time. Gloves also give you better grip control when handling small parts.
Take your time with setup. A rushed workspace leads to mistakes. Spend five minutes organizing your tools and clearing your work area. This simple step makes the actual repair process go smoothly and safely.
Step-by-Step: Removing the Clamps and Accessing the Ribbon
Removing the clamps and accessing the ribbon requires a calm, methodical approach. You will work with delicate components, so patience matters more than speed.
Start by locating both clamps that hold your ribbon in place. These clamps sit at the top and bottom of the ribbon element. Take a photo with your phone before you begin. This gives you a visual reference for reassembly later.
Use your small flathead screwdriver to loosen the first clamp slowly. Turn the screw just a quarter turn at a time. Do not rush this step. Stop when the clamp feels loose but still sits in place. You want control, not sudden movement.
Once the first clamp loosens, gently work on the second clamp the same way. Again, quarter turns work best. This two clamp approach prevents the ribbon from dropping suddenly when you remove them.
Now comes the careful part. Gently pry the ribbon away from the lower clamp surface using your screwdriver. Work slowly and use light pressure. The ribbon should move slightly without bending. If you feel resistance, stop and loosen the clamps more.
As the ribbon lifts, you will see the gap between the ribbon and the lower clamp increase. This is normal. Keep prying until you have enough space to see the entire ribbon clearly.
At this point, you have full access to the ribbon element. The ribbon hangs freely or sits loosely in the clamps. Your workspace should remain clean and vibration free. Keep your hands steady and avoid touching the ribbon surface itself.
You are now ready to retension the ribbon properly. The hard part of accessing the element is complete.
Step-by-Step: Retensioning the Ribbon to Proper Sag
Now that you have access to your ribbon element, the real work begins. Your goal is to restore proper tension so the ribbon sits at approximately 0.5mm sag when horizontal.
Start by gently prying the ribbon away from the lower clamp surface using a small flathead screwdriver or plastic tool. Move slowly and apply even pressure across the ribbon width. You want to lift it gradually, not jerk it upward.
As you lift, watch for the ribbon to begin straightening. Stop frequently and check your progress. The ribbon should move smoothly without resistance or binding against the magnetic poles.
Once the ribbon lifts slightly, locate your tension adjustment mechanism. Many ribbon mics have a small motor or screw system that controls overall tension. Turn this mechanism incrementally while monitoring the ribbon position.
Here’s a practical tip: rock your microphone forward and backward gently. This helps you find the true horizontal position where sag should measure around 0.5mm. The ribbon will naturally settle into its correct spot.
Tap the tension mechanism lightly with a small tool to set the tension firmly. Avoid hammering or applying sudden force, which can damage the delicate ribbon.
Listen through headphones as you adjust. Proper tension produces a clearer, more balanced frequency response. You will notice the difference immediately when tension is correct.
Once satisfied with the ribbon position, carefully retighten both clamps in small increments. Tighten one clamp partially, then the other, working back and forth. This prevents uneven pressure that could shift the ribbon sideways.
Test your microphone again before closing everything up. The ribbon should look straight with minimal sag and sound crisp and responsive.
Testing and Fine-Tuning the Frequency Response
After retensioning your ribbon, testing becomes your most important step. The frequency response tells you whether your adjustment worked correctly. Listen carefully through headphones as you speak into the microphone or play audio through it.
Pay attention to the low frequencies first. A properly tensioned ribbon produces smooth bass without muddiness. If the lows sound boomy or unclear, your ribbon may still have too much sag. Increase tension slightly and test again.
Next, focus on the midrange frequencies. Your voice or audio should sound clear and natural. Midrange problems often signal tension issues. Too much tension makes mids sound thin and harsh. Too little creates a dull, rolled-off response.
High frequencies deserve equal attention. Properly tensioned ribbons capture crisp highs without harshness. If highs sound too bright or piercing, reduce tension a bit. If highs disappear entirely, you likely need more tension.
Rock the microphone gently forward and backward while listening. The sound should remain consistent in all positions. If the response changes dramatically when you move the mic, tension is uneven or incorrect.
Make small adjustments between tests. Change tension by tiny amounts, then listen again. This prevents over-correcting and damaging your ribbon. Document each adjustment by noting what you changed and how it affected the sound.
Compare your microphone’s response to a reference recording if possible. This helps you identify whether remaining issues stem from tension or other factors. Once the frequency response sounds balanced and natural across all ranges, your retensioning work is complete. Your ribbon element should now perform at its best.
Tips for Steady Hands and Precise Adjustments
Steady hands make all the difference when adjusting your ribbon microphone element. This is not a task for shaky fingers or rushed movements. Take a few deep breaths before you start, and choose a time when you feel calm and focused.
Position yourself comfortably at a clean, well-lit workspace. Your hands need freedom to move without strain. Rest your forearms on the table to reduce tremors and give yourself better control. This simple setup prevents accidental jerks that could damage the delicate ribbon.
Work slowly through each adjustment step. Move your screwdriver or tool at half the speed you normally would. Patience here beats speed every time. Rushing leads to over-tensioning or snapping the ribbon entirely.
Monitor your progress constantly as you make changes. Adjust the tension slightly, then pause and assess. Listen through headphones to hear how the frequency response shifts. This feedback loop keeps you from going too far in either direction.
Use light pressure when handling all tools. Your goal is precision, not force. The ribbon responds to gentle, deliberate movements far better than aggressive ones.
Keep your hands clean and dry throughout the process. Moisture or oils reduce your grip control and can transfer to the ribbon itself. If your hands get sweaty, wipe them with a clean cloth between adjustments.
Practice the motions mentally before you execute them physically. Visualize each step and exactly where your tool will go. This mental rehearsal trains your hands to move with intention rather than hesitation.
Remember that ribbon elements forgive very little. One careless moment can ruin hours of careful work. Your steady hands are your best insurance against costly mistakes.
Common Mistakes That Ruin a Ribbon Repair
Ribbon microphone repairs fail most often because people rush through the tensioning process. Over tensioning stands as the number one mistake. When you pull the ribbon too tight, you damage the delicate metal strip permanently. The ribbon cannot stretch back, so excessive tension creates permanent deformation.
Under tensioning causes the opposite problem. Your ribbon sags too much, and the frequency response suffers badly. The microphone sounds muddy and loses clarity in the midrange. You end up back where you started with a sagging element.
Rough handling during clamp removal ruins repairs quickly. Many people yank the clamps away forcefully instead of loosening them gradually. This sudden movement can bend or crease the ribbon element. Always loosen clamps in small turns, checking your progress after each adjustment.
Skipping the listening test is another critical error. You cannot see proper tension with your eyes alone. Your ears tell you when the ribbon sits at the correct position. Many people retension the ribbon, tighten the clamps, and assume the job is done. This approach leaves you guessing.
Dirty hands and tools create problems too. Oils from your skin transfer to the ribbon and affect its movement. Dust particles can lodge between the ribbon and clamp surfaces, causing uneven tension.
Finally, people often forget that horizontal position matters. A ribbon that sits perfectly when vertical might sag when you rotate the microphone. Always test your microphone in the position where you will actually use it.
These mistakes are completely avoidable. Work slowly, listen carefully, and keep your workspace clean. Proper attention to these details makes your ribbon repair successful and long lasting.
Troubleshooting Persistent Sag or Sound Issues
When your ribbon microphone element continues to sag despite your adjustment efforts, several underlying issues might be at play. Persistent sag often signals that your tensioning mechanism itself has become worn or damaged. Over time, the motor or spring system loses its ability to hold proper tension effectively.
Start by examining the clamps closely. Look for bent metal, stripped threads, or corrosion that prevents them from gripping securely. If clamps are damaged, they cannot maintain tension no matter how carefully you adjust. Sometimes debris or dust accumulates inside the clamp mechanism and blocks proper contact with the ribbon.
Check if your ribbon has developed permanent deformation. If the ribbon has been over tensioned in the past, it may have lost its natural elasticity. A deformed ribbon will sag again quickly even after you retension it correctly. This indicates the ribbon element itself needs replacement rather than simple adjustment.
Another common cause involves the microphone’s internal frame or housing. If the frame has shifted or warped from impact or temperature changes, it can prevent proper ribbon alignment. Test this by checking if the sag appears in specific positions or consistently regardless of how you hold the microphone.
Sound quality issues accompanying the sag suggest the ribbon may have developed micro tears or wrinkles. These damage the frequency response and cannot be fixed through tensioning alone. Listen carefully for crackling, distortion, or loss of high frequencies.
If you have confirmed the clamps work properly and the ribbon appears undamaged, your tensioning mechanism itself may need professional service. Some internal components wear beyond what home adjustment can fix.
Final Thoughts
Fixing a sagging ribbon microphone element takes patience and a calm approach. You now know the target sag is about 0.5mm when the microphone sits horizontal. This small detail makes a huge difference to your sound quality.
The repair process itself is not complicated once you understand the steps. Loosen the clamps, adjust the ribbon gently, and retension with care. Steady hands matter more than fancy tools here.
Most failed repairs happen because people rush. They skip the listening test or yank clamps instead of easing them open. Slowing down solves most problems before they start.
If sag continues after your adjustments, check for deeper issues. Permanent deformation, frame damage, or a worn tensioning mechanism can all block your progress. These problems need extra attention, but they rarely mean the microphone is beyond saving.
Remember that practice builds confidence. Your first attempt may feel awkward, and that is normal. Each adjustment teaches you something new about how your microphone responds.
Trust the process and trust your ears. The 0.5mm rule gives you a clear target, but your headphones tell you when the sound feels right. Combine both for the best results.
Ribbon microphones reward careful owners. A little maintenance now prevents bigger problems later. You do not need professional training to keep your element in good shape.
With the steps in this guide, you can confidently diagnose and fix sagging issues. Take your time, work in a clean space, and test often. Your microphone will thank you with warmer, richer sound for years to come.
Frequently Asked Questions
What does normal ribbon sag look like?
A healthy ribbon microphone should have minimal sag when positioned horizontally. The acceptable range is around 0.5mm, which is roughly the thickness of a credit card. You can check this by looking at the ribbon from the side while the microphone sits flat.
Any sag larger than this affects your frequency response. The ribbon won’t vibrate correctly, and your sound quality drops. If you see visible drooping or the ribbon touches the lower clamp, retensioning is necessary.
How do I know if my ribbon is permanently damaged?
Examine the ribbon carefully under good lighting. Look for wrinkles, creases, or areas where the metal appears crinkled or bent. These signs indicate permanent deformation that tensioning alone cannot fix.
Micro tears are harder to spot. If your ribbon has been over tensioned in the past, it may have developed tiny ruptures. Play audio through the microphone and listen for crackling or distortion that wasn’t there before. These sounds suggest internal damage.
Can I fix ribbon sag myself without professional help?
Yes, you can handle this repair if you work carefully and methodically. The process requires steady hands and mechanical skill, but it’s moderate difficulty. Most people successfully retension their ribbons by following the correct steps and listening to results as they adjust.
The key is avoiding rushing. Take your time loosening clamps and gently prying the ribbon. Listen through headphones while you work. This feedback helps you find the sweet spot for tension.
Why does my ribbon still sag after I adjusted it?
Check your clamps first. They may not be gripping firmly enough to hold the new tension. Verify that both clamps sit flush against the ribbon and tighten them fully.
Next, inspect your tensioning mechanism. The motor or spring that maintains tension might be worn out or misaligned. If the clamps and ribbon look fine, this internal component likely needs attention.

Hi, I’m Pearl Standen, the voice behind The Web Utility. I’m a passionate tech enthusiast who loves exploring the latest gadgets, smart devices, and electronics that make everyday life easier. Through my website, I share honest, well-researched reviews of trending Amazon products to help you make smarter buying decisions.