How To Fix Guitar Amplifier Tolex Peeling At Corners?
Your guitar amp works hard for you. It travels to gigs, sits in practice rooms, and gets bumped around more than we like to admit.
Over time, this wear shows up in one common spot. The tolex covering starts peeling right at the corners.
This is not a sign your amp is broken. It is just normal aging that happens to almost every amplifier.
The good news? You can fix this yourself with a few simple tools and the right technique.
In a Nutshell
- Clean the area first. Wipe away dust and dirt with a dry cloth before applying any adhesive. This helps the glue bond properly.
- Choose the right adhesive. Contact cement works best for lasting repairs. Super glue only works for very small tears.
- Skip weak adhesives. White glue, hot glue, and wood glue will not hold tolex long term. Avoid these completely.
- Warm the tolex slightly. This small step makes the material more flexible. It helps the adhesive stick better.
- Clamp it down properly. Insufficient clamping time is a common mistake. Let the repair cure fully before you touch it.
- Replace corner protectors carefully. Remove old screws first. Line up new protectors and secure them with matching screws.
Why Tolex Peels at the Corners
Tolex peels at corners because that area takes the most physical stress. Your amp gets moved, bumped, and handled regularly. The corners absorb impact that the flat surfaces never experience.
The material itself has limits. Tolex is a vinyl covering glued to plywood or particle board underneath. Over time, the adhesive bond weakens from repeated flexing and temperature changes. Corners bend and flex more than any other part of the cabinet.
Moisture and humidity play a major role too. When humidity rises, the tolex absorbs water and expands. When it drops, the material shrinks back. This constant expanding and contracting eventually breaks the glue bond at stress points. Corners suffer first because they already experience the most movement.
Impact damage speeds up the process. A corner bump or dropped amp can separate the tolex immediately. Even small dings create weak spots where peeling starts. Once peeling begins, it spreads because the damaged edge catches on things during transport and handling.
Temperature swings also matter. Hot rehearsal rooms and cold storage spaces cause the tolex to expand and contract rapidly. The adhesive underneath cannot keep up with this movement. Corner areas fail before flat surfaces because the material is already under tension there.
Age is another factor. Original adhesive used in manufacturing degrades over decades. Older amps are more prone to corner peeling simply because the glue has lost strength. This does not mean your amp is damaged beyond repair.
The good news? Tolex peeling at corners is one of the easiest amp repairs you can make yourself. Understanding why it happens helps you prevent future peeling after you fix it. Proper clamping and the right adhesive will keep your corners sealed tight for years to come.
Tools and Adhesives You’ll Need
Fixing tolex corners requires just a few essential items. You probably have some of these around your home already.
Start with a dry cloth or soft brush. This removes dust and debris from the peeling area. A clean surface is critical because dirt blocks adhesive from making proper contact with both the tolex and the amp cabinet.
Next, you need the right adhesive. Contact cement is the best choice for this job because it creates a strong, flexible bond that lasts. It works better than super glue for large peeling sections. Super glue works only for tiny repairs on small tears. Avoid white glue, hot glue, and wood glue entirely. These adhesives fail quickly on tolex and will not hold under stress.
You will also need clamping tools. Heavy books, clamps, or weights keep the tolex pressed down while the adhesive cures. This step matters more than most people realize. Insufficient clamping time causes repairs to fail later.
A heat source like a hair dryer on low setting helps slightly. Warming the tolex makes it more flexible and improves adhesion. Keep the heat brief and gentle to avoid damage.
If your amp has plastic corner protectors, gather a screwdriver that fits the mounting screws. You may need to remove and replace these protectors as part of the repair.
A small applicator like an old credit card or plastic spreader helps apply adhesive evenly. This prevents excess glue from seeping out onto visible surfaces.
Finally, keep paper towels or rags nearby. Adhesive spills happen, and you want to clean them up quickly before they dry.
This simple toolkit costs very little and handles most corner peeling issues. Having everything ready before you start makes the repair faster and cleaner.
Step-by-Step: Repairing Peeling Tolex
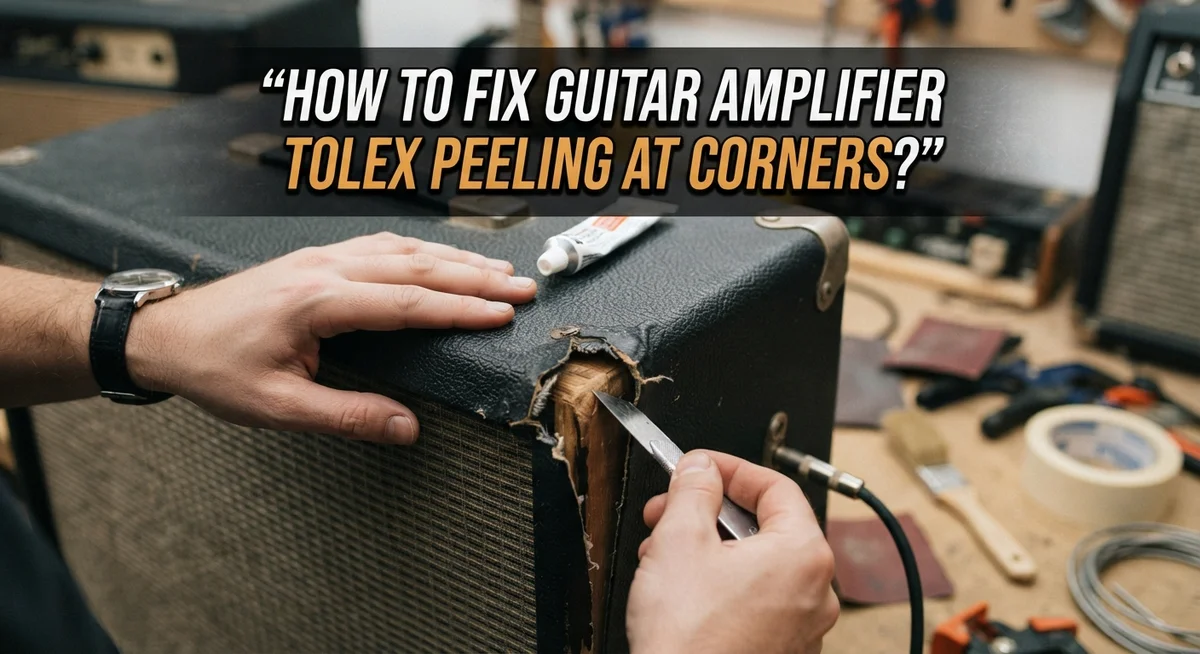
Start by examining the damaged corner closely. Look at how much tolex has lifted or separated from the amp’s wooden frame. Small peeling areas are quick fixes, while large sections may need more patience and careful work.
Gather your materials before you begin. You need a dry cloth, the right adhesive, clamping tools, and possibly a heat source. Having everything ready prevents interruptions during the repair process.
Clean the corner area thoroughly. Use a dry cloth to wipe away dust, dirt, and debris. Any particles trapped under the tolex will prevent proper adhesion and weaken your repair. Pay special attention to the edges where the tolex has lifted.
Warm the tolex gently using a hair dryer on low heat. Hold it several inches away from the surface. This makes the material more flexible and receptive to adhesive. Do not overheat it, as excessive temperature can damage the tolex covering.
Apply adhesive according to the product instructions. Most contact cements require application to both surfaces. Spread it evenly with a small applicator like an old credit card or plastic spreader. Work quickly since some adhesives set fast.
Press the tolex firmly back into place. Use your fingers to smooth out air bubbles and wrinkles. Start from the center of the lifted area and work toward the edges.
Clamp or weight the corner down securely. This is crucial for proper bonding. Use C clamps, bar clamps, or heavy objects to hold pressure on the repair. Leave it clamped for the full curing time specified by your adhesive manufacturer.
Check the repair after curing is complete. The tolex should feel solid and not lift when you apply gentle pressure. If any edges still feel loose, repeat the adhesive application and clamping process for those spots.
Replacing Damaged Corner Protectors
Corner protectors on guitar amplifiers wear out faster than the tolex around them. These plastic or metal pieces take direct impacts and absorb most of the physical stress. When they fail, the tolex underneath often peels away. Replacing damaged corner protectors is a straightforward fix that stops further damage.
Start by examining the old protector closely. Look for cracks, breaks, or areas where it has separated from the amp. Identify all the mounting points before you remove anything.
Use your screwdriver to remove all fasteners holding the damaged protector. Keep these screws in a safe place. Some amps use screws, while others use rivets or adhesive only. If rivets are present, you may need to drill them out carefully. Work slowly to avoid damaging the tolex or cabinet beneath.
Clean the area where the old protector sat. Remove any old adhesive residue, dust, or debris. A dry cloth works well for this step. Wipe the surface thoroughly so the new protector seats properly.
Position your new corner protector carefully. Line it up precisely with the amp’s edges and corners. The protector should sit flush against the cabinet with no gaps. Check the alignment from multiple angles before securing it.
Install new fasteners that match the original type and size. If the old protector used screws, use screws for the replacement. Tighten fasteners firmly but do not overtighten, which can crack plastic protectors or strip screw holes.
If the new protector uses adhesive, apply it according to the product instructions. Press it down and hold it in place for the recommended time. Some adhesives cure faster than others.
Once installed, inspect the entire corner. The protector should sit flush and secure. The tolex around it should lay flat without wrinkles or gaps. Your amp now has proper corner protection again.
Clamping and Curing for a Lasting Bond
Proper clamping and curing makes the difference between a repair that lasts and one that fails within weeks. After you apply adhesive, the bond needs steady pressure and adequate time to set completely.
Apply consistent pressure across the entire peeled corner. Use clamps, heavy weights, or both together. C clamps work well for corners. Place a thin cloth between the clamp and tolex to prevent marking. Tighten gradually rather than all at once. The goal is firm contact without crushing the material.
Weights offer another solid option. Stack books, sandbags, or purpose made weights directly on the repair area. This method distributes pressure evenly. Leave weights in place for the full curing time your adhesive requires.
Check your adhesive instructions carefully. Contact cement typically needs 24 hours to cure fully. Some products reach initial set within hours but continue hardening longer. Rushing the process invites failure. Patience here pays off with a durable repair.
Temperature affects curing speed. Warmer environments speed up the process. Cold conditions slow it down significantly. Keep your amp in a stable, room temperature space during curing. Avoid moving the amp or disturbing the clamps during this period.
Monitor the repair periodically. After curing, check that the tolex stayed flat and the bond feels solid. Press gently on the corner. It should not lift or shift. If it does, the adhesive did not set properly. You may need to reapply and clamp again.
Once fully cured, remove clamps slowly and carefully. Inspect the entire corner. The tolex should sit flush against the amp body with no gaps or bubbles. A successful repair shows no visible seams or lifted edges. Your corner now has protection against future wear and handles normal use without issue.
Common Mistakes to Avoid
Using the wrong adhesive is the biggest mistake people make when fixing peeling tolex. White glue, hot glue, and wood glue all fail because they don’t bond well to vinyl. These adhesives dry brittle and crack under the flex and movement that amplifiers experience. Your repair will peel again within days or weeks.
Super glue seems like a quick fix, but it’s not designed for this job. Super glue works on small areas only and becomes hard and inflexible. It cannot handle the stretching that tolex undergoes when the amplifier gets bumped or moved around. Save super glue for tiny dings, not corner repairs.
Contact cement is the right choice because it creates a flexible bond that moves with the tolex. This adhesive stays pliable after it dries, which means it won’t crack or separate when your amplifier shifts position.
Skipping the cleaning step ruins many repairs. Dust and debris between the tolex and the cabinet prevent adhesive from making full contact. Even a thin layer of grime breaks the bond. Always wipe the area with a dry cloth before applying any adhesive.
Not clamping long enough is another common error. People remove weights or clamps too early, thinking the repair is done. Adhesive needs time to cure completely. Removing pressure before the bond sets lets the tolex lift again. Follow the product instructions exactly. Most contact cements need at least 24 hours.
Temperature matters more than people realize. Cold temperatures slow curing dramatically. If your workshop or garage is cold, the repair takes longer. Warmth speeds up the process, but extreme heat can damage tolex. Room temperature works best for consistent results.
Rushing the job always leads to failure. Take your time with each step. Proper preparation and patience create repairs that last for years.
Troubleshooting Persistent Lifting Issues
When tolex keeps lifting at corners despite your repair attempts, you’re dealing with a persistent adhesion problem. This usually means the initial fix didn’t create a strong enough bond or the wrong adhesive was used from the start.
The most common cause is inadequate surface preparation. Dust, debris, and old adhesive residue block new adhesive from making contact with both the tolex and the cabinet. Clean the area thoroughly with a dry cloth before any repair attempt. Get into the corner crevices where dust hides.
Insufficient clamping pressure ranks as the second major culprit. The adhesive needs consistent, firm pressure across the entire peeled section. Light pressure or clamping for too short a time allows the tolex to shift before the bond sets. Your clamps should hold the corner flat without gaps.
Temperature plays a bigger role than most people realize. Cold environments slow adhesive curing dramatically. If your amp sits in a cool room, the repair takes longer to harden. Warming the tolex slightly before application helps adhesive penetrate better and bond faster.
Check your adhesive choice carefully. Contact cement works best because it creates a flexible bond that moves with the tolex. Super glue hardens too rigidly and fails when the tolex expands and contracts with temperature changes. White glue, hot glue, and wood glue don’t hold fabric to hard surfaces reliably.
If lifting persists after a second attempt, the corner protector itself may be damaged underneath the tolex. Removing and replacing the protector eliminates the underlying problem. Sometimes the cabinet edge is warped or the tolex is stretched too thin at that spot, making adhesion nearly impossible without addressing the root issue first.
Final Thoughts
Fixing peeling tolex at the corners is a simple job once you know the right steps. Clean surfaces, quality contact cement, and proper clamping make all the difference.
Your amp does not need a full re-tolexing job for small corner damage. Most peeling problems come from age, bumps, or humidity changes. These are easy fixes with basic tools and patience.
Remember that patience beats speed in every repair. Contact cement needs time to bond properly. Rushing the curing process leads to repairs that fail within days or weeks.
Avoid the common mistakes we covered here. Skip the white glue, hot glue, and wood glue. They simply do not hold up to the flexing and stress that tolex faces.
Your amp takes bumps during transport and gigs. It needs an adhesive built for that kind of movement. Contact cement gives you that flexibility.
Take your time with each step. Clean the area well. Warm the tolex slightly before applying adhesive. Clamp it down firmly and let it cure fully.
These small details separate a lasting repair from one that fails again soon.
If you replace corner protectors, make sure everything lines up correctly. Matching screws and careful placement keep your amp looking sharp and professional.
Persistent lifting issues usually point to deeper problems. Check your surface prep first. Then look at your clamping pressure and curing time.
Most tolex problems get solved with basic troubleshooting steps. You do not need special skills or expensive tools for this job.
Your amp deserves proper care to look and perform its best. A little effort now saves you bigger repair costs later.
Fixing tolex corners is a job any guitar owner can tackle at home. With the right adhesive, some patience, and careful attention to detail, your amp will look great again. Keep these tips handy for future repairs too.
Frequently Asked Questions
What adhesive works best for tolex corner repairs?
Contact cement is your best choice for this job. It creates a flexible bond that moves with the tolex as your amp expands and contracts. Apply it according to the product instructions and clamp the area firmly until it fully cures.
Avoid white glue, hot glue, and wood glue. These adhesives don’t hold tolex well over time. Super glue might seem quick, but it’s too rigid and brittle for this application.
How long should I clamp the repair?
Follow the cure time on your adhesive’s label. Most contact cements need 24 hours of clamping pressure for a solid bond. Don’t rush this step.
Patience beats speed with tolex repairs. Removing clamps too early causes the tolex to lift again. Check the instructions carefully and give the adhesive plenty of time to set.
Why does my tolex keep lifting after I repair it?
The most common reason is inadequate surface preparation. Dust and debris between the tolex and cabinet prevent adhesive from bonding properly. Clean the area with a dry cloth before applying any adhesive.
Insufficient clamping pressure ranks second. Make sure you apply firm, even pressure across the entire repair area. Temperature also matters more than people realize. Slightly warming the tolex before repair improves adhesion.
Should I replace the corner protectors?
If the corner protector underneath is damaged, replacement helps prevent future peeling. Remove the old screws and protectors carefully. Line up the new ones precisely and secure them with matching screws.
Small tears in the tolex don’t require full corner replacement. Use the adhesive method for minor damage.

Hi, I’m Pearl Standen, the voice behind The Web Utility. I’m a passionate tech enthusiast who loves exploring the latest gadgets, smart devices, and electronics that make everyday life easier. Through my website, I share honest, well-researched reviews of trending Amazon products to help you make smarter buying decisions.