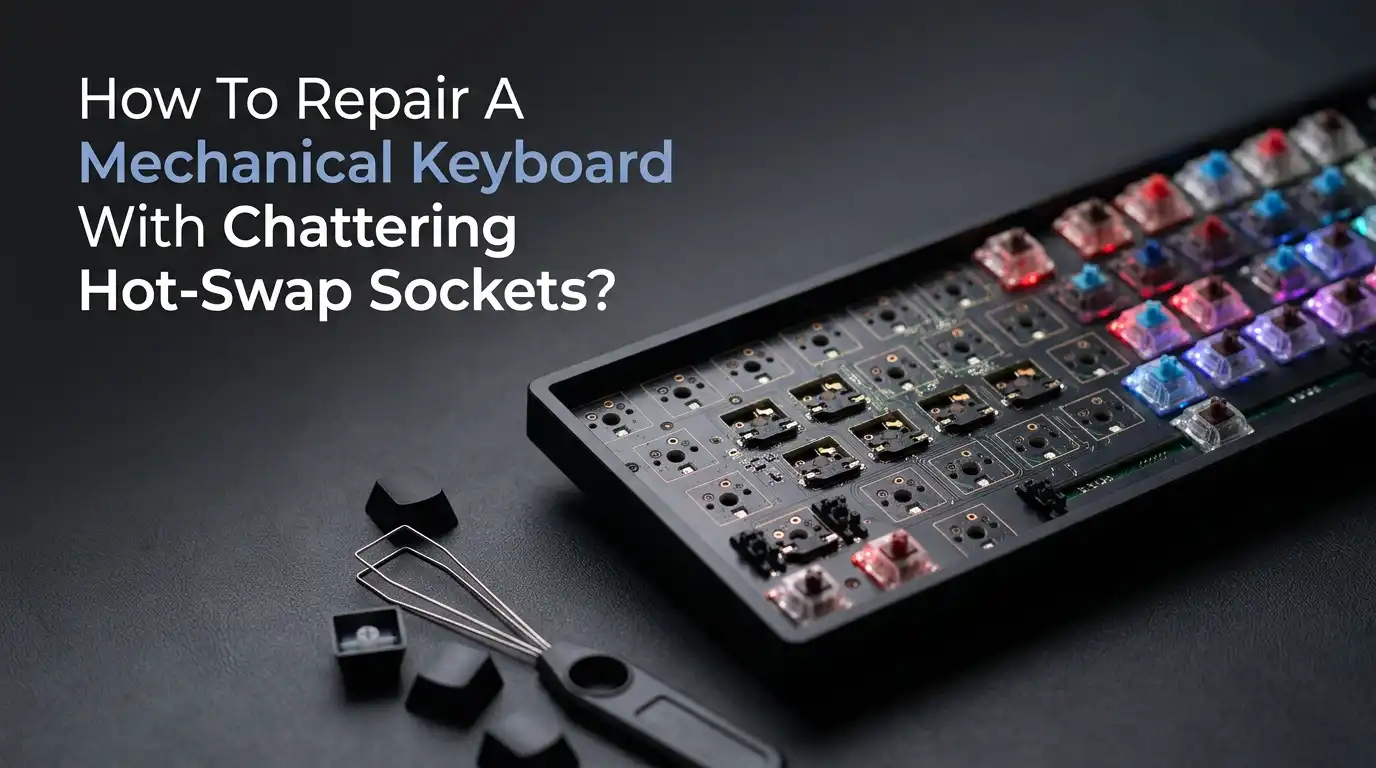
How To Repair A Mechanical Keyboard With Chattering Hot-Swap Sockets?
You press the letter “E” once. “Ee” appears on your screen. You delete it, type again, and it happens once more. That tiny stab of frustration is something every mechanical keyboard owner knows too well.
This problem has a name: key chatter. It happens when a single keypress registers as multiple inputs. And on a hot-swap keyboard, the culprit often sits not inside the switch itself but in the tiny metal sockets that hold it in place.
Hot-swap sockets changed the keyboard hobby forever. They let you pull out one switch and snap in another in seconds. No soldering. No waiting. But this convenience comes with a hidden cost.
Key Takeaways
- Chattering in hot-swap keyboards often comes from loose or worn sockets, not faulty switches. The metal clips inside Kailh-style sockets lose their spring tension after repeated switch swaps. When the grip weakens, the switch pin makes intermittent contact with the socket walls, creating the rapid on-off signals that cause double typing.
- Start with the simplest fixes first. Clean the switch and socket with compressed air and isopropyl alcohol before attempting anything more involved. Dust, oxidation, and stray debris cause a surprising number of chatter cases. You can solve many problems with a quick blast of air and a cotton swab.
- Slightly bending the switch pins is a free, non-permanent fix that works for many people. When a socket loses tension, a gentle outward bend on the two metal pins of the switch forces them to press harder against the socket contacts. This restores a clean connection without any tools. The risk is minimal if you bend gently.
- Pushing the socket leaves back together with a fine tool addresses the root cause. The two small metal leaves inside each Kailh socket spread apart from repeated insertion of switch pins. Using a needle, a fine screwdriver, or the tip of a craft knife to gently press them inward restores the original clamping force.
- Resoldering the socket fixes both loose connections and broken pads. If the socket itself has come partially detached from the printed circuit board (PCB), reheating the existing solder while pressing the socket flush against the board creates a solid mechanical and electrical joint. This works for loose sockets and fully detached ones alike.
- Full socket replacement should be your last resort for badly damaged or missing sockets. Kailh hot-swap sockets are inexpensive and widely available. Swapping in a new one requires basic soldering skill but permanently resolves issues with sockets that have cracked, bent, or lost all their clamping strength.
Understanding Why Hot-Swap Sockets Cause Key Chatter
Your keyboard works by completing tiny electrical circuits. When you press a key, the two metal leaves inside the switch touch each other.
That touch sends a signal through the switch pins, into the hot-swap socket, and across the PCB to the keyboard’s brain chip. The chip reads that signal, applies a short filter called a debounce window, and tells your computer that a key was pressed.
A hot-swap socket is a small metal clamp soldered onto the back of your PCB. It grips the two metal pins that stick out from the bottom of every mechanical switch. This clamping action is what makes hot-swap possible. Instead of soldering the switch directly to the board, you solder the socket once and then snap switches in and out freely.
Here is where the problem begins. Every time you insert a switch, those two metal pins push the socket leaves slightly apart. Pull the switch out and insert another, and the leaves spread a tiny bit more.
Most Kailh sockets are rated for about 100 insertion cycles. That sounds like a lot, but keyboard enthusiasts who swap switches regularly can hit that number within a year or two. When the leaves spread too far apart, the connection becomes unreliable
Gathering the Tools You Will Need for the Repair
You do not need a professional workshop to fix chattering hot-swap sockets. Most of these repairs use tools you might already own.
For the simpler methods, you need nothing more than a keycap puller, a switch puller, and a can of compressed air. Most mechanical keyboards ship with both pullers in the box. If yours did not, a basic plastic puller costs less than a cup of coffee.
For the intermediate methods, add a small flathead screwdriver or a sewing needle to your kit. These tools let you reach inside the socket and gently adjust the metal leaves.
A pair of fine tweezers helps with precision work. You will also want a bottle of 90% or higher isopropyl alcohol and some cotton swabs. These clean oxidation and debris from both the switch pins and the socket contacts.
For the advanced soldering repairs, you need a few more items. A basic soldering iron with a fine tip works perfectly. Look for one with adjustable temperature control. You will also need rosin-core solder wire, ideally 0.6mm to 0.8mm in diameter.
Method 1: Cleaning the Socket and Switch Contacts
Dust and oxidation are silent troublemakers. A single speck of debris lodged between the switch pin and the socket contact can break the circuit for a fraction of a millisecond. Multiply that by thousands of keystrokes, and you get a keyboard that feels like it has a mind of its own.
Start by unplugging the keyboard from your computer. Remove the keycap from the chattering key using your keycap puller.
Then use the switch puller to grip the two tabs on the north and south sides of the switch housing. Pull straight up with steady, even pressure. The switch will release from the plate and socket with a satisfying click.
Now inspect the two metal pins on the bottom of the switch. Do they look dull, dark, or dull gray instead of shiny gold? That is oxidation.
Take a cotton swab dipped in isopropyl alcohol and gently scrub each pin until it looks clean. Do the same for the two holes on the top side of the hot-swap socket. Twist the swab slightly as you insert it to reach the metal contacts inside.
Pros: This method costs almost nothing and fixes many chatter problems caused by contamination. It requires no technical skill and carries zero risk of damage.
Cons: It only works when dirt or oxidation is the root cause. If the socket leaves have physically spread apart, cleaning will not restore the grip. The fix may also be temporary if the contamination returns.
Method 2: Bending the Switch Pins for Better Contact
When cleaning does not solve the problem, the socket leaves have likely lost their spring tension. The switch pins sit loosely inside the socket instead of being firmly gripped. A clever workaround involves slightly bending the switch pins to force better contact against the socket walls.
Take the switch you just removed and cleaned. Look at the two metal pins on the bottom. They are quite flexible and can tolerate a gentle bend. Hold the switch firmly and use your fingernail or the tip of a flathead screwdriver to push each pin outward by a tiny amount.
We are talking about a bend of perhaps half a millimeter. The goal is to create a slightly wider stance so the pins press more firmly against the inner walls of the socket when you reinsert the switch.
Line up the bent pins with the socket holes and insert the switch slowly. You should feel slightly more resistance than usual. That resistance is a good sign. It means the pins are making firm contact with the metal leaves inside the socket. Press the switch down until it clicks into the plate, replace the keycap, and test the key.
Pros: This fix is free, fast, and reversible. If you bend too far, you can bend the pin back. It requires no tools beyond your fingers or a small screwdriver.
Cons: It does not address the root cause of the worn socket leaves. Over time, the socket leaves may spread further, requiring another bend. There is also a small risk of snapping a pin if you bend too aggressively, though the pins are quite durable.
Method 3: Tightening the Socket Leaves from Above
Bending the switch pins works, but it treats the symptom rather than the cause. If you want to address the actual problem, you need to tighten the metal leaves inside the hot-swap socket itself. This is easier than it sounds, and you can do it from the top side of the PCB without any disassembly.
Remove the switch as described earlier. Now look closely inside the empty socket. You will see two small metal leaves, one on each side of the socket hole.
These are the spring-loaded contacts that grip the switch pin. In a healthy socket, these leaves nearly touch each other. In a worn socket, you will see a visible gap between them. That gap is why the switch pin rattles around.
Take a fine needle, a pin, or the tip of a craft knife. Gently insert it between the two leaves and use a slight prying motion to push each leaf inward toward the center of the socket. You do not need much force. The metal is thin and responds to light pressure.
After adjusting both sides, inspect the gap. It should look much smaller now, ideally with the leaves almost touching. If they do touch slightly, that is fine. The switch pin will push them apart when you insert it.
Pros: This method directly fixes the worn socket rather than working around it. It costs nothing and requires only a needle or pin. The results tend to last because you have restored the original clamping geometry.
Cons: It requires a steady hand and good eyesight. Pushing too hard can permanently deform the leaf or snap it off. If the leaf breaks, you will need to replace the entire socket. Work slowly and check your progress often.
Method 4: Reflowing the Socket Solder Joints
Sometimes the socket leaves are fine, but the chattering comes from a different source. Hot-swap sockets attach to the PCB with two small solder joints, one on each end.
Repeated switch insertions place mechanical stress on these joints. Over months and years, the solder can develop microscopic cracks. These cracks create an intermittent electrical connection that behaves exactly like a loose socket leaf.
To check for this, you need to open the keyboard case and look at the back of the PCB. Most mechanical keyboard cases come apart with a few screws on the bottom. Remove them, gently separate the top and bottom halves, and lift out the PCB.
Look at the two small silver dots on the back that correspond to the chattering key. If you see a thin dark ring around the solder joint, that is a crack. If the socket wiggles when you touch it, the joint has failed.
This process is called reflowing. It melts the existing solder just enough to repair the cracked joint and re-establish a solid connection. The entire repair takes less than five minutes per socket once you have the case open.
Pros: Reflowing permanently fixes cracked solder joints that no amount of cleaning or pin bending can address. It requires only basic soldering skill and costs nothing beyond the tools you may already own.
Cons: You must disassemble the keyboard and work on the PCB, which some people find intimidating. There is a small risk of burning the PCB pad if you hold the iron in place too long. Keep contact brief and you will be fine.
Method 5: Replacing a Damaged Hot-Swap Socket Completely
A socket that has cracked, broken off, or lost all its clamping force needs replacement. This sounds like a major operation, but it is actually a straightforward soldering task. Kailh hot-swap sockets cost very little and are available from most keyboard parts vendors.
First, identify which type of socket your keyboard uses. The vast majority of mechanical keyboards use Kailh MX-style sockets.
These look a bit like small rectangular boxes with two metal prongs on each end. There is also a Choc variant for low-profile switches, which has a different shape. Check the other sockets on your board to confirm the type before ordering replacements.
Open the keyboard case and remove the PCB. Apply your soldering iron to one of the two solder joints holding the old socket. Once the solder melts, use a desoldering pump to suck it away. Repeat for the second joint. The socket should now lift off the board easily. If it resists, reheat both joints to make sure no solder remains.
Before reassembling, test the repair by inserting a switch into the new socket and using a keyboard tester website to confirm the key registers cleanly. This saves you from having to open the case again if something went wrong.
Pros: A new socket restores the keyboard to factory condition. The repair is permanent, and new Kailh sockets often have a tighter grip than the originals. The cost is minimal.
Cons: This requires confident soldering skills and the right tools. Removing the old socket can be tricky if the solder does not flow easily. If you have never soldered before, practice on some scrap electronics first.
Method 6: Adjusting Firmware Debounce to Mask the Chatter
If physical repairs feel beyond your comfort zone, or if you need a temporary fix while you gather tools, adjusting the firmware debounce setting offers a software-based solution.
Debounce is a delay that the keyboard’s chip applies after detecting a keypress. During this delay, it ignores any additional signals from the same key. This filtering masks the micro-bouncing caused by loose sockets.
Many custom keyboards run QMK firmware. If yours does, you can adjust the debounce time in the firmware settings. The default is usually 5 milliseconds. Increasing it to 10ms or 15ms often filters out socket-related chatter completely.
You can make this change by editing the config file and reflashing the keyboard, or through graphical tools like VIAL if your board supports it.
Mainstream gaming keyboards often include a debounce setting in their manufacturer software. Razer calls it “Key Response.” Corsair places it under “Key Response Speed” in iCUE. SteelSeries labels it “Anti-Ghosting Speed” in GG. Increasing this value adds a few milliseconds of filtering to each keypress.
Pros: Software debounce costs nothing, requires no tools, and works immediately. It applies across the entire keyboard, so you do not need to identify every problematic socket.
Cons: It does not fix the underlying hardware issue. The sockets will continue to wear, and you may need to increase the debounce further over time. Higher debounce adds latency, which bothers some competitive gamers.
Method 7: Stabilizing Loose Sockets with Non-Conductive Support
Some chattering issues come not from the socket leaves but from the socket body moving relative to the PCB. Kailh sockets rely on two small solder pads for both electrical connection and physical anchoring. If the solder joints are intact but the socket still wiggles, the plastic housing may be flexing under the pressure of switch insertion.
A simple reinforcement trick can help. Open the keyboard case and inspect the loose socket. Apply a tiny dab of non-conductive epoxy or super glue to the plastic body of the socket where it meets the PCB. Use a toothpick or the tip of a needle to place the glue precisely. You want to anchor the socket body without getting any glue on the metal contacts or the solder pads.
Hold the socket steady for 30 seconds while the glue sets. Super glue cures quickly. Epoxy takes longer but provides a stronger bond. Once the glue dries, the socket will not flex when you insert or remove switches. This stability often eliminates the micro-movements that cause intermittent contact.
Pros: The fix is cheap, fast, and uses commonly available adhesives. It reinforces the socket without requiring any soldering. The results are permanent as long as the glue holds.
Cons: Glue is permanent. If you ever need to replace the socket, removing glued plastic from the PCB is difficult and risks damaging the board. Be absolutely sure the socket is otherwise healthy before committing to this fix. Also, never use conductive glue, as it could short nearby traces.
Method 8: Testing Your Repair and Preventing Future Chatter
After any repair, you need to confirm the problem is truly solved. The best way is to use an online keyboard tester. These free tools show each keypress on screen and count how many times each key activates.
Press the repaired key deliberately, once per second, for about thirty presses. If the counter shows exactly thirty, the fix worked. If it shows thirty-five or forty, the chatter persists and needs more attention.
For a more thorough test, use software like Switch Hitter. It logs every key event with timestamps and flags any rapid successive activations. This catches intermittent chatter that might not show up in a quick manual test. Test the key at different press speeds, from slow deliberate presses to quick taps, since chatter often varies with typing style.
Prevention is the best long-term strategy. Limit how often you swap switches. Every swap cycle wears the socket leaves a little more. When you do swap, pull the switch straight up with steady force.
Angled pulling stresses the socket and can crack the solder joints. Inspect switch pins before insertion. Bent or dirty pins accelerate socket wear. Store your keyboard under a cover when not in use to keep dust and humidity away from the metal contacts.
Pros: Systematic testing catches hidden problems before they frustrate you during real work or gaming. Good prevention habits extend the life of your repaired sockets by months or years.
Cons: Testing takes time and patience. Prevention requires discipline, and it is easy to forget to cover your keyboard or inspect pins when you are excited to try new switches.
When to Accept Defeat and Replace the PCB
There comes a point where continued repairs stop making sense. If you have tried cleaning, pin bending, leaf tightening, soldering, and socket replacement, and the chatter keeps returning across more and more keys, your PCB may have deeper problems.
Lifted solder pads are the most common terminal diagnosis. Each hot-swap socket sits on a small copper pad glued to the PCB surface. Excessive heat or mechanical stress can lift this pad off the board, leaving nothing for the socket to anchor to.
You can sometimes bridge a lifted pad with a fine wire, but this is delicate work that fails often. When multiple pads lift across the board, the PCB is no longer economically repairable.
Consider the math. A brand new hot-swap PCB for a standard 60% or 65% keyboard costs between thirty and sixty dollars from most vendors.
The time and frustration of chasing chatter across a failing board may not be worth the savings. If your keyboard uses a proprietary PCB with no available replacements, you might need to consider a new keyboard entirely.
Pros: Replacing the PCB gives you a completely fresh foundation. All sockets will grip tightly. All solder joints will be factory fresh. You can transfer your switches, keycaps, and case to the new PCB.
Cons: A new PCB costs money and requires you to transfer all your switches. Proprietary PCBs may not be available. If the keyboard case is non-standard, finding a compatible replacement PCB can be challenging.
Common Mistakes to Avoid During Hot-Swap Socket Repair
Rushing through a repair often creates more problems than it solves. The most frequent mistake is using too much force when pulling switches.
Yanking a switch out at an angle puts enormous stress on the socket solder joints. Always pull straight up. If a switch feels stuck, wiggle it gently side to side while pulling upward, but keep the motion small and controlled.
Another common error involves using the wrong cleaning products. Standard WD-40 is not a contact cleaner. It leaves an oily residue that attracts dust and gums up the switch mechanism over time.
Only use products labeled specifically as electrical contact cleaner or high-purity isopropyl alcohol. These evaporate completely and leave nothing behind.
Finally, do not ignore firmware settings while chasing hardware problems. If your keyboard supports per-key debounce adjustment through QMK, you can apply a higher debounce value only to the problematic keys while keeping the rest of the board fast and responsive. This hybrid approach combines the best of both worlds and extends the useful life of aging sockets by years.
Frequently Asked Questions
Can I use WD-40 to clean my hot-swap sockets?
No. Standard WD-40 is a water displacer and lubricant, not an electrical contact cleaner. It leaves a sticky residue that attracts dust and can seep into your switches, causing more problems than it solves. Use a product specifically labeled as electrical contact cleaner, or use 90% or higher isopropyl alcohol. Both evaporate completely and leave no residue behind.
How many times can I swap switches before the sockets wear out?
Kailh hot-swap sockets are officially rated for around 100 insertion cycles. In practice, many users report far more swaps without issues, while others see problems after just 20 or 30 cycles. The actual lifespan depends on how carefully you insert and remove switches, the thickness of your switch pins, and the quality of the socket manufacturing batch.
Will tightening the socket leaves void my keyboard warranty?
Yes, opening the keyboard case almost always voids the manufacturer warranty. If your keyboard is still under warranty and you are experiencing chatter, contact the manufacturer first. Many companies will replace a board with documented socket issues. If the warranty has expired or does not cover the problem, then the DIY repair methods in this guide become your best options.
How do I know if the chatter is from the switch or the socket?
Perform a simple swap test. Take the switch from the chattering key and install it in a different socket that you know works properly. If the chatter follows the switch to the new socket, the switch is the problem. If the original socket still chatters with a known good switch installed, the socket is the culprit. This one-minute test saves you from chasing the wrong problem.
Can hot-swap socket chatter damage my computer or keyboard?
No, key chatter cannot damage your hardware. It creates extra keystroke signals at the software level, which is annoying but electrically harmless. However, ignoring chatter for months can lead to increased wear on the affected sockets, making future repairs more difficult. Address the problem early for the easiest fix.
What if I do not have a soldering iron and cannot afford one?
Start with the no-solder methods in this guide. Cleaning the socket contacts, tightening the leaves with a needle, and slightly bending the switch pins resolve most chatter cases without any soldering tools. If those methods fail and you have a single problematic key, consider asking a friend who owns soldering equipment for help. A five-minute socket reflow or replacement is an easy favor to ask.

Hi, I’m Pearl Standen, the voice behind The Web Utility. I’m a passionate tech enthusiast who loves exploring the latest gadgets, smart devices, and electronics that make everyday life easier. Through my website, I share honest, well-researched reviews of trending Amazon products to help you make smarter buying decisions.