How To Fix Audio Interface Phantom Power Switch Sinking?
Does your phantom power switch feel loose or stuck halfway? That sinking feeling can leave your condenser mic silent right before a big recording session.
This is a common problem for many audio interface users. The switch controls a critical 48V DC signal that powers your microphone. When it sinks or fails to click properly, your whole setup can stop working.
Don’t panic just yet. Most phantom power issues have simple fixes. Sometimes it’s a hardware fault. Other times it’s a simple mistake like plugging into the wrong input.
In a Nutshell
- Check the switch first. Make sure the phantom power switch is fully toggled on. A “sinking” feel often means it’s stuck between positions.
- Use a multimeter to test voltage. A working phantom power circuit should show around 48V DC on the XLR jack. This confirms if the interface itself is the problem.
- Swap your cable. Damaged cables are a common culprit. Try a different XLR cable to rule out this simple fix.
- Test with another microphone. This helps you figure out if the mic or the interface is causing the silence.
- Confirm you’re using the right connector. Phantom power only works through XLR inputs, not TRS. Using the wrong connector type can cause power issues.
- Don’t assume the worst. Many sinking switch problems come from small, fixable issues rather than a broken interface.
What Is Phantom Power and How the Switch Works
Phantom power is a feature that sends electrical power through your audio cables to condenser microphones. This power arrives as 48 volts of direct current (DC). The microphone uses this voltage to operate its internal electronics and produce sound.
Your audio interface has a switch to control phantom power. You’ll find it labeled “Phantom,” “P48,” or “48V” somewhere on your device. Flipping this switch on sends power down the XLR cable to your microphone.
The switch works by completing an electrical circuit. When you toggle it on, the interface routes 48V DC through specific pins on your XLR connector. Condenser microphones are designed to receive power this way. Dynamic microphones do not need phantom power and ignore it completely.
Here’s the important part: phantom power only travels through XLR connectors. If you plug a condenser mic into a TRS input jack, the phantom power switch won’t help. The voltage simply doesn’t reach that connector type.
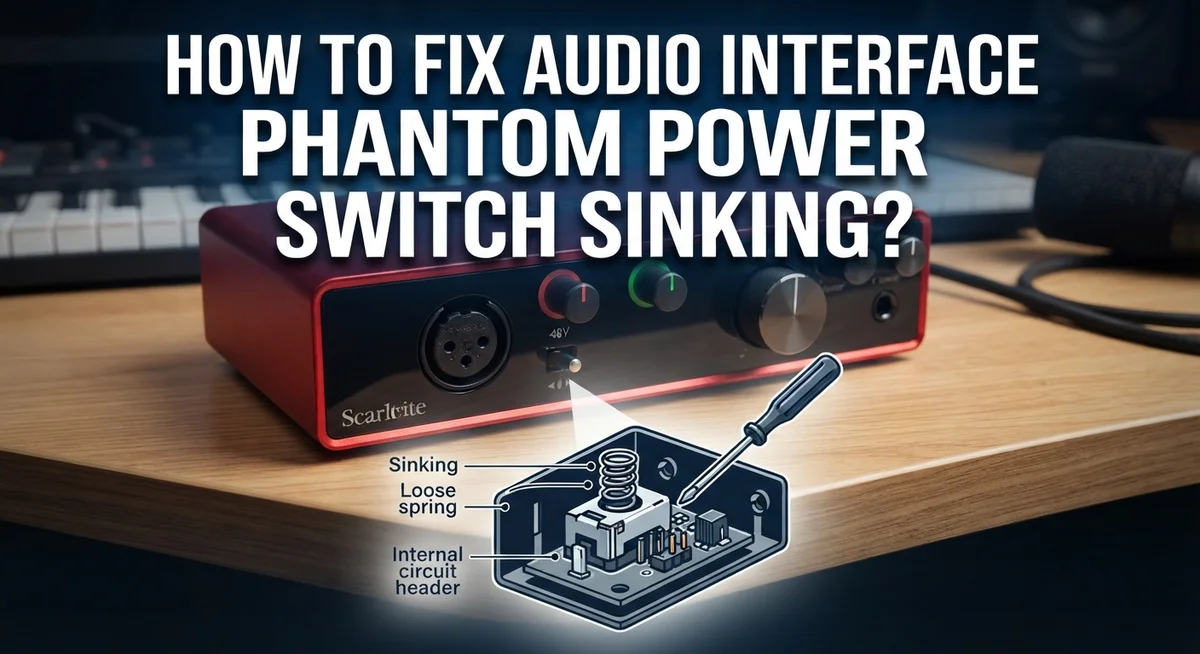
A “sinking” switch feels loose or stuck in the middle position. This usually means the switch mechanism itself has an issue. Sometimes debris gets stuck inside the switch. Other times, the internal contacts wear out from repeated use.
The good news is that a sinking switch doesn’t always mean your phantom power is broken. The electrical circuit behind the switch might still work fine. You can test this with a multimeter by checking for voltage at the XLR jack.
Understanding how phantom power flows through your interface helps you troubleshoot faster. You’ll know exactly where to look when something goes wrong. This knowledge saves you time and frustration.
Signs Your Phantom Power Switch Is Sinking or Malfunctioning
Your phantom power switch can fail in several ways. Recognizing these signs helps you fix problems before they damage your equipment.
The switch feels loose or stuck. A sinking switch doesn’t move smoothly between on and off positions. It may rest halfway or feel wobbly. This physical problem prevents the electrical circuit from completing properly. Your condenser mic won’t receive power even though you think the switch is on.
Your condenser microphone produces no sound. This is the most obvious sign something is wrong. You’ve checked your cables and interface settings, but silence persists. The phantom power switch could be the culprit. However, this symptom also points to cable damage or a faulty microphone, so don’t jump to conclusions yet.
The switch clicks but nothing happens. You toggle the switch and hear a click, but your microphone still doesn’t work. This suggests the switch mechanism moves, but the electrical connection isn’t forming. Internal contacts may be corroded or damaged.
Audio quality drops suddenly. Your microphone worked fine yesterday, but today the sound is weak or distorted. Phantom power issues can cause audio degradation. The voltage delivery might be inconsistent or incomplete.
The interface powers on, but the phantom light doesn’t illuminate. Many interfaces have an LED indicator for phantom power status. If this light stays off when you toggle the switch, the circuit isn’t activating. Some interfaces lack this light, so test with a multimeter instead.
You see visible damage around the switch. Cracks, loose parts, or corrosion around the switch housing indicate internal problems. Moisture or dust can cause these issues. Physical damage usually means the switch needs professional repair or replacement.
Step-by-Step: Diagnosing the Switch With a Multimeter
A multimeter is your best tool for diagnosing phantom power problems. This device measures electrical voltage and helps you confirm whether your interface is actually sending 48V to your microphone.
Start by setting your multimeter to DC voltage mode. Most multimeters have a dial or button to switch between AC and DC. You need DC because phantom power delivers direct current, not alternating current. Set the range to at least 50V to safely measure the 48V signal.
Next, locate the XLR input jack on your audio interface where you connect your condenser microphone. Turn on your phantom power switch. With the multimeter probes, touch the positive lead to pin 2 of the XLR jack and the negative lead to pin 1 (ground). The reading should show approximately 48V DC.
If your multimeter displays around 48V, your interface is working correctly. The problem likely sits elsewhere, such as a damaged cable or faulty microphone. If the reading shows 0V or significantly lower voltage, your interface may have an internal issue with the phantom power circuit.
Check the measurement twice to confirm accuracy. Sometimes a loose connection gives false readings. Move the probes slightly and observe if the voltage remains stable.
Test all XLR inputs on your interface. Some interfaces have phantom power switches that control multiple inputs. If only certain jacks show voltage while others don’t, you’ve narrowed down the problem to specific channels.
Record your voltage readings. This information helps you determine whether the fault originates from your switch, the power supply, or the interface’s internal circuitry. A multimeter transforms guesswork into solid diagnostic data.
Isolating the Problem: Mic, Cable, or Interface
When your phantom power switch feels loose or stuck, the problem might not be the switch itself. The issue could stem from your microphone, cable, or interface. Start by identifying which component is actually failing.
Test your microphone first. Borrow a different condenser microphone from a friend or colleague. Connect it to the same XLR cable and interface you normally use. Toggle the phantom power switch on. If the borrowed microphone works perfectly, your original microphone is damaged. If it still doesn’t work, move to the next step.
Check your XLR cable next. Cables get damaged from repeated coiling, stepping on them, or bent connectors. Inspect both ends of your cable for visible damage, corrosion, or bent pins. Borrow a different XLR cable and test it with your original microphone. If sound comes through with the new cable, your old one is faulty.
Verify the interface itself. Use a multimeter set to DC voltage mode. Turn phantom power on. Touch the multimeter probes to the XLR input jack pins. You should read approximately 48 volts. If the reading shows zero or fluctuates, your interface’s phantom power circuit has an internal problem.
Check connector types carefully. Remember that phantom power only works through XLR connectors. If you’re plugging into a TRS input jack and enabling phantom power, nothing will happen. Your interface might have both XLR and TRS inputs. Make sure you’re using the correct one.
This systematic approach isolates exactly which component needs attention or replacement.
Fixing Connector Mismatches Between XLR and TRS Inputs
Connector mismatches happen when you try to send phantom power through the wrong input type. Your audio interface has different jacks: XLR inputs and TRS inputs. Phantom power only travels through XLR connectors. TRS jacks simply do not support this feature.
Here’s what occurs when mismatches happen. You enable phantom power on your interface. You plug a condenser microphone into a TRS input instead of XLR. The microphone receives no power. Your condenser mic stays silent because it needs that 48V DC voltage to function.
Some interfaces let you enable phantom power globally. This means the switch affects all inputs at once. Other interfaces have separate phantom switches for individual XLR channels. Check your manual to understand your specific setup.
The fix is straightforward. Always connect condenser microphones to XLR inputs when you need phantom power. Reserve TRS inputs for dynamic microphones or line level equipment that doesn’t require phantom power.
If you’re unsure which input is which, look at your interface’s label. XLR inputs show three or five pin circular connectors. TRS inputs show quarter inch jack sockets that look like headphone plugs.
Test your setup this way. Plug your condenser microphone into an XLR input. Enable the phantom power switch. Use your multimeter to measure voltage at that XLR jack. You should read approximately 48V DC.
If you’ve been using TRS inputs by mistake, simply move your microphone cable to an available XLR input. Enable phantom power again. Your condenser microphone should now receive proper voltage and produce sound. This simple connector swap solves most phantom power problems caused by input mismatches.
Cleaning and Repairing a Physically Sticking Switch
A physically sticking phantom power switch needs careful attention. The switch mechanism collects dust and debris over time, which prevents smooth movement.
Start by powering off your audio interface completely. Unplug the power cable and wait 30 seconds. This ensures your safety while you work on the switch.
Examine the switch closely. Look for visible dust, hair, or grime around the edges. Use a flashlight to see into the crevices. Compressed air is your first cleaning tool. Hold the can upright and use short bursts to blow debris away from the switch. Angle the nozzle to reach between the switch and the interface housing.
If compressed air doesn’t work, try a dry cotton swab. Gently insert it around the switch perimeter. Rotate it slowly to collect particles. Never force the swab into tight spaces. Avoid using liquids like water or alcohol, as moisture damages internal components.
Test the switch gently after cleaning. Move it back and forth slowly without forcing it. The switch should click smoothly into both positions. If it still sticks, repeat the compressed air process.
For stubborn stickiness, try wiggling the switch repeatedly. Move it left and right 20 to 30 times with gentle pressure. This can help loosen stuck particles inside the mechanism.
If the switch remains stuck after cleaning, the internal contact points may be damaged. The switch assembly itself might need professional repair or replacement. Contact the interface manufacturer for service options.
Prevention matters most. Keep your interface in a dust free environment. Use a protective cover when not in use. Store cables properly to prevent them from creating debris around the switch area.
Common Mistakes to Avoid When Troubleshooting
When troubleshooting phantom power issues, many people make preventable mistakes that waste time and create frustration. Understanding these errors helps you fix problems faster and avoid causing additional damage.
The biggest mistake is enabling phantom power on the wrong connector type. Phantom power only works through XLR inputs, not TRS or other connector styles. If you force phantom power through a TRS input, you risk damaging your microphone or interface. Always check your cable and input type before flipping the switch.
Another common error is assuming audio problems always mean phantom power failure. Poor sound quality can come from many sources like a faulty microphone, damaged cable, or power supply issues. Test with a different microphone first to confirm the problem actually relates to phantom power delivery.
Don’t skip cable inspection during troubleshooting. People often assume their cables work fine, but damage happens easily. Cables get bent, stepped on, or coiled too tightly. A compromised cable blocks phantom power from reaching your microphone even when your interface works perfectly. Examine your XLR cable for visible damage before moving on to other components.
Rushing through voltage tests creates false conclusions. When using a multimeter, take multiple readings to confirm accuracy. Loose connections sometimes give incorrect measurements. Record your results and test all XLR inputs on your interface.
Finally, avoid applying excessive force to a sticking phantom power switch. Pushing too hard can break internal contact points permanently. Use gentle pressure and try cleaning first. If the switch remains stuck after cleaning, internal damage likely occurred and professional repair may be necessary.
When to Seek Professional Repair or Replacement
If you’ve tried all the basic troubleshooting steps and your phantom power switch still won’t work properly, it’s time to consider professional help. A technician can diagnose internal damage that you cannot see from the outside.
Professional repair becomes necessary when the switch physically breaks inside the interface. Internal contact points may corrode or wear out over time. The switch mechanism itself could be damaged beyond simple cleaning. A technician has specialized tools to test these internal components accurately.
You should also seek professional service if voltage tests show no 48V output at your XLR jacks. This indicates a power delivery failure deep within the interface circuitry. Fixing this requires soldering skills and electronic knowledge most users don’t have. Attempting repairs yourself could cause permanent damage to your equipment.
Replacement might be more practical than repair in some situations. If your interface is older, repair costs could approach the price of a new unit. Newer interfaces often have better reliability and additional features. Consider the age and condition of your current equipment before deciding.
When contacting a repair service, describe exactly what you’ve already tested. Mention whether the switch is physically stuck or simply unresponsive. Tell them if voltage tests showed zero output or partial voltage. This information helps technicians diagnose the problem faster.
Keep your warranty information handy. Many manufacturers cover phantom power failures under warranty if the interface is still within the coverage period. Some offer free repairs or replacements for defective switches.
A professional repair typically takes one to two weeks. Plan your recording schedule accordingly if you depend on phantom power regularly. In the meantime, explore rental options or borrow equipment from other musicians to keep your projects moving forward.
Final Thoughts
Fixing a sinking phantom power switch does not need to feel hard. Most problems come from simple causes. A stuck switch, a bad cable, or the wrong input can all trigger this issue.
Start with the basics first. Check your connector type. Confirm you plugged into an XLR input, not a TRS jack. This single step solves many cases instantly.
Next, test your equipment methodically. Use a multimeter to check for 48V DC on your XLR jacks. Try a different microphone to rule out mic failure. These tests show you exactly where the problem lives.
Cleaning often fixes a sinking switch. Dust and debris cause switches to stick or feel loose. A gentle cleaning with compressed air restores smooth movement in many cases.
Sometimes the fix goes beyond cleaning. Internal contact damage means the switch cannot make proper connection anymore. This calls for professional repair or replacement.
Patience matters more than speed here. Rushing through tests gives you wrong answers. Take your time with each troubleshooting step. Confirm one thing before moving to the next.
Remember that prevention saves future headaches. Handle your switches gently. Store your interface somewhere clean and dry. Regular care keeps switches working longer.
Your interface represents an investment worth protecting. A few extra minutes of careful troubleshooting can save you from unnecessary repair costs. Most sinking switch problems have straightforward solutions.
Trust the process outlined here. Work through each step calmly. You will likely restore proper function without expensive intervention. When basic fixes do not work, professional help remains available.
Frequently Asked Questions
Why does my phantom power switch feel stuck or sinking?
A sinking phantom power switch usually means dust, debris, or corrosion built up inside the mechanism. Over time, small particles settle between the switch contacts. This prevents the switch from clicking into place properly. The problem gets worse if you use your interface in dusty environments or expose it to humidity.
Sometimes the internal spring weakens from repeated use. This makes the switch feel loose or fail to stay in the “on” position. The good news is that cleaning often solves this issue completely.
Can I use phantom power with all microphone types?
No. Phantom power only works with condenser microphones. Dynamic microphones do not need phantom power and will work fine even when it’s enabled. However, ribbon microphones can get damaged if phantom power is active. Always check your microphone manual before turning on phantom power.
Also remember that phantom power travels through XLR connections only. If your condenser mic uses a TRS connector, you cannot deliver phantom power through that cable. Many interfaces have separate XLR and TRS inputs for this reason.
How do I test if phantom power is actually working?
Use a multimeter set to measure DC voltage. Connect the multimeter to your XLR jack while phantom power is on. You should read approximately 48 volts. If you see zero volts or a much lower reading, your interface may have a problem delivering power.
Test with a different condenser microphone if possible. This tells you whether the issue is with your mic or your interface. A working microphone should produce sound when phantom power is active.
What should I do before calling for professional help?
Clean the phantom power switch gently with a dry cloth first. Toggle it back and forth several times to work out any stuck debris. Test your cables for visible damage like cuts or bent connectors. Swap in a different microphone to rule out mic failure.
Perform the multimeter voltage test described above. Write down your results. This information helps a repair technician understand exactly what’s happening. These simple checks often reveal the real problem without needing professional service.

Hi, I’m Pearl Standen, the voice behind The Web Utility. I’m a passionate tech enthusiast who loves exploring the latest gadgets, smart devices, and electronics that make everyday life easier. Through my website, I share honest, well-researched reviews of trending Amazon products to help you make smarter buying decisions.