How To Fix Noise Canceling Headphone Yoke Swivel Squeaking?
That annoying squeak from your headphone yoke can ruin a good listening session. You put on your favorite noise canceling headphones, and instead of silence, you hear a high pitched whine every time you move your head.
This problem happens more often than you think. It usually comes from the swivel mechanism or the ANC microphone system inside the ear cups.
The good news is that most squeaking issues have simple solutions. You do not need to send your headphones for repair right away.
In a Nutshell
- Turn off ANC first. Many squeaks come from the noise canceling microphone, not the actual hinge. Switch it off in your headphone app and see if the noise stops.
- Press gently around the earcups. Sometimes pressure on the cup edges triggers the squeak. This simple test tells you where the sound comes from.
- Reset your Bluetooth connection. Unpair your headphones and pair them again. This clears small software glitches that cause weird sounds.
- Update your firmware. Manufacturers often release fixes for exactly this problem. Check your app for any pending updates.
- Remove the earpads carefully. Use a butter knife and slide it gently between the pad and cup. Do not force it, or you might damage the cup.
- Check for loose parts inside. If nothing else works, there may be a mechanical issue with the swivel itself.
Why Do Noise Canceling Headphones Squeak at the Yoke Swivel?
Squeaking at the yoke swivel comes from two main sources: your headphone’s active noise cancelling system or mechanical wear in the hinge itself.
The ANC microphone sits near the swivel area. When ANC runs, tiny electronic components vibrate to create sound waves that cancel background noise. Sometimes these vibrations create a high pitched whine. This is especially common when pressure builds up around the earcup edges.
The mechanical swivel can also be the culprit. Your headphones bend and flex thousands of times. Over time, plastic hinges wear down. Metal parts inside rub together. Dust and debris settle into tight spaces. All of this creates friction that produces squeaking sounds.
Pressure on the earcups makes squeaking worse. When you wear your headphones tightly or press them against your ears, you compress the internal components. This triggers vibrations in both the ANC system and the swivel mechanism.
Environmental factors matter too. Temperature changes cause plastic to expand and contract. Humidity can make internal parts swell slightly. Both situations increase friction between moving parts.
The squeaking often starts in one ear cup and may spread to the other side. You might notice it gets louder during specific activities like walking or exercising. This happens because movement creates vibrations that activate the squeaking.
Understanding where the noise comes from helps you fix it faster. Software issues like ANC electronics usually respond to simple toggles and resets. Mechanical problems need physical inspection and sometimes part replacement.
Most squeaking sounds are not dangerous. They do not mean your headphones will break immediately. However, they signal that something needs attention. Addressing the issue early prevents bigger problems later.
Software-Based Fixes: Toggling ANC and Resetting Bluetooth
Your headphone’s software controls can often fix squeaking without any physical repairs. Start by turning off Active Noise Cancelling through your headphone app or settings menu. ANC systems use microphones near the swivel area, and these can produce high pitched sounds when they malfunction.
Leave ANC off for a few hours while you listen to music. If the squeaking stops completely, your issue is software related. You can then turn ANC back on to see if the problem returns. This test tells you whether the noise comes from electronics or mechanics.
Next, unpair your headphones from your device completely. Go to your phone or computer’s Bluetooth settings and forget the headphone connection. Wait 30 seconds, then pair them again from scratch. This reset clears any corrupted connection data that might trigger the ANC microphone to malfunction.
Check your headphone manufacturer’s app or website for firmware updates. Outdated firmware can cause ANC glitches that produce squeaking sounds. Download and install any available updates while your headphones charge fully. Many users report that firmware updates eliminate squeaking without any other action needed.
After updating, test your headphones during normal use. Listen for squeaking in different environments. Try adjusting the earcup fit on your head, since pressure changes can affect ANC performance.
If squeaking persists after toggling ANC off, resetting Bluetooth, and updating firmware, the problem likely involves physical damage. However, these software steps resolve most squeaking issues within minutes. They cost nothing and require no tools or technical skills. Always try software fixes first before considering hardware repairs.
Updating Firmware to Resolve ANC Microphone Noise
Firmware updates are one of the most effective ways to stop ANC microphone noise. Your headphones run software that controls how the noise cancelling system works. Outdated firmware can cause the ANC microphone to produce squeaking or high pitched whining sounds.
Check your manufacturer’s app first. Most headphone brands have a dedicated app where you can see your current firmware version. Open the app and look for a settings or device information section. This is where firmware update options usually live.
Connect your headphones to power before updating. A dead battery during a firmware update can damage your device permanently. Let your headphones charge to at least 50% before proceeding.
Download the latest firmware version available. The app will show you if an update exists. Tap or click the update button and wait for the process to complete. This typically takes 5 to 10 minutes. Do not disconnect your headphones during this time.
After the update finishes, restart your headphones completely. Turn them off for 30 seconds, then power them back on. This helps the new firmware load properly into your device’s system.
Test your ANC microphone by turning noise cancelling on and off. Listen carefully for any squeaking or whining sounds. In many cases, the firmware update resolves the issue entirely because it fixes bugs in the ANC software that caused the noise.
If squeaking continues after updating, the problem likely involves hardware rather than software. Move forward with physical troubleshooting steps like checking earcup pressure or examining the mechanical swivel for damage.
Diagnosing Mechanical Swivel and Hinge Wear
When squeaking persists after software fixes, mechanical wear becomes the likely culprit. Your headphone’s swivel joint contains moving parts that can degrade over time. These parts rub against each other, creating that high pitched noise you hear.
Start by examining the swivel area closely. Look where the ear cup connects to the headband. Press gently on this joint while listening for changes in the squeaking sound. If pressure makes it worse, you’ve found the problem spot.
Next, check for visible damage or gaps. Swivel mechanisms have plastic or metal components that can crack or loosen. Inspect both sides of your headphones. One ear cup often shows wear before the other.
Gently flex the swivel back and forth. Does it feel loose or stiff? A healthy swivel moves smoothly without grinding sensations. Any resistance or grinding indicates internal component damage.
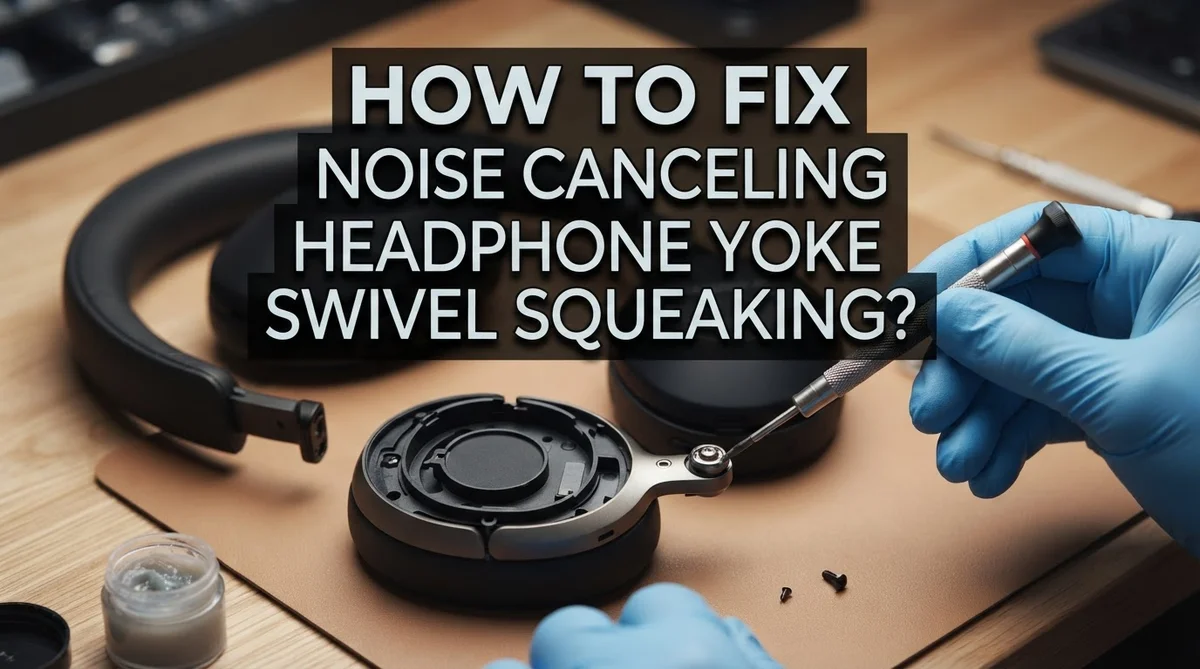
Remove your earpads to see deeper into the mechanism. Use a butter knife and slide it between the pad and cup until you hear a click. This reveals the swivel’s inner structure. Look for debris, dust, or visible cracks in the plastic housing.
Test the swivel’s range of motion carefully. Rotate it through its full path slowly. Listen for where exactly the squeaking occurs during rotation. Does it happen at specific angles? This tells you which internal component is worn.
If you find loose parts rattling inside, the swivel assembly needs replacement. If you see cracks in the plastic housing, mechanical failure has occurred. Both situations require hardware repair rather than software solutions.
Document your findings with photos. This information helps when contacting support or considering repair options.
Step-by-Step Guide to Safely Removing Earpads
Removing earpads safely is essential before you inspect the swivel mechanism. This process takes only a few minutes and requires minimal tools.
Start by gathering what you need. A soft butter knife or plastic spoon works best for this task. Avoid metal tools that could scratch your headphone cups. You may also want a clean cloth nearby.
Hold your headphone firmly in one hand. Position the earpad so you can see where it meets the cup. The connection point usually has a small lip or groove that holds the pad in place.
Insert your butter knife at a slight angle between the earpad and the cup. Work slowly around the edges rather than forcing it at one spot. You’ll feel slight resistance as the pad begins to separate.
Listen for a soft clicking sound. This means the pad is releasing from its mounting clips. Continue sliding your tool around the entire circumference until the pad comes free.
Once the first earpad is off, repeat the process on the other side. Take your time here. Rushing can damage the clips that hold these pads in place.
Examine the exposed area carefully. Look for dust, debris, or visible damage around the swivel joint. Clean away any dirt using a dry cloth.
Now you can see the internal swivel mechanism clearly. Check if any parts appear loose or misaligned. Gently flex the swivel back and forth to test its movement.
When you’re ready to reattach the earpads, align them with the cup first. Press down firmly around all edges until you hear the clicks again. The pads should sit flush against the cup with no gaps.
This removal method prevents damage while giving you full access to diagnose the squeaking source.
Testing and Relieving Earcup Pressure Points
Pressure points on your earcups often trigger squeaking sounds. The mechanism responds to how tightly the pads press against the swivel assembly. Testing these pressure points helps you identify whether the noise comes from tension or mechanical wear.
Start by putting on your headphones normally. Press gently around the entire earcup edge with your fingers. Move slowly from the top of the cup down to the bottom. Listen carefully for any changes in the squeaking intensity. If the noise gets louder when you press certain spots, you’ve found a pressure point causing the problem.
Now try the opposite approach. Remove your headphones and place them on a flat surface. Gently press down on each earcup from above. Apply steady, moderate pressure for several seconds. Release slowly and listen for squeaking during this motion. Repeat this test three times to confirm the pattern.
Next, adjust how you wear your headphones. Loosen the headband slightly so the earcups sit less tightly against your ears. Wear them for a few minutes and see if the squeaking stops. If it does, excess pressure is your culprit. You can reduce pressure by adjusting the band tension or wearing the headphones in a slightly different position.
For a more detailed inspection, remove your earpads using a butter knife as previously described. Once exposed, you’ll see the swivel joint clearly. Gently flex the earcup in different directions while watching for gaps or movement between parts. Excessive movement indicates worn components that need replacement.
Document which pressure points trigger noise. This information helps you decide whether to adjust your wearing habits or pursue hardware repairs. Most pressure related squeaking stops once you find the right fit and positioning.
Common Mistakes to Avoid When Troubleshooting Squeaking
Many people make critical mistakes when trying to fix squeaking noise canceling headphones. These errors often make the problem worse instead of better.
The biggest mistake is ignoring the squeaking entirely. Many users assume the noise will disappear on its own. This approach backfires because squeaking signals either software issues or mechanical damage. Waiting allows small problems to become major failures that require complete replacement.
Another common error involves forcing earpads off without proper technique. People grab and pull aggressively, damaging the connection points permanently. This makes it impossible to reattach the pads correctly later. Always use a butter knife and slide gently between the pad and cup until you hear a click.
Don’t skip the software troubleshooting steps. Some people jump straight to hardware inspection when a simple ANC toggle or firmware update would solve everything. You should always turn off Active Noise Cancelling first through your headphone app. Then check for firmware updates before assuming mechanical failure.
Applying too much pressure during testing is another mistake. People press hard on earcups trying to locate the squeaking source. Excessive force can actually damage internal components or create new problems. Instead, apply gentle, steady pressure and listen carefully.
Many users also fail to document their findings. Taking photos of the swivel area and noting exactly when squeaking occurs helps identify the real cause. Without this information, you’re essentially guessing.
Finally, avoid disassembling beyond the earpads. Opening the headphone body itself can damage circuits and void warranties. Stick to safe inspection methods like removing earpads and checking swivel movement gently. These mistakes waste time and money while delaying actual solutions.
When to Consider Hardware Replacement
Hardware replacement becomes necessary when software fixes and basic troubleshooting fail to stop the squeaking. You should consider this option after you’ve toggled ANC off, reset your headphones, and updated the firmware without success.
Persistent mechanical squeaking signals real damage. If the noise continues after software steps, your swivel mechanism likely has internal wear or broken components. This is especially true if squeaking happens regardless of how you wear the headphones or adjust pressure points.
Look for these warning signs before replacement. Does the squeaking come from a specific hinge area? Can you feel grinding or resistance when you rotate the earcup? These symptoms point to mechanical failure rather than electronic issues.
Document the exact location and trigger for the squeaking before you decide on replacement. Take photos of the swivel from different angles. Note whether the noise happens during specific movements or stays constant. This information helps you understand which parts need replacement.
Check if your headphones still work otherwise. If the ANC functions, sound quality remains good, and only the squeaking bothers you, replacement might be worth considering. However, if multiple issues exist, the entire headphone unit may need service.
Contact the manufacturer’s support team with your documentation. They can confirm whether replacement parts exist for your model. Some headphones have user replaceable swivel assemblies. Others require professional service.
Don’t delay replacement if the swivel feels loose. Damaged hinges can worsen over time and cause additional problems. A loose swivel may eventually fail completely, leaving one earcup unable to rotate or stay in position.
Consider your headphone’s age and warranty status. Newer models under warranty often qualify for free replacement or repair.
Final Thoughts
Squeaking noise canceling headphones can feel frustrating. But most fixes are simple and quick.
Start with software steps first. Toggle your ANC off and on. Reset your Bluetooth connection. Update your firmware. These steps solve many squeaking problems without any tools.
If software fixes don’t work, check for pressure points. Press gently around your earcups. Notice where the squeaking gets louder or softer. This helps you pinpoint the exact problem area.
Sometimes the swivel mechanism itself causes the noise. This happens from normal wear over time. Mechanical parts can loosen or wear down with regular use.
Don’t ignore persistent squeaking. It often signals a real hardware issue. Waiting too long can make the problem worse. A small squeak today might become a bigger issue tomorrow.
Remember to document your findings along the way. Note when the squeaking happens and where. This information helps you decide your next steps.
It also helps if you need to contact support later. Clear details make troubleshooting much faster for everyone involved.
Most squeaking issues resolve through software fixes or gentle adjustments. Only a small number need actual hardware replacement.
If you reach that point, don’t panic. Contact your manufacturer’s support team. Share your documented findings with them. They can guide you through warranty options or repair services.
Your headphones deserve proper care and attention. Regular checks can prevent squeaking before it starts. Simple maintenance goes a long way toward keeping your headphones quiet and comfortable.
Following these practical steps will help you enjoy clear, squeak free listening again. Most people find their fix within the first few troubleshooting attempts.
Frequently Asked Questions
Why does my noise canceling headphone swivel squeak?
Squeaking comes from two main sources: your ANC microphone or the swivel hinge mechanism. The ANC system picks up external sounds to cancel them out. When this electronics component malfunctions, it produces a high-pitched whine. The swivel joint can also squeak from wear, loose parts, or pressure on the earcup.
Pressure on the earcup often triggers the noise. Press gently around the edges to see if the squeaking changes. This helps you identify whether electronics or mechanics cause the problem.
Can I fix squeaking by turning off ANC?
Yes, this is your first troubleshooting step. Open your headphone app and toggle Active Noise Cancelling off. If the squeaking stops, your ANC system needs attention. Leave ANC off temporarily while you try other fixes.
This simple test saves you time and effort. It tells you whether software or hardware is responsible. Many squeaking issues resolve once you disable ANC and update your firmware.
What should I do before taking my headphones apart?
Reset your headphones first through Bluetooth settings. Unpair them completely, then pair them again. Next, check your headphone app for firmware updates and install any available versions.
These software steps fix most squeaking problems. Only move to physical inspection if squeaking persists after these steps. Avoid forcing earpads off until you’ve completed all software troubleshooting.
When should I replace the swivel mechanism?
Replace the swivel when squeaking continues after software fixes and the hinge feels loose or damaged. Persistent mechanical squeaking signals real wear inside your headphones. Contact manufacturer support with details about when and where the noise occurs.

Hi, I’m Pearl Standen, the voice behind The Web Utility. I’m a passionate tech enthusiast who loves exploring the latest gadgets, smart devices, and electronics that make everyday life easier. Through my website, I share honest, well-researched reviews of trending Amazon products to help you make smarter buying decisions.