How To Fix Electric Callus Remover Sanding Roller Detaching?
Your electric callus remover works hard to smooth rough, cracked heels. But what happens when the sanding roller keeps popping off mid session?
This is a common problem. Many users face a loose or detaching roller during use.
The good news is that this issue is usually easy to fix. You do not need a new device right away.
In most cases, a simple adjustment solves the problem completely.
This guide walks you through practical fixes for a detaching sanding roller. We will cover why this happens in the first place. You will also learn how to reattach the roller correctly and securely.
In a Nutshell
- Check the alignment first. Most detachment issues happen because the roller head is not snapped in straight. Line it up evenly and press until you hear a click.
- Inspect for wear and damage. A worn out roller or cracked attachment point will not stay secure. Look closely for any visible cracks or loose parts.
- Clean the attachment area regularly. Dead skin, dust, and debris build up inside the base. This buildup stops the roller from locking in fully.
- Avoid excessive pressure during use. Pushing too hard strains the attachment point. Gentle pressure keeps both your skin and the roller safe.
- Replace old roller heads when needed. Rollers wear out over time with regular use. A fresh head often solves persistent detachment problems instantly.
- Store your device properly after each use. Keeping it in a dry, safe place prevents damage to the roller mechanism. Proper storage extends your device’s life significantly.
Why Sanding Rollers Detach: Common Causes
Your sanding roller detaches for several clear reasons. Understanding these causes helps you fix the problem quickly and prevent it from happening again.
Worn Roller Heads are the top culprit. Every time you use your device, the roller experiences friction and pressure. Over time, the attachment points weaken. The roller head may crack, split, or lose its grip on the base. This wear happens naturally with regular use.
Misalignment during attachment causes many detachment issues. If you do not snap the roller head straight onto the base, it sits at an angle. This uneven fit makes the roller pop off during use. The connection point never fully engages when alignment is wrong.
Debris buildup inside the attachment area prevents secure fitting. Dead skin cells, dust, and moisture accumulate in the base where the roller connects. This buildup acts like a barrier between the roller and base. The roller cannot seat properly when debris is present.
Excessive pressure during use strains the attachment mechanism. Pushing too hard on your feet forces the roller to work beyond its design limits. This stress weakens the connection point and causes premature detachment. Gentle, steady pressure is always better.
Damaged attachment clips or grooves on the base make secure attachment impossible. If the base has cracks, bent clips, or worn grooves, the roller cannot lock in place. Physical damage to the device itself requires attention.
Moisture and humidity can affect how well rollers stay attached. Water inside the base or on attachment surfaces reduces grip. Storing your device in damp areas increases this problem.
These causes work alone or together. Identifying which ones apply to your situation helps you choose the right fix.
Tools and Replacement Parts You’ll Need
Before you start fixing your electric callus remover, gather the right supplies. You will need a few basic items to complete this repair successfully.
First, get a replacement sanding roller head. These come in different grit sizes, from coarse to soft. Coarse grits handle thick calluses aggressively. Soft grits work gently on sensitive skin. Most devices use interchangeable roller heads that snap into the base.
You should have a clean cloth or soft brush on hand. This removes dead skin, dust, and debris from the attachment area. A dry environment helps the roller stay secure.
Gather some rubbing alcohol for cleaning. This dissolves stubborn buildup inside the attachment mechanism. Use it sparingly to avoid damaging the device.
A small screwdriver set may be helpful. Some devices have screws holding the attachment base together. Check your specific model to see if you need this tool.
Keep a moisturizing cream or foot balm nearby. After fixing your roller, you will want to treat your feet. Proper aftercare prevents rough skin from returning quickly.
Have your device manual available. This shows you exactly how your model attaches and detaches. Different brands use different mechanisms.
Consider getting a storage container for your replacement parts. Keeping rollers in a dry, protected space prevents damage between uses.
Stock some extra roller heads if possible. Having backups means you can replace worn ones immediately. This prevents the frustration of a detached roller during your routine.
These basic supplies help you fix detachment problems fast. You probably have most items at home already. The investment is small compared to buying a new device.
Step-by-Step: Reattaching a Loose Sanding Roller
Here’s how to reattach your sanding roller securely. Start by powering off your device completely and unplugging it from the wall. Safety comes first when working with electric tools.
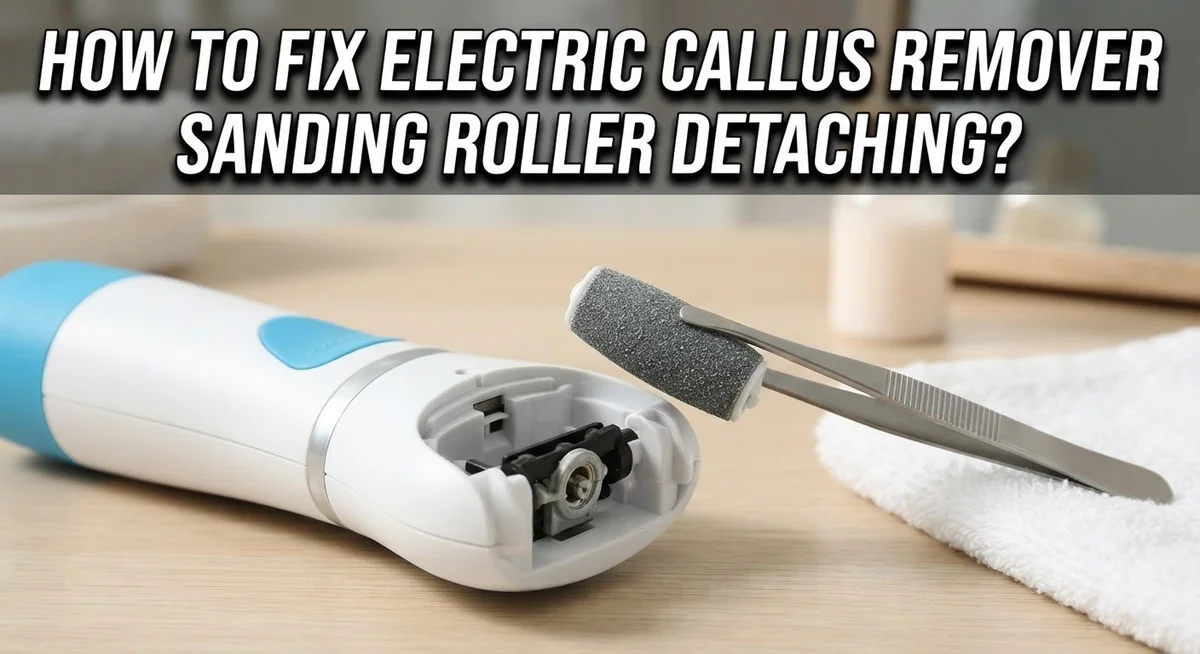
Examine the roller head connection point carefully. Look for the attachment mechanism, which typically has grooves, clips, or a snap fit design. Check if any parts look bent, cracked, or worn out. A damaged attachment point prevents secure reattachment.
Clean the entire attachment area thoroughly. Use a soft brush or cloth to remove dead skin, dust, and debris. These particles create gaps between the roller and the base. Wipe the connection points with a clean, dry cloth to ensure a tight fit.
Inspect the roller head itself for damage. Look for cracks, worn edges, or flat spots on the sanding surface. If the roller shows significant wear, reattachment alone won’t solve your problem. You’ll need a replacement roller head for best results.
Align the roller head properly before pressing it into place. Most devices require you to line up grooves or tabs on the roller with corresponding slots on the base. Position it straight and perpendicular to the device body.
Press the roller head firmly into the attachment point. Apply steady, even pressure until you hear or feel a click. This click indicates the roller has snapped into the correct position. Don’t force it if resistance occurs. Remove it and check alignment again.
Test the connection by gently tugging the roller. It should not move or wiggle. If it still feels loose after proper reattachment, the attachment mechanism may be damaged and need professional repair or replacement.
How to Replace a Worn or Damaged Roller Head
Replacing a worn or damaged roller head is straightforward and takes just a few minutes. A worn roller loses its effectiveness because the sanding surface becomes smooth and dull. You’ll notice poor results or the roller spinning without actually removing calluses.
Start by powering off your device completely. Unplug it from the wall to stay safe. Let the roller cool down if you’ve just used it, as heat can make removal tricky.
Locate the attachment point where your roller connects to the motor shaft. Gently wiggle the roller head side to side while pulling outward. Most roller heads come free with steady, firm pressure. Don’t force it violently, as this can damage the connection point on the device itself.
Once removed, examine the attachment area on your device. Look for debris, dried skin cells, or moisture buildup. Use a clean cloth to wipe away any residue. A soft brush works well for stubborn particles stuck in grooves.
Now inspect your replacement roller head. Check that the center hole aligns perfectly with the motor shaft. The fit should be snug but not overly tight. Misalignment causes future detachment problems.
Insert the new roller head straight onto the shaft. Push firmly until you hear or feel a click. The roller should sit flush against the device base. Give it a gentle tug to confirm it’s secure.
Test your device on low speed first. Run it for 10 seconds without touching skin. Listen for unusual sounds or vibrations that suggest improper installation.
Proper replacement prevents detachment issues and keeps your device working effectively. Replace roller heads every few months depending on usage frequency.
Choosing the Right Grit for Secure, Effective Use
Selecting the right grit size is crucial for keeping your sanding roller attached and working well. Grit determines how aggressively the roller removes dead skin, and the wrong choice creates problems beyond just poor results.
Coarse grit rollers are very aggressive. They remove thick calluses quickly but require firm pressure to work effectively. This extra pressure strains the attachment mechanism and causes rollers to detach more easily. Coarse grits work best for severely thickened skin on heels and balls of feet.
Medium grit rollers offer a balanced approach. They remove calluses without demanding excessive force from your hand. This gentler pressure protects the attachment connection and reduces detachment risks significantly. Medium grit suits most people with moderate callus buildup.
Fine or soft grit rollers are gentle and light. They work best for maintenance between deeper treatments. These rollers need minimal pressure, which actually reduces wear on the attachment point and keeps your roller secure longer.
Matching grit to your skin condition prevents unnecessary pressure. When you use appropriate grit, your hand naturally applies the right force. This protects both your skin and the mechanical connection holding your roller in place.
Check your device manual for recommended grit sizes. Different models work best with specific grits. Some devices come with multiple roller options, allowing you to switch based on your needs.
Start with medium grit if you’re unsure about your skin type. You can always switch to coarser or finer options once you understand what works for your feet. Proper grit selection keeps your roller attached, prevents skin damage, and ensures your device performs reliably for months.
Best Practices for Preventing Future Detachment
Preventing future detachment starts with understanding how your device works. The sanding roller attaches to a motor shaft through a simple connection. When you use your device correctly, this connection stays secure and lasts longer.
Store your device in a dry place. Moisture builds up inside the motor housing and weakens the attachment point over time. After each use, wipe down the exterior with a dry cloth. Never submerge your device in water, even if the manual suggests rinsing parts.
Use gentle pressure during every session. Many people press too hard thinking it removes calluses faster. This actually damages the connection point and causes the roller to pop off. Let the device do the work for you.
Clean the attachment area regularly. Dead skin, dust, and debris accumulate around where the roller connects to the motor shaft. This buildup creates gaps that loosen the connection. Use a soft brush or cloth to remove particles weekly.
Rotate between different roller heads if you own multiple ones. This gives each roller time to rest and prevents constant wear on a single connection point. Worn rollers detach more easily than fresh ones.
Check your device before each use. Gently tug the roller to confirm it sits snugly. If you feel any movement, reattach it immediately before turning on the motor.
Apply moisturizer after every treatment session. Hydrated skin is less likely to cause excessive friction that stresses the roller connection. Dry, cracked skin creates resistance that pulls the roller loose.
Store replacement rollers in a cool, dry container away from direct sunlight. Temperature changes and UV exposure can degrade the attachment mechanism over months of storage.
Mistakes That Lead to Roller Damage or Loosening
Mistakes happen when using electric callus removers, and many of them lead directly to roller loosening or damage. Understanding what causes these problems helps you avoid them.
Applying too much pressure is the most common mistake. Users often think harder pressure means better results, but this actually forces the roller to work against your skin instead of gliding smoothly. Excessive pressure strains the attachment point and can cause the roller to pop off during use. Your device works best with light, gentle contact.
Using the wrong grit size creates problems too. Coarse grit rollers are very aggressive and demand careful handling. If your skin is sensitive, a coarse roller can slip because you’ll instinctively reduce pressure, which weakens the connection. Medium grit works better for most people and keeps steady pressure easier to maintain.
Overusing your device damages both your skin and the roller attachment. Treating the same area repeatedly in one session puts stress on the motor and attachment mechanism. Limit each foot to about 1 to 2 minutes per session.
Skipping the cleaning step between uses allows dead skin cells and moisture to accumulate around the attachment area. This buildup prevents the roller from seating properly. Clean the attachment point and roller head after every use.
Ignoring post treatment moisturizing might seem unrelated, but it matters. Dry, cracked skin requires more aggressive treatment, which means more pressure and faster wear. Moisturizing regularly keeps your skin in better condition, so your device needs less force to work effectively.
These mistakes compound over time. Each one individually causes problems, but combined they guarantee roller detachment and premature wear.
Troubleshooting Persistent Roller Issues
When your sanding roller keeps detaching despite your efforts, the problem usually goes deeper than simple installation. Persistent detachment points to underlying wear or damage that basic reattachment won’t fix.
First, inspect the shaft where the roller connects. Look for cracks, bent areas, or stripped threads. A damaged shaft cannot hold a roller securely, no matter how tightly you push it on. If you see visible damage, the shaft likely needs replacement through the manufacturer.
Check the roller head itself for damage. Cracks in the roller or a worn connection point mean the roller won’t grip the shaft properly. Even if the shaft looks fine, a damaged roller head will keep slipping off. Replace it with a new one designed for your specific device model.
Examine the attachment mechanism closely. Some devices use a screw or locking ring to secure the roller. Verify this component isn’t loose, stripped, or missing. Tighten any visible fasteners gently but firmly.
Motor vibration can cause persistent detachment. If your device vibrates excessively, the roller shakes loose over time. This suggests an internal motor issue requiring professional service.
Test with a different roller head if you have one available. This tells you whether the problem is the roller itself or the shaft. If a new roller stays attached, your original roller was the culprit.
Clean the entire connection area thoroughly. Built up dead skin cells and moisture create a slippery surface. Use a dry cloth to wipe both the shaft and the inside of the roller head opening.
If detachment continues after trying these steps, contact the manufacturer. Persistent issues often indicate internal problems you cannot fix at home. Professional service ensures your device works safely and effectively again.
Final Thoughts
A detaching sanding roller feels frustrating, but it’s a fixable problem. Most cases come down to simple issues like loose attachment, wrong grit size, or lack of regular cleaning.
Once you understand why detachment happens, fixing it becomes straightforward. Small adjustments in how you use and store your device make a big difference.
Remember that your device needs care just like any other tool. Skipping maintenance steps speeds up wear and tear on the roller mechanism.
Fixing detachment issues is only part of the process. You also need to think about long term skin care.
Electric callus removers work best as part of a routine. They smooth rough skin, but they don’t replace moisturizing or gentle foot care.
Consistency matters more than intensity. Using your device gently and regularly gives better results than aggressive, occasional sessions.
If you’ve tried everything and the roller still detaches, don’t force it. Continuing to use a damaged or unstable roller head can hurt your skin.
At that point, reaching out to the manufacturer makes sense. They can guide you toward a proper repair or replacement option.
Taking care of your feet takes patience. Small consistent efforts bring smoother results over time than quick fixes.
Keep your device clean, check it before each use, and store it properly. These simple habits prevent most detachment problems before they start.
Your feet do a lot of work every day. Giving them proper care with a well maintained device keeps them healthy and comfortable.
With the right approach, you can enjoy smooth, callus free skin without dealing with constant roller issues. Good habits today mean fewer problems tomorrow.
Frequently Asked Questions
Why does my sanding roller keep detaching during use?
Your roller detaches because the connection isn’t tight enough. Motor vibration shakes it loose over time. The attachment mechanism may have wear, or the shaft could be damaged. Always check that you’ve inserted the roller completely before each use. Make sure it clicks or locks into place properly.
What should I do if the roller won’t stay attached?
First, clean the entire connection area with a dry cloth. Remove any dead skin cells or moisture buildup. Inspect the shaft for cracks or damage. Check the roller head itself for wear. If everything looks clean and intact, try inserting it more firmly. The connection point needs to be completely sealed to hold properly.
Can I use a different roller head if mine keeps detaching?
Yes, testing with a different roller head helps identify the problem. If a new roller stays attached, your original one may be worn or damaged. If the new roller also detaches, the issue is likely with the device’s shaft or attachment mechanism itself. This tells you whether you need a replacement roller or device repair.
How often should I replace my sanding roller?
Replace your roller when it becomes worn or damaged. Signs include visible wear on the sanding surface, cracks in the roller, or consistent detachment. Regular use typically means replacing the roller every few months. Gentle pressure and proper care extend the roller’s life. Overuse shortens it significantly.
Is a detaching roller a sign my device is broken?
Not necessarily. A detaching roller often means the connection just needs attention. Clean it thoroughly and ensure proper insertion. However, if detachment continues after troubleshooting, the device’s internal mechanism may need professional service. Contact the manufacturer if basic fixes don’t work.

Hi, I’m Pearl Standen, the voice behind The Web Utility. I’m a passionate tech enthusiast who loves exploring the latest gadgets, smart devices, and electronics that make everyday life easier. Through my website, I share honest, well-researched reviews of trending Amazon products to help you make smarter buying decisions.