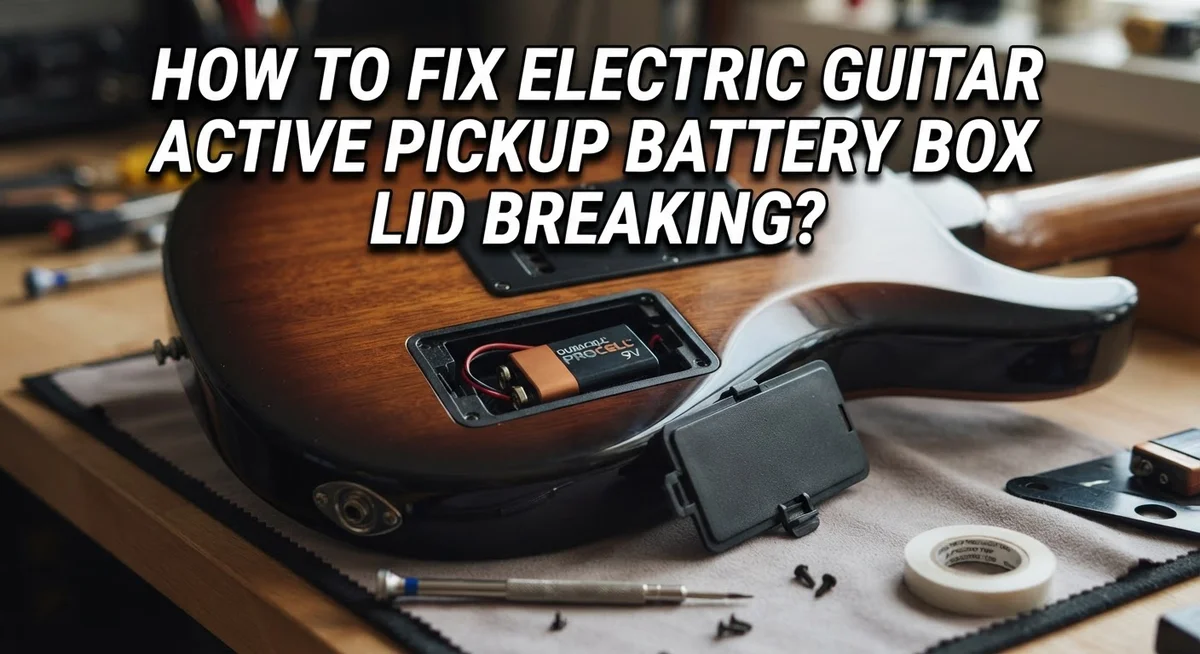
How To Fix Electric Guitar Active Pickup Battery Box Lid Breaking?
Your electric guitar suddenly goes silent during practice. You check the battery compartment and find the lid cracked or missing. This small plastic piece causes big frustration for many guitar players.
Active pickup systems need steady power to work right. When the battery box lid breaks, your battery can bounce around or lose contact. This leads to crackling sounds or complete signal loss.
The good news? You do not need a repair shop visit for this fix. Most battery box problems come from simple issues like stuck backplates or worn out clips.
In a Nutshell
- Loosen the strap button first. This gives the compartment door room to rotate upward without cracking further.
- Remove backplate screws carefully. Stripped screws or stuck plates need gentle handling, not force.
- Use a bent wire hook for stuck plates. Slide it through the screw hole to pop the backplate free safely.
- Check your battery clip condition. A faulty clip often causes bouncing batteries, not just the lid itself.
- Repair or replace the clip if needed. Sometimes the lid works fine once the clip gets fixed too.
- Reassemble and test power retention. Make sure the battery sits snug and the lid closes without gaps.
Understanding Your Active Pickup Battery Compartment
Your active pickup battery compartment sits inside your guitar’s body. It holds the battery that powers your pickups. Without understanding how this system works, repairs become confusing.
The battery box has three main parts. First, there is the lid or door. Second, there is the backplate that sits behind it. Third, there is the battery clip that holds your battery in place.
Active pickups need steady power flow. When the lid breaks or won’t close properly, air and moisture can enter. This damages your battery and electronics over time. A loose lid also lets the battery bounce around inside.
The battery clip is a metal spring mechanism. It grips your battery and keeps it from sliding out. Many people think the lid itself is broken when really the clip has failed. A bent or weak clip causes batteries to fall out even with a perfect lid.
The backplate connects to your guitar’s body. It sits behind the battery compartment and protects the internal wiring. Removing it requires careful work because it often gets stuck from age or corrosion.
Understanding these parts helps you diagnose the real problem. Is your lid cracked? Does your battery keep bouncing out? Does the backplate feel stuck? Each issue has a different solution.
Most people force the compartment door open without loosening the strap button first. This causes unnecessary damage. The strap button sits near the battery box. Loosening it gives the door room to rotate upward safely.
Knowing your battery compartment layout prevents costly mistakes. You will handle repairs with confidence once you see how simple these parts actually work together.
Why Battery Box Lids Break: Common Causes
Battery box lids break for several straightforward reasons. Understanding these causes helps you prevent future damage and fix current problems correctly.
Repeated opening and closing wears down the lid’s plastic or metal hinges over time. Every time you swap batteries during gigs or practice sessions, you stress the connection points. The material gradually becomes brittle or loses its grip strength.
Forcing the compartment open without loosening the strap button first causes immediate cracks. Many players push the battery door upward with too much force. The strap button holds tension on the compartment, so skipping this step creates unnecessary strain on the lid itself.
Poor battery clip condition leads to loose batteries that bounce around inside the box. When batteries move freely, they press against the lid from inside. This constant pressure warps the lid or breaks the latch mechanism that holds it shut.
Moisture and temperature changes degrade plastic lids over months and years. If your guitar sits in humid environments or experiences sudden temperature shifts, the material expands and contracts. This repeated movement weakens stress points where the lid connects to the body.
Impact or accidental drops obviously crack the lid directly. Even a minor bump during transport can split plastic compartments. Metal lids can dent or bend out of alignment, preventing them from closing properly.
Corrosion of metal hinges happens when sweat or moisture reaches the connection points. Salty sweat from your hands transfers to the battery compartment during regular use. Over time, corrosion weakens the hinge strength and causes the lid to fail.
Recognizing these causes lets you address the real problem, not just patch the symptom.
Tools You’ll Need Before Starting Repairs
Before you start fixing your active pickup battery box lid, gather the right tools. You don’t need many items, but having them ready saves frustration and prevents damage.
A screwdriver set is essential. You’ll need both Phillips and flat head sizes to remove backplate screws. Different guitar manufacturers use different screw types, so having options matters.
A bent metal hook or wire tool helps tremendously. You can make this yourself from an old wire hanger. Straighten most of the wire, then bend one end into a small hook shape. This tool slides through screw holes to pop stuck backplates free without forcing them.
Keep a flashlight or headlamp nearby. The battery compartment sits deep inside your guitar body. Good lighting helps you see the battery clip condition, spot cracks in the lid, and identify stuck screws clearly.
A small container holds loose screws safely. Losing screws during repair is frustrating and delays your work. Label which screws came from which position if you remove multiple ones.
Have a replacement battery on hand. You’ll want to test your repair by installing a fresh battery and checking if it stays secure. This confirms your fix actually works before you finish.
A soft cloth prevents accidental scratches. Use it to wipe away dust or corrosion from metal parts inside the compartment. This also helps you inspect the battery clip for damage more clearly.
Gather these simple tools before opening your guitar. Preparation makes the repair faster and reduces the risk of stripping screws or breaking components further. You’re now ready to access your battery compartment safely.
Step-by-Step: Safely Removing the Backplate
Removing the backplate safely requires patience and the right approach. Start by loosening your strap button slightly so the battery compartment can rotate upward without resistance. This simple step prevents unnecessary stress on the lid and surrounding plastic.
Once the strap button is loose, locate all the screws holding the backplate to your guitar’s body. Most battery compartments have two to four screws. Remove each screw slowly and place them in your small container immediately. Losing even one screw makes reassembly frustrating.
If the backplate feels stuck or won’t budge, don’t force it. Instead, use your bent metal hook tool. Insert the hook through one of the empty screw holes and gently wiggle the backplate side to side. This technique breaks the seal without damaging the plastic edges.
Work the backplate loose gradually. Apply steady, gentle pressure rather than sudden jerking motions. If resistance continues, try the hook from a different screw hole. The goal is to coax the plate away rather than pry it off.
Once the backplate starts moving, you can use your fingers to carefully pull it free. Keep the backplate level as you remove it to prevent the battery clip from catching on anything inside the compartment.
Before setting the backplate down, examine the battery clip closely. Look for bent metal, rust, or broken springs. These issues explain why your battery keeps bouncing out during play. Take a photo of the clip’s condition for reference during repair decisions.
Place the backplate on a clean, soft cloth to protect it from scratches. Your battery compartment is now open and ready for inspection and repair work.
Step-by-Step: Repairing or Replacing the Battery Clip
The battery clip is the small metal or plastic component that holds your battery in place inside the compartment. When this clip breaks or weakens, your battery bounces around and eventually stops making proper contact with the terminals.
Start by examining the clip closely under good lighting. Look for visible cracks, bent metal, or plastic pieces that have snapped off. A damaged clip cannot hold the battery securely, so replacement becomes necessary. If the clip appears intact but loose, it may just need repositioning or tightening.
To repair a bent metal clip, use gentle pressure to bend it back into its original shape. Work slowly and avoid over bending, which can snap the metal. Test the battery fit after each small adjustment. This method works well for minor bending issues.
For clips with visible cracks or breaks, replacement is your best option. The clip slides or screws into the battery compartment housing. Gently remove the old clip by sliding it out or unscrewing the fasteners holding it. Take a photo of the original clip before removal so you can match the replacement exactly.
When installing a new clip, ensure it sits flush against the compartment wall. The clip should grip the battery firmly without crushing it. Insert a test battery to verify proper tension and contact.
If the clip housing itself is cracked, the entire battery box may need replacement. Check whether your guitar model allows individual component repairs or requires a complete compartment assembly swap.
Test your repair by inserting a fresh battery and rotating your guitar in different angles. The battery should stay in place and maintain electrical contact throughout all movements.
Reassembling and Testing Battery Retention
After you’ve repaired or replaced the battery clip, reassembling your guitar requires careful attention. Start by positioning the backplate back against your guitar’s body. Align all the screw holes properly before you insert any screws.
Insert screws slowly and turn them clockwise by hand first. This prevents cross threading, which damages the holes permanently. Once all screws are hand tight, use your screwdriver to tighten them fully. Don’t overtighten, as this can crack the backplate or strip the screw holes.
Next, tighten your strap button back to its original position. Make sure it’s snug but not overly tight. A loose strap button can cause the battery compartment to shift during playing.
Now comes the critical testing phase. Insert a fresh battery into the compartment with the correct polarity. Push it in firmly until you hear or feel a click from the clip.
Close the battery box lid completely. Rotate your guitar in different directions—up, down, sideways, and at angles. The battery should not bounce, rattle, or fall out during any movement. Shake your guitar gently to simulate playing conditions.
If the battery stays secure through all these tests, your repair is successful. If it still bounces out, the clip may need additional adjustment or the compartment itself might have structural damage.
Test your active pickups by plugging into an amplifier. You should hear clean, amplified sound with no crackling or dropout. If sound cuts out intermittently, the battery connection may still be loose.
Keep your guitar upright and stationary for 24 hours after reassembly. This allows any adjusted components to settle into their final positions before you play normally.
Pro Tips for a Long-Lasting Fix
When you’re fixing your guitar’s battery box lid, several professional techniques help ensure the repair lasts. Start by identifying exactly what broke. Did the lid crack? Did the hinge fail? Is the latch mechanism damaged? Understanding the specific problem guides your repair approach.
One key tip is to work slowly and deliberately. Rushing through repairs often causes additional damage to surrounding components. Take time to examine the broken area under bright light before attempting any fixes.
Use the right tools for your situation. A bent wire hook works well for stuck backplates, but you may need different tools depending on what failed. Improvising with incorrect tools can worsen the damage.
When reassembling, hand tighten all screws first before using a screwdriver. This prevents cross threading and ensures even pressure distribution. Screws should feel snug but not over tightened, which can crack plastic or strip threads.
Temperature matters during repairs. Cold temperatures make plastic brittle and more prone to breaking. Work in a warm environment when possible.
Test your fix multiple times before considering it complete. Insert and remove the battery several times. Rotate your guitar in different directions. Close and open the lid repeatedly. This thorough testing reveals whether your repair truly solved the problem.
Keep detailed notes about what you fixed and how you fixed it. This information helps you identify patterns if the same component breaks again. Some guitar designs have weak spots in the battery box design, so knowing your guitar’s tendencies helps prevent future failures.
Store your guitar in a safe location after repairs. Avoid placing heavy objects on top of it or exposing it to extreme temperature changes for several days.
Troubleshooting Common Post-Repair Issues
After you repair your battery box lid, problems sometimes pop up. Your battery might still bounce out during playing. This happens when the clip doesn’t grip tightly enough or when the lid doesn’t close all the way.
Check the battery clip first. Look at how it grips your battery. If the clip seems loose or bent, it won’t hold the battery secure. A weak clip is the most common reason batteries fall out after repair.
Next, examine the lid itself. Does it close completely? Sometimes the lid warps slightly and won’t seal properly. Gently press down on the lid while closing it. If you feel resistance or gaps, the lid may need adjustment.
Test battery retention properly. Insert a fresh battery and rotate your guitar in different directions. Shake it gently. Tilt it upside down. If the battery stays put through all these movements, your repair works well.
If problems continue, check your screws. Loose screws let the entire compartment shift around. Remove the backplate again and tighten each screw by hand first. Then use your screwdriver carefully.
Another issue involves the compartment door itself. Sometimes the hinge area gets damaged during the original break. Inspect where the lid connects to the guitar body. Look for cracks or loose connection points.
Wait before giving up on your repair. Adjusted components need time to settle. Keep your guitar upright and stationary for 24 hours after reassembly. Then test again.
If your battery still bounces out after these checks, the clip or lid may need replacement rather than repair. Document what you’ve tried. This information helps you decide on next steps.
Final Thoughts
Fixing a broken battery box lid is a simple task once you know the right steps. You do not need special tools or advanced skills. A little patience goes a long way.
Start slow and stay gentle with your guitar’s compartment. Rushing often causes more damage than the original problem. Take your time with each screw and each movement.
Remember that most lid problems come from two sources. Either the clip fails to grip the battery, or the compartment door does not close properly. Identify which issue you face before starting repairs.
Simple fixes work for simple problems. A loose strap button or a stuck backplate rarely needs professional help. You can solve these issues at home with basic household items.
Your active pickups depend on steady power. A secure battery box keeps your guitar ready for practice or performance. This small fix protects your entire electronic system.
Do not ignore early signs of trouble. A wobbly lid or a battery that shifts slightly often signals bigger issues ahead. Address these problems early to avoid future headaches.
Practice makes repairs easier over time. Each time you open your battery compartment, you learn more about your guitar’s build. This knowledge helps you spot problems faster next time.
Keep your tools organized for future use. A metal hook, a screwdriver, and a spare clip can solve most lid issues. Having these ready saves time later.
Trust your own hands with this repair. Most guitarists can fix a broken battery box lid without a technician. Follow the steps, stay patient, and your guitar will work well again.
Frequently Asked Questions
Why does my battery keep bouncing out of the compartment?
A bouncing battery usually means one of two things. First, check the battery clip inside the compartment. If the clip is bent or worn, it won’t grip your battery properly. Second, the compartment door itself might be loose. Try tightening the screws on the backplate. If the clip looks damaged, you may need to replace it rather than repair it.
How do I remove a stuck battery compartment backplate?
Stuck backplates happen often. Start by loosening your strap button slightly, then gently rotate the compartment door upward. Remove the visible screws carefully. If the plate still won’t budge, use a bent metal hook (you can make one from a wire hanger) and push it through the screw hole to help lift the plate free. This technique prevents damage from forcing the plate.
What’s the difference between repairing and replacing the battery clip?
Look at your battery clip closely. If it’s bent slightly, you can often reshape it gently. If it’s cracked, broken, or completely flattened, replacement is your better option. A working clip must grip the battery firmly without being so tight that it crushes the battery. Test the clip by inserting a fresh battery and rotating your guitar in different directions. The battery should stay put.
How long should I wait after reassembling before testing my pickup?
Wait at least 24 hours after reassembly. This allows adjusted components to settle into place. During this time, keep your guitar upright and stationary. After 24 hours, plug into an amplifier and test your active pickups. Insert a fresh battery and check that it stays secure during normal playing.

Hi, I’m Pearl Standen, the voice behind The Web Utility. I’m a passionate tech enthusiast who loves exploring the latest gadgets, smart devices, and electronics that make everyday life easier. Through my website, I share honest, well-researched reviews of trending Amazon products to help you make smarter buying decisions.