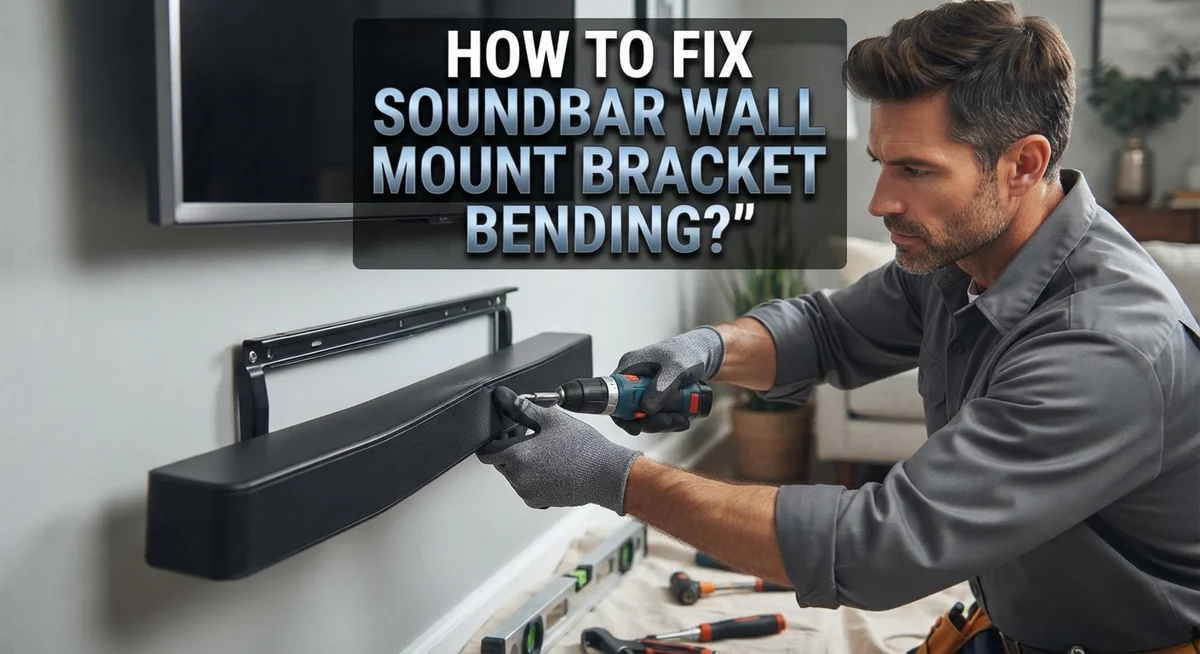
How To Fix Soundbar Wall Mount Bracket Bending?
Does your soundbar sit at a weird angle on the wall? Do you see the bracket bending or sagging under its weight?
You are not alone. This is a common problem for many soundbar owners.
Heavier soundbars need strong support. When the wall anchors are too weak or the bracket is installed incorrectly, gravity takes over. The metal starts to bend.
This bending is not just annoying. It can actually be dangerous. A bent bracket might snap, causing your soundbar to fall.
In a Nutshell
- Weight mismatch is the main cause. Your soundbar’s weight often exceeds what the anchors can hold. Always check the weight rating before you drill.
- Templates matter. Skipping the placement guide leads to crooked holes. This puts uneven stress on the bracket.
- Anchors need to match your wall. Drywall, brick, and concrete each need different anchor types. A wrong choice will cause sagging over time.
- Stud location helps a lot. Mounting into a stud gives much stronger support than drywall alone. Use a stud finder if you can.
- Clearance behind the unit is important. Cramped spacing can twist the bracket arms. Leave enough room for airflow and cables.
Why Soundbar Wall Mount Brackets Bend or Sag
Soundbar brackets bend or sag for specific reasons. Understanding these causes helps you prevent the problem before it starts.
Weight exceeds anchor capacity. This is the most common culprit. Your soundbar has a certain weight, and your wall anchors have a weight limit. When the soundbar weighs more than the anchors can support, the bracket gradually bends downward. Heavy soundbars need anchors rated for 50 pounds or more per hole.
Hole placement is incorrect. Many people skip the placement template that comes with the soundbar. Without it, holes end up in weak spots on the wall. The bracket then bears uneven pressure, causing one side to bend before the other.
Wrong anchor type for your wall. Drywall, brick, and concrete require different anchors. Using a drywall anchor on a concrete wall will fail. The anchor cannot grip properly, and the bracket sags under load.
Insufficient number of anchors. Some people use fewer anchors than recommended. The manufacturer specifies exactly how many anchor points you need. Cutting corners here is a direct path to bending.
Poor stud location. Mounting into a wooden stud is much stronger than mounting into drywall alone. If you skip checking for studs, you miss the opportunity for rock solid support. Studs can hold significantly more weight than drywall.
Tight spacing behind the unit. If the soundbar sits too close to a wall or cabinet, the bracket arms twist during installation. This twisted position creates stress that causes bending over time.
Installation mistakes. Drilling at slight angles, tightening anchors unevenly, or forcing the bracket into place all cause problems. Each of these errors puts extra stress on the mounting hardware.
The fix starts with understanding what went wrong. Once you know the cause, you can address it properly and mount your soundbar securely.
Signs Your Bracket Installation Needs Attention
Your soundbar bracket may be sending you warning signs before it fails completely. Watch for these red flags that mean your installation needs attention right away.
Visual sagging or tilting is the most obvious sign. If your soundbar leans to one side or dips downward in the middle, the bracket is losing its grip. This happens fast once bending starts, so act quickly.
Gaps between the bracket and wall tell you something is wrong. A properly installed bracket sits flush against the wall surface. Visible space means the anchor points are pulling away or the bracket arms are warping.
Creaking or popping sounds when you touch the soundbar indicate stress on the mounting hardware. The bracket is struggling under weight and shifting slightly. These noises mean failure could come soon.
Difficulty adjusting the soundbar angle suggests the bracket is bent. If the bracket won’t stay where you position it or feels loose when you tighten it, the metal is likely warped and can’t hold its shape.
Visible cracks or bends in the bracket itself are serious warning signs. Even small cracks spread quickly and lead to complete failure. Bent metal loses strength fast.
Movement when you push gently on the soundbar shows the anchors aren’t holding properly. Your soundbar should feel rock solid with no give. Any wobble means the anchors are failing or undersized.
Uneven spacing from the wall is another clue. Measure the distance from the bracket to the wall at multiple points. If these measurements vary, the bracket is bending unevenly.
Visible rust or corrosion on metal brackets weakens the structure over time. Rust eats away at metal strength and causes eventual failure.
Don’t ignore these signs. Address bracket problems early before your soundbar falls or gets damaged. The sooner you fix it, the safer your installation becomes.
Step-by-Step: How to Fix a Bent or Sagging Bracket
Start by turning off and unplugging your soundbar. Safety comes first when working with mounted electronics.
Inspect the bracket closely. Look for visible bends, cracks, or permanent warping in the metal arms. Take photos from multiple angles so you can track any changes. Run your hand along the bracket surface to feel for deformations you might miss visually.
Check all mounting holes and fasteners. Use an appropriate wrench or screwdriver to tighten every bolt and screw. Sometimes brackets sag simply because fasteners have loosened over time. Work methodically through each connection point.
Measure the gap between the bracket and wall at multiple spots. An uneven gap tells you the bracket is tilted or bent. Mark these measurements so you can compare them after making repairs.
Remove the soundbar carefully from the bracket. Have a helper support the weight so you don’t strain yourself. Set it on a soft surface to prevent damage.
Examine the wall anchors behind the bracket. Pull out the bracket to see if anchors are bent, cracked, or partially pulled from the wall. This reveals whether the wall itself is failing or the anchors are undersized.
If anchors are damaged, remove them completely. Fill the old holes with spackling compound and let it dry. Sand smooth when dry.
Assess whether the bracket can be straightened. Minor bends sometimes respond to careful tapping with a rubber mallet against a wooden block. However, severely bent brackets usually cannot be reliably restored and should be replaced.
Check stud location in the wall using a stud finder. If studs are available, drilling into them provides far better support than drywall alone.
Reinstall anchors rated for your soundbar’s weight. Most soundbars need anchors supporting at least 50 pounds per hole. Match the anchor type to your wall material.
Mount the bracket again using the manufacturer’s placement template. This ensures proper hole alignment and spacing. Reattach your soundbar and test stability by gently pushing it from different angles.
Choosing the Right Anchors and Hardware for Your Wall Type
Different wall materials require different anchors. This is the key to preventing bracket bending. Your wall type determines which hardware will actually hold your soundbar’s weight.
Drywall is the most common wall material in homes. Standard drywall anchors work here, but they have weight limits. Plastic expansion anchors typically hold 25 to 50 pounds per anchor. Heavy soundbars need multiple anchors rated for at least 50 pounds each. Toggle bolts offer better support in drywall, often holding 75 to 100 pounds per anchor.
Concrete and brick walls are much stronger. Concrete anchors and masonry bolts handle heavier loads easily. These materials support soundbars weighing 30 to 40 pounds without sagging. You’ll need a hammer drill to create proper holes in concrete or brick.
Wood studs provide the strongest foundation possible. If you locate a stud behind your TV, mount directly into it. Wooden studs hold any standard soundbar without special anchors. Use wood screws rated for the bracket’s specifications.
Check your soundbar’s weight before selecting anchors. The manufacturer provides this information in the manual. Match your anchor capacity to this weight, then add extra safety margin. If your soundbar weighs 20 pounds, use anchors rated for at least 50 pounds total.
Use a stud finder to locate wooden studs in your wall. Mark stud locations before drilling any holes. Mounting into a stud eliminates most bending problems completely.
Never guess about your wall type. Test a small area first if unsure. Tap the wall with your knuckles. Solid sounds suggest a stud. Hollow sounds mean drywall alone.
Follow the manufacturer’s placement template exactly. This template accounts for proper anchor spacing and weight distribution. Incorrect spacing causes uneven pressure on brackets, leading to bending. The template ensures anchors support the soundbar evenly across its entire width.
Reinstalling With Proper Placement and Stud Alignment
When you reinstall your soundbar bracket, proper placement and stud alignment make all the difference. Start by using the manufacturer’s placement template. This guide shows you exactly where to drill holes.
Hold the template against your wall at the correct height. Most soundbars mount 12 to 24 inches above your TV. Mark the center point with a pencil. This center mark guides all your other measurements.
Use a stud finder to locate wooden studs behind your drywall. Studs provide the strongest support available. If your soundbar bracket holes align with studs, drill directly into them. This eliminates the need for wall anchors in those spots. Stud mounting is your best option for heavy soundbars.
When studs don’t line up with your bracket holes, you’ll need quality wall anchors. Measure your soundbar’s weight and select anchors rated for that load. Most manufacturers recommend anchors rated for 50 pounds or more per hole.
Space your holes evenly across the bracket. Uneven spacing puts stress on certain anchors and causes bending. The template should show you the correct spacing.
Before drilling into drywall, double check your measurements. Measure from the center point in both directions. Verify the distance between holes matches your bracket specifications exactly.
Drill pilot holes first using a smaller drill bit. This prevents the wall from cracking and helps anchors sit properly. Insert your anchors into the holes and tap them gently until they’re flush with the wall.
Leave adequate clearance behind the soundbar. Many brackets need 2 to 3 inches of space for ventilation and cable management. Check your manual for specific clearance requirements.
Mount the bracket securely using all provided fasteners. Don’t skip any holes or use undersized hardware. Proper installation prevents future bending and keeps your soundbar safe.
Common Mistakes That Cause Bracket Failure
Improper hole placement is the leading cause of bracket problems. Many people skip the placement template and drill by eye. This creates misaligned holes that put uneven stress on the bracket.
Undersized anchors are another major issue. Your soundbar’s weight matters more than you think. A 20 pound soundbar needs anchors rated for at least 50 pounds per hole. Using anchors meant for lighter items causes them to pull free from the wall.
Choosing the wrong anchor type for your wall material leads to failure. Drywall requires expansion anchors that spread behind the wall. Concrete needs different fasteners than drywall. Using a drywall anchor in concrete won’t hold properly.
Many people ignore the manufacturer’s hardware specifications. The bracket comes with specific bolts, screws, and anchors for a reason. Substituting cheaper fasteners or using what you have on hand creates weak points. The bracket then bends under the soundbar’s weight.
Incorrect spacing behind the soundbar also causes problems. Brackets need proper clearance for ventilation. Without space, heat builds up and can warp the bracket over time. Cables also need room to connect without pressure on the mounting hardware.
Failing to verify stud locations is a common error. Some people mount brackets only on drywall without checking for studs. Studs provide much stronger support than drywall alone. A stud finder costs little and prevents expensive mistakes.
Not checking fastener tightness after installation causes gradual sagging. Vibrations from sound can loosen bolts over weeks or months. Regular inspection catches loose hardware before the bracket bends.
Rushing the installation process leads to mistakes. Taking time to measure twice, drill once, and follow instructions prevents most bracket failures. Patience during setup saves money and frustration later.
Preventive Tips to Keep Your Soundbar Mount Secure Long-Term
Keeping your soundbar mount secure requires ongoing attention and simple maintenance steps. Your bracket won’t bend if you check it regularly and address small issues before they become big problems.
Start with monthly inspections. Look at your bracket from different angles every four weeks. Tighten all visible fasteners with the appropriate wrench or screwdriver. Even small movements can loosen hardware over time. A quarter turn on each bolt takes just minutes but prevents major sagging.
Monitor your soundbar’s position closely. If you notice it tilting or dropping even slightly, stop using it immediately. This early warning sign means fasteners are loosening or the wall anchor is failing. Catching this early prevents the bracket from bending permanently.
Keep your wall dry and clean around the mount area. Moisture damages drywall and weakens anchors. Dust buildup around the bracket can hide corrosion or rust forming on metal components. Wipe the area gently with a dry cloth every few months.
Avoid placing heavy objects on or near your soundbar. Pets jumping on it or leaning against the wall nearby adds unexpected stress. This extra weight can accelerate bracket bending even if your initial installation was perfect.
Check cable connections regularly too. Loose cables create tension that pulls on the bracket. Secure all wires with clips or ties so they hang freely without tugging on your mount.
Review your installation setup annually. Ask yourself if anything has changed in your home. New construction, wall repairs, or even temperature changes affect wall integrity. If you’ve had any work done near your soundbar, inspect the bracket immediately afterward.
These simple habits keep your mount stable for years. You’re essentially giving your bracket a health checkup to catch problems early. Regular maintenance costs almost nothing but saves you from expensive repairs or replacement.
Final Thoughts
A bent soundbar bracket does not mean you need a new setup. Most bending problems come from simple fixable causes. Weak anchors, wrong hole placement, or poor spacing all lead to this issue.
The good news is that you can fix this yourself. Proper reinstallation solves most bracket problems permanently. You just need the right tools and a bit of patience.
Start by removing the bent bracket completely. Check your wall for stud locations before drilling new holes. This single step prevents most future bending issues.
Always match your anchors to your soundbar’s weight. A heavier unit like larger models needs stronger hardware. Skimping on anchors almost always leads to sagging later.
Take your time with each step. Rushing causes more damage than the original problem. Measure twice and drill once for the best results.
Your soundbar deserves a stable, secure mount. This protects your device and keeps your wall undamaged too. A properly installed bracket lasts for years without issues.
Remember that prevention beats repair every time. Regular checks catch small problems before they become big ones. A few minutes each month saves you hours of repair work later.
Wall material matters just as much as bracket quality. Drywall needs different anchors than concrete or wood studs. Know your wall type before you start any installation.
Don’t ignore early warning signs like slight tilting or gaps. These small changes often signal bigger problems ahead. Catching issues early keeps repairs simple and quick.
With the right approach, your soundbar bracket will stay secure. Proper installation combined with regular maintenance creates a lasting solution. Your entertainment setup stays safe and sound for the long run.
Take these steps seriously from the start. Your soundbar performs best when properly supported. A stable mount means better sound and peace of mind.
Frequently Asked Questions
Why does my soundbar bracket keep bending?
Your bracket bends when it cannot support your soundbar’s weight. This happens for two main reasons. First, your wall anchors may be too small or the wrong type for your wall material. Second, you might have placed holes in the wrong spots without using the manufacturer’s template.
Heavy soundbars need anchors rated for 50 pounds or more per hole. Drywall requires different anchors than plaster or concrete. Using the wrong anchor type causes gradual sagging over weeks or months.
What’s the best way to prevent bracket bending before it starts?
Start with the manufacturer’s placement guide. This template shows you exactly where to drill. Mark your center point first, then measure carefully before making any holes.
Use anchors that match your soundbar’s weight. Check your wall material too. Drywall, plaster, and concrete all need different hardware. Verify stud locations when possible, as studs provide the strongest support.
After installation, tighten all fasteners securely. Check them monthly to catch any loosening early.
Can I fix a bent bracket myself?
Yes, you can fix it. Remove the bent bracket completely from the wall. Inspect the mounting holes for damage. If holes are enlarged or damaged, you may need to drill new holes slightly offset from the originals.
Install new, heavier duty anchors rated for your soundbar’s weight. Reinstall your bracket and tighten everything firmly. Test the stability before hanging your soundbar again.
Should I use wall studs for mounting?
Studs offer the strongest support available. If your soundbar sits at stud height, mount directly into studs using wood screws. This eliminates anchor failure completely.
Not all soundbars align with stud locations. If yours doesn’t, use high quality anchors rated well above your soundbar’s weight. Studs are ideal but not always necessary with proper anchors.

Hi, I’m Pearl Standen, the voice behind The Web Utility. I’m a passionate tech enthusiast who loves exploring the latest gadgets, smart devices, and electronics that make everyday life easier. Through my website, I share honest, well-researched reviews of trending Amazon products to help you make smarter buying decisions.