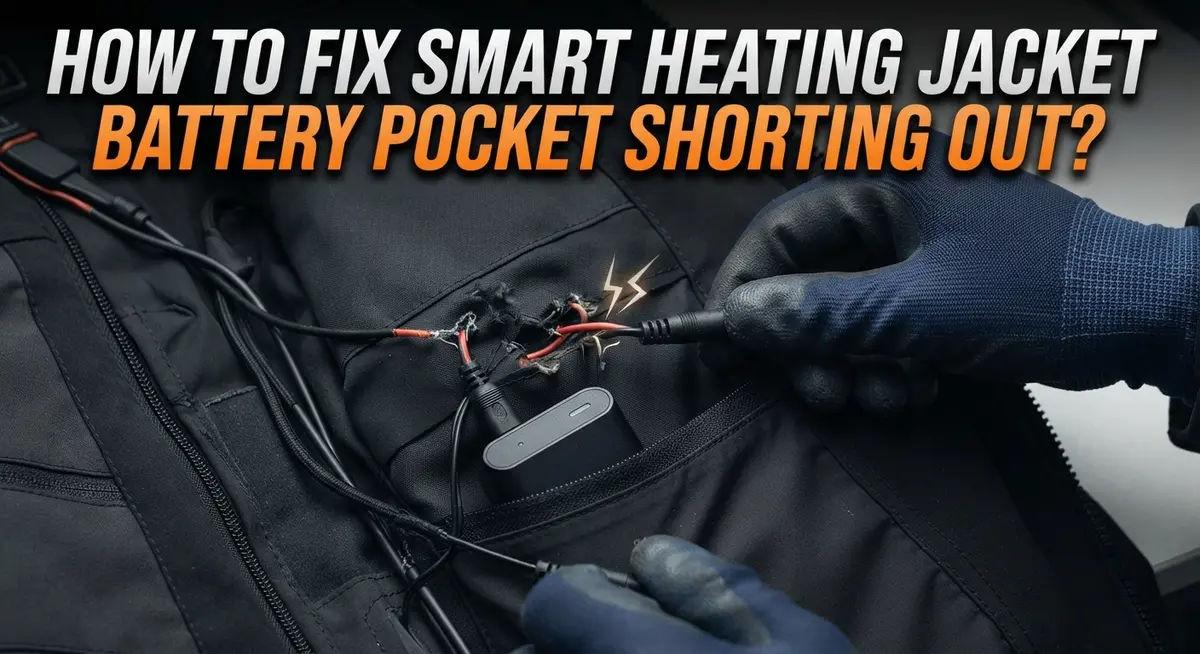
How To Fix Smart Heating Jacket Battery Pocket Shorting Out?
Your smart heating jacket keeps you warm on cold days. But what happens when the battery pocket starts shorting out?
This problem frustrates many jacket owners. Your battery might show a perfect voltage reading. Yet your jacket still won’t heat up.
The culprit is often hidden inside the wiring. Frayed wires at connector points cause power to short circuit. This happens even when everything looks fine on the surface.
In a Nutshell
- Disconnect the battery right away. This stops further damage and keeps you safe from electrical harm.
- Check the wires for fraying. Frayed wires near connectors are the most common cause of shorts. Look closely at every connection point.
- Remove zip ties and unplug connections. This lets you inspect the heating pad and main power cable without obstruction.
- Test the battery voltage first. A battery can show normal voltage, like 12.5V, even when a short blocks power flow.
- Store the battery separately. Never leave it plugged into the jacket during off season storage. This habit causes many shorts.
- Avoid quick fixes. Temporary repairs often fail again soon. A full cable replacement works better than a bodged patch.
Understanding Why Battery Pockets Short Out
Battery pockets short out due to specific electrical failures inside your jacket’s wiring system. The main culprit is frayed wires at connector points. When insulation strips away from copper wire, exposed conductors touch each other or the metal connector housing. This creates an unintended electrical path that bypasses your heating elements.
Moisture also plays a major role in shorts. Water seeps into connector areas during washing or rain exposure. The moisture bridges the gap between positive and negative wires, forcing electricity to flow the wrong direction. This happens even if you can’t see visible water inside the pocket.
Loose connections cause shorts too. When connectors aren’t fully seated, metal pins don’t align properly. The battery tries to send power through misaligned contacts, creating resistance and heat. This resistance generates electrical faults that disable your entire system.
Physical damage creates another common problem. Bending or crushing the battery pocket damages internal wiring. The wires inside the pocket can crack or break from impact. These broken wires then touch each other, creating short circuits that stop power delivery.
A critical fact: your battery can show normal voltage while a short prevents power flow. You might check the battery with a meter and see 12.5V, but the jacket still won’t heat. This confuses many owners who assume the battery is dead. The real issue is the short circuit blocking electricity from reaching your heating pads.
Understanding these causes helps you spot problems early. Regular inspection of your connector areas catches fraying before shorts develop. Keeping moisture away from the battery pocket prevents water related failures. Careful handling protects your wiring from damage that leads to electrical shorts.
Signs Your Heating Jacket Has a Short Circuit
Your smart heating jacket shows several clear warning signs when the battery pocket develops a short circuit. Learning to spot these symptoms helps you catch problems before they worsen.
The jacket won’t power on despite the battery being fully charged. You press the power button, but nothing happens. The heating elements stay cold, and no lights appear on the control panel. This is the most obvious sign something is wrong with your electrical connection.
The battery shows normal voltage but produces no heat. You test the battery with a voltage meter and see it reads 12.5V or higher. Yet when you connect it to the jacket, zero power flows to the heating pads. This specific situation almost always points to a short circuit in the wiring or connectors.
You notice burning smells coming from the battery pocket area. A burnt plastic or electrical odor means excessive current is flowing through damaged wires. Stop using the jacket immediately when you detect this smell.
The connector feels hot to the touch. Run your finger near the quick-release connection or battery pocket. If it feels warm or hot, electrical resistance is building up at that spot. Heat generation at connectors signals a serious short circuit.
The jacket worked fine, then suddenly stopped. It functioned normally for months, then quit working without any obvious damage. This sudden failure often means internal wiring finally frayed enough to create a complete short.
You see visible damage on the wires or connectors. Look for exposed copper, melted plastic coating, or bent metal contacts. Physical damage like this creates immediate short circuit risk.
These signs tell you action is needed right away.
Step-by-Step Guide to Diagnosing the Short
Start by disconnecting the battery from your jacket immediately. This prevents further electrical damage and keeps you safe. Set the battery aside in a clean, dry location.
Next, locate all the wires running through your jacket. Look for zip ties that bundle them together. Carefully cut or remove these zip ties to expose the full length of each wire. This step matters because shorts often hide under tight bundling.
Find the quick-release connector where the battery plugs into the jacket. Unplug this connection gently. If it feels stuck, wiggle it slowly rather than forcing it. Examine both the male and female connector ends closely. Look for bent pins, corrosion, or debris inside the connection points.
Now remove the heating pad and main power cable from the jacket. Lay them flat on a clean surface. Run your fingers along every inch of wire, feeling for cuts, breaks, or exposed copper. Pay special attention to areas near connectors where wires bend frequently.
Use a flashlight to inspect connector points for frayed wires. Fraying is the most common cause of shorts. You may see copper strands sticking out from the insulation. Check where wires enter the heating pad itself.
Test your battery voltage with a multimeter if you have one. Set it to DC voltage mode and touch the leads to the battery terminals. A healthy battery shows around 12.5 volts or higher depending on your model. Record this reading.
If the battery shows normal voltage but you suspect a short, the problem lies in the wiring or connectors themselves. This is the key diagnostic finding. Your battery works fine, but damaged wiring prevents power from reaching the heating elements.
How to Safely Repair Frayed Wires and Connectors
Start by disconnecting your battery from the jacket. This prevents electrical damage while you work. Safety comes first every time.
Next, remove all zip ties bundling your wires together. Zip ties can hide damage and make inspection difficult. Gently separate each wire so you can see the full length.
Unplug the quick release connections carefully. These connectors experience the most stress during normal use. Handle them gently to avoid causing additional damage.
Remove the heating pad and main power cable from the jacket lining. You may need to carefully peel back fabric or undo stitching. Take photos before you start so you remember how everything connects.
Use a flashlight to inspect every connector point closely. Look for frayed wires, exposed copper, or melted plastic around the connections. Frayed wires are the most common culprit behind shorts. Run your fingers gently along the wires to feel for cuts or breaks in the insulation.
Check the connector pins for corrosion or discoloration. Oxidation appears as green or white crusty buildup. This buildup prevents proper electrical contact and causes power loss.
Examine where wires enter the connector housing. This junction point often develops cracks from repeated bending and flexing. Cracks expose the copper wire underneath.
Once you identify the damage, do not attempt temporary fixes. Electrical tape or quick patches create fire hazards. The entire damaged section needs replacement.
Verify your battery holds a full charge before reconnecting anything. A fully charged battery helps you test whether your repairs actually worked. Test the voltage with a multimeter if possible.
Document all damage with photos before proceeding to replacement steps. This creates a reference for proper reassembly and helps you avoid repeating the same mistakes.
Testing and Reconnecting the Battery Safely
Before you reconnect your battery, you need to perform careful tests to ensure the short circuit is truly fixed. This step prevents damage to your jacket and keeps you safe from electrical hazards.
Start by using a multimeter to check your battery voltage. A fully charged battery should read between 12 and 13 volts. Place the red probe on the positive terminal and the black probe on the negative terminal. If your battery shows normal voltage, this confirms the short was in the wiring or connectors, not the battery itself.
Next, inspect the quick-release connector under bright light. Look for any green or white corrosion on the metal pins. Corrosion blocks electrical flow and creates resistance that generates heat. Gently clean the pins with a dry cloth if you see discoloration.
Check every wire connection point where wires enter the connector housing. Frayed wires or exposed copper indicate damage. These exposed areas cause shorts when they touch other metal components.
Once you complete your inspection, let the battery sit disconnected for 30 minutes. This allows any residual charge to dissipate safely.
When you’re ready to reconnect, plug the quick-release connector in slowly. Listen for any clicking sounds or smell for burning odors. These signs mean a short still exists.
After reconnecting, press the power button for 3 to 5 seconds to activate your jacket. Feel the battery connector area with your hand after 10 seconds of operation. It should feel warm, not hot. A burning sensation means you need to disconnect immediately and investigate further.
Test your heating elements in a safe location before wearing your jacket again.
Preventing Future Shorts: Storage and Maintenance Tips
Proper storage and maintenance prevent most battery pocket shorts before they happen. Start by storing your battery separately from your jacket during off season months. Never leave the battery plugged into the quick release connector while your jacket sits unused in a closet or storage bin.
Keep your battery in a cool, dry place away from moisture and direct sunlight. Store it in a location where temperature stays between 50 and 80 degrees Fahrenheit. Extreme heat or cold damages battery cells and connector contacts over time.
Check your battery connectors every month, even during storage. Look for signs of corrosion, discoloration, or white crusty buildup on the metal pins. Gently wipe connector surfaces with a dry cloth if you notice any discoloration.
Inspect all wires running through your jacket before each season. Look for fraying, cracks in the insulation, or exposed copper wire. Pay special attention to areas where wires bend or fold inside the jacket lining.
When you wash your jacket, always disconnect the battery first. Remove the heating pad and power cable completely from the garment. Allow everything to dry thoroughly before reconnecting anything.
Handle quick release connectors with care. Avoid dropping your battery or yanking the connector apart forcefully. Gentle disconnection and connection prevents internal pin damage that leads to shorts later.
Store zip ties loosely around wire bundles. Tight zip ties create stress points where wires break inside the insulation. Replace damaged zip ties immediately with new ones.
Test your battery voltage twice per year using a multimeter. A healthy battery maintains consistent voltage readings. Voltage that drops suddenly suggests internal damage or developing short circuits.
These simple habits keep your heating jacket functioning reliably for many seasons.
Common Mistakes to Avoid When Fixing a Short
When fixing a short circuit in your battery pocket, certain mistakes can make the problem worse or create safety hazards. Understanding what to avoid protects both you and your jacket.
Never leave the battery connected while you work on the wiring. Many people think they can diagnose the issue faster this way. In reality, a connected battery risks electrical shock and can damage components further. Always disconnect immediately and wait a few minutes before touching any connectors.
Don’t ignore frayed wires at connector points. Some people see minor fraying and assume it’s not serious. Frayed wires are often the exact cause of shorts. They expose internal conductors and create unintended electrical paths. Replace damaged wires completely instead of wrapping them with tape.
Avoid temporary fixes at all costs. Taping, gluing, or bundling damaged wires together might restore power temporarily. These solutions fail quickly and create fire hazards. Your jacket deserves a proper repair with replacement cables and connectors.
Don’t skip the inspection step. Rushing through this phase means you’ll miss hidden damage inside connector housings. Take your time and use a flashlight to examine every contact point.
Never wash your jacket while the battery pocket is still wet from your repair work. Moisture inside connectors causes new shorts. Let everything dry completely before reconnecting anything.
Finally, avoid skipping the voltage test before reconnection. Even if your battery shows normal voltage on the display, internal shorts can still exist. A multimeter confirms the battery is truly safe to use.
These mistakes seem small individually. Combined, they transform a fixable short into a permanently damaged jacket or worse, a safety emergency.
Troubleshooting Persistent Power Issues
When your smart heating jacket won’t turn on despite a charged battery, a short circuit in the battery pocket is often the culprit. Power issues persist even when your battery shows normal voltage output. This happens because frayed wires or damaged connectors prevent electricity from reaching your heating elements.
Start by disconnecting your battery immediately. Remove all zip ties bundling your wires together. Unplug the quick release connections carefully. Take out your heating pad and main power cable to access the full wiring system.
Inspect every connector and wire for visible damage. Look for frayed edges, exposed copper, or bent pins inside the connector housing. Fraying typically occurs where wires enter the connector. These damaged areas create resistance that blocks power flow.
Check if your battery is fully charged before reconnecting anything. A low battery can mask wiring problems. Use a multimeter to verify your battery voltage sits at the expected level for your jacket model.
Once you identify damaged wiring, full cable replacement is necessary. Temporary fixes like tape or glue fail quickly and create safety hazards. Electrical tape cannot reliably restore insulation around frayed wires.
After replacing damaged cables, reconnect your battery slowly. Press your power button for 3 to 5 seconds to activate the jacket. Test your heating elements in a safe location away from flammable materials.
Persistent power issues often indicate multiple problem areas. Check connections at both ends of every wire. Verify that your heating pad receives power even if the jacket doesn’t heat. This helps you pinpoint exactly where the short circuit occurs.
Final Thoughts
A short circuit in your battery pocket feels like a big problem. But most fixes are simple once you know where to look.
Frayed wires and damaged connectors cause most shorts. Your battery might show full voltage, yet the jacket still won’t heat.
This happens because the short blocks power flow, even when the battery works fine.
The fix always starts the same way. Disconnect your battery first. Then check every wire and connector for damage.
Replace any wiring that looks worn or exposed. Small fixes today prevent bigger problems later.
Regular care makes a real difference here. Store your battery properly. Check connectors often. Handle quick release plugs with care.
These habits protect your jacket for many seasons ahead.
Don’t rush the repair process either. Take time to inspect each part carefully.
A rushed fix often misses hidden damage. That damage can cause the same short circuit again within weeks.
Full cable replacement beats quick patches every time. Tape and glue might work for a day. They won’t last through regular use or washing.
Your jacket deserves a proper fix, not a temporary patch.
Remember that safety comes first in every repair. Never work on wet wiring. Never reconnect a battery without checking voltage first.
These simple checks protect you and your jacket at the same time.
Smart heating jackets serve you well when treated right. A little care now prevents bigger headaches later.
Check your wiring. Fix damaged connectors. Store your battery properly during off seasons.
Follow these steps, and your jacket will keep you warm for many winters. Simple maintenance beats costly repairs every single time.
Stay warm, stay safe, and keep your jacket working right.
Frequently Asked Questions
Why does my battery show voltage but the jacket still won’t heat?
A short circuit in your battery pocket can block power flow even when the battery works fine. Your battery might read 12.5V on a meter, but damaged wiring prevents that power from reaching the heating elements. Frayed wires at connectors are the most common culprit here.
Start by disconnecting the battery immediately. Then inspect every connector and wire for visible damage. Look for exposed copper, bent pins, or frayed edges. If you find damage, the wiring needs full replacement, not a quick tape job.
How do I know if my battery pocket has a short circuit?
Check these signs: the jacket won’t turn on despite a charged battery, the power button feels unresponsive, or the heating pads stay cold. You might also notice the battery gets warm or feels hot to the touch during storage.
Test the battery voltage with a meter before assuming it’s broken. A normal reading means the problem lies in your wiring or connectors. Unplug the quick-release connections and inspect them closely for corrosion or damage.
What’s the safest way to inspect the battery pocket?
Always disconnect the battery first. Remove any zip ties bundling wires together. Unplug the quick-release connectors gently. Take out the heating pad and main power cable so you can see everything clearly.
Look at each connector pin and wire section under good lighting. Don’t force anything apart. If wires are frayed or connectors are bent, stop and plan for replacement parts.
Should I try a temporary fix or replace the whole cable?
Temporary fixes fail quickly and create safety hazards. Taping or gluing damaged wires might restore power briefly, but the short circuit returns soon. Full cable replacement is always the better choice.
A proper repair keeps your jacket safe for many seasons. Rushed fixes often miss hidden damage that causes problems later.

Hi, I’m Pearl Standen, the voice behind The Web Utility. I’m a passionate tech enthusiast who loves exploring the latest gadgets, smart devices, and electronics that make everyday life easier. Through my website, I share honest, well-researched reviews of trending Amazon products to help you make smarter buying decisions.