How To Fix DJ Turntable Pitch Slider Center Detent Wearing?
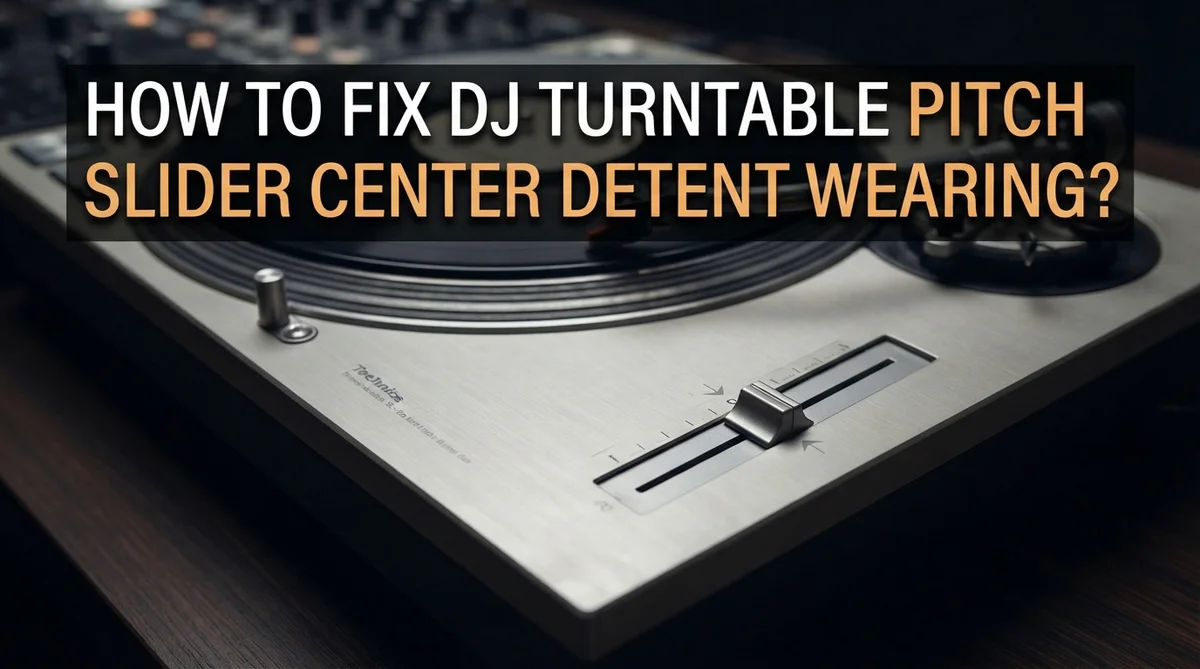
Your DJ turntable pitch slider should snap right into place at the center mark. That little click tells you the pitch is at 0%. But over time, that click can start to feel loose, sticky, or gone completely.
This happens because of a tiny ball bearing called the center detent. It sits under the slider and wears down with heavy use. DJs who spend hours mixing every week often notice this issue first.
You might feel your slider catch awkwardly or slide past center without stopping. This throws off your pitch accuracy and makes beatmatching harder. Technics SL1200 and SL1210 mk5 models are especially known for this problem.
In a Nutshell
- The problem starts small. A worn ball bearing inside the center detent stops holding the slider firmly at zero. Over time, this makes the pitch point drift off center.
- You’ll notice it fast. The slider feels loose, sticky, or catches at the wrong spot. Your pitch accuracy suffers during playback.
- Fixing it means opening up the turntable. Flip it onto a soft surface like a pillow first. This protects the platter and buttons from scratches.
- Removing screws is straightforward. Take off the feet, then unscrew the hidden screws underneath. This gives you access to the slider mechanism inside.
- The real fix targets the bearing itself. You can replace the worn ball bearing, clean the mechanism, or adjust detent tension if your model allows it.
- Avoid one big mistake. Never force the slider through a worn detent. This only causes more damage and makes repairs harder later.
Understanding the Center Detent Mechanism
The center detent mechanism is a small but critical part of your turntable’s pitch slider system. At its core sits a ball bearing that holds your slider in the exact center position when you’re not adjusting the pitch.
Think of it like a tiny ball sitting in a cup shaped groove. When the slider moves to the center, the ball drops into this groove and creates resistance. This resistance is what gives you that satisfying “snap” when the pitch returns to zero. The groove keeps the slider from wandering off center accidentally.
Over time, this groove wears down from constant use. The ball bearing gets smaller, the groove gets wider, or both happen together. Once wear sets in, the ball can’t grip the slider anymore. The result is a loose, sloppy feeling at center position.
The mechanism lives inside your turntable’s body, beneath the pitch slider itself. It connects to the slider through a mechanical linkage. When you move the slider up or down, the linkage moves the ball bearing groove into and out of position.
Understanding how this works helps you see why simple cleaning sometimes fixes the problem. If dust or old lubricant gummed up the mechanism, clearing it out restores function. But if the ball bearing itself is truly worn, replacement becomes necessary.
The detent tension can also be adjusted on many turntable models. Tighter tension means more resistance at center. Looser tension means less grip. Finding the right balance keeps your slider responsive without feeling stuck.
This knowledge prepares you for the repair work ahead. You now understand what’s happening inside and why it matters for your pitch accuracy.
Signs Your Pitch Slider Detent Is Wearing Out
Your pitch slider will show clear warning signs before it completely fails. Recognizing these early symptoms helps you catch the problem before it gets worse.
The most obvious sign is a loose or wobbly feeling when you move the slider. Instead of snapping firmly into the center position, it drifts or feels uncertain. You might notice the slider catches at slightly different spots each time you use it.
Listen for unusual sounds or resistance. A worn detent often creates a grinding or scratching noise as the slider moves. The mechanism may feel sticky or sluggish, requiring extra pressure to move smoothly through the center position.
Your pitch accuracy suffers when the detent wears. The zero pitch point shifts away from the true center mark. This means your records play at slightly incorrect speeds, even when the slider appears centered. Musicians and precise listeners notice this immediately.
Some sliders develop a dead zone around the center. The slider passes through the middle without catching at all. This feels like the detent has completely disappeared. Other sliders catch too aggressively, making fine pitch adjustments nearly impossible.
Check if the slider drifts after you release it. A healthy detent holds the slider firmly in place. A worn detent lets the slider creep toward one side on its own.
Play your records and listen carefully. Speed inconsistencies, warbling, or pitch variations point to detent problems. Test this with tracks you know well.
These signs tell you the ball bearing mechanism needs attention soon. Acting quickly prevents additional damage to surrounding components and keeps your turntable performing reliably.
Tools and Preparation Needed Before Disassembly
Before you start disassembling your turntable, gather the right tools. Having everything ready prevents frustration and keeps parts organized during the repair process.
You’ll need basic hand tools first. A screwdriver set with multiple sizes is essential since turntables use different screw types. Phillips head and flathead screwdrivers both come in handy. A small flashlight or headlamp helps you see inside tight spaces once the turntable opens up.
Workspace preparation matters more than you might think. Find a clean, flat surface with plenty of room. A pillow or folded towel protects your turntable from scratches when you flip it upside down. This soft surface also prevents the turntable from rolling during work.
Container organization keeps you sane. Use small bowls or containers to separate screws by size and location. Label each container so you remember where each screw came from. This simple step saves hours of confusion during reassembly.
You’ll also want cleaning supplies on hand. A soft brush removes dust from the pitch slider mechanism. Isopropyl alcohol cleans the detent area without damaging electronics. Use lint free cloths to avoid leaving fibers behind.
Consider getting a parts diagram beforehand. Most turntable manuals show screw locations and internal layouts. This reference guide prevents accidentally removing the wrong components.
A magnifying glass helps inspect the ball bearing mechanism closely. You need to see wear patterns clearly to understand the damage level.
Finally, keep your phone nearby for photos. Take pictures as you disassemble each section. These images become your reassembly guide and help you remember component positions accurately.
Step-by-Step: Opening the Turntable and Accessing the Slider
Start by placing your turntable upside down on a soft pillow or towel. This protects the platter and tonearm from damage. The pillow also prevents the turntable from rolling during work.
Locate all the feet on the bottom of your turntable. These feet screw into the chassis. Unscrew each foot carefully and set them aside in your container. Some feet may have washers underneath them, so keep track of these small parts.
Once the feet are removed, you’ll see screw holes in the turntable’s base. These holes contain the hidden screws that hold the bottom panel in place. Unscrew all of these internal screws. Count them as you go so you know how many to reinstall later.
The bottom panel should now lift away from the turntable body. Set it aside gently on your workspace. Take a photo of the internal layout before you proceed further. This helps you remember how everything connects.
Look for the pitch slider mechanism inside the turntable. You’ll see it mounted near where the slider sits on top. The ball bearing assembly sits directly beneath the slider track. This is the component causing your center detent problems.
Before touching anything, inspect the mechanism closely with your magnifying glass. Look for dirt, dust, or visible wear on the ball bearing. Note any discoloration or damage you see. This inspection tells you whether cleaning alone might work or if replacement is necessary.
Don’t force any parts during this stage. If something feels stuck, stop and investigate why. Forcing components can damage surrounding electronics and make repairs more expensive. Take your time and work methodically through each step.
Step-by-Step: Repairing or Replacing the Ball Bearing Detent
Once you’ve accessed the pitch slider mechanism, you’re ready to work on the ball bearing detent itself. This is where the actual repair happens.
Start by examining the ball bearing closely. Use your magnifying glass to see if the bearing appears flat, dented, or discolored. A worn bearing loses its smooth, spherical shape and can’t hold the slider in the center position anymore.
If the bearing looks damaged, you’ll need to remove it. Most turntables have the bearing housed in a small cup or socket. Gently pry out the worn bearing using a small flathead screwdriver. Work slowly to avoid damaging the surrounding plastic or metal housing.
Clean the detent socket thoroughly. Remove any dust, dirt, or old lubricant buildup. A clean space helps you see exactly what you’re working with. Wipe the area with a soft, dry cloth.
Now you have two main options. You can replace the ball bearing with a new one of the same size and material. Measure your old bearing first to ensure you get the correct replacement. Alternatively, you can clean and lubricate the existing bearing if it’s only slightly worn.
If you choose lubrication, apply a tiny amount of light machine oil or specialized slider lubricant. Too much lubricant makes the slider feel mushy and defeats the purpose of the detent.
Test the slider movement carefully. Move it up and down slowly through the center point. You should feel a subtle click or catch at 0% pitch. The slider should also return to center when released.
If the slider still feels loose or won’t hold center, the bearing needs replacement rather than cleaning.
Cleaning, Lubricating, and Reassembling the Slider Mechanism
Once you’ve removed the worn ball bearing, cleaning becomes your first priority. Use a soft brush to remove dust and debris from the detent socket. Wipe the area with a lint free cloth to eliminate any remaining particles that could interfere with smooth operation.
Inspect the socket carefully for any visible damage or corrosion. If you see discoloration or pitting, the socket itself may need replacement. A clean socket provides the foundation for everything that follows.
For the ball bearing itself, clean it gently with a cloth. Don’t use harsh chemicals that could damage the bearing’s surface. A simple wipe down removes old lubricant and grime buildup.
Lubrication is critical but less is more here. Apply only a tiny amount of light machine oil to the ball bearing. A single small drop goes a long way in the slider mechanism. Too much lubricant attracts dust and creates sticky movement instead of smooth operation.
Reassemble the ball bearing into the detent socket carefully. Position it so it sits evenly in the center. The bearing should rest naturally without forcing.
Before fully reassembling your turntable, test the slider movement. Move it slowly from bottom to center to top. You should feel a gentle catch at the center point, not a harsh stop or complete lack of resistance.
If movement feels wrong, remove the bearing and repeat the cleaning process. Sometimes multiple cleaning cycles are needed to restore proper function. The goal is smooth, consistent center detent without sticking or drifting. Once satisfied with the feel, proceed with reassembling the turntable base and feet.
Common Mistakes to Avoid During the Repair
Many people damage their turntable further while trying to fix the pitch slider. Here are the mistakes you need to avoid.
Never force the slider through the worn detent. This is the biggest error. When the center catch feels sticky or loose, your instinct might be to push harder. Forcing it creates tiny scratches and dents in both the ball bearing and the socket. These new marks make the problem worse, not better. Stop immediately if you feel resistance.
Don’t skip the inspection step. Some people assume the bearing is damaged without looking closely. A magnifying glass reveals the real condition. The bearing might just need cleaning instead of replacement. You save time and money by checking first.
Avoid using heavy oils or thick lubricants. These products attract dust and gum up the mechanism. The slider becomes even stickier after a few weeks. Use only light machine oil or specialized slider lubricant in tiny amounts.
Don’t reassemble too quickly. After cleaning or replacing the bearing, test it several times before closing up your turntable. Move the slider slowly through the center point. Listen for smooth clicks. Feel for consistent resistance. If something feels wrong, open it back up and repeat the cleaning.
Never touch the bearing with bare fingers after cleaning. Skin oils transfer to the metal and cause corrosion. Use a clean cloth when handling parts.
Finally, avoid working on a wobbly surface. Your turntable needs stability during repair. Place it upside down on a soft pillow. This prevents accidental drops and protects both your turntable and your floor.
Troubleshooting Persistent Pitch Center Issues
When your pitch slider won’t stay centered, the problem usually stems from a worn ball bearing inside the detent mechanism. This small but crucial component holds your slider at the 0% pitch point. Over time, repeated use causes the bearing to flatten or develop dents, losing its ability to grip properly.
The first sign of trouble appears when your slider feels loose or catches inconsistently at center. You might notice the pitch drifts slightly even when the slider should be at zero. Some users describe it as a “mushy” feeling where the slider doesn’t snap into place like it used to.
Understanding the root cause helps you avoid making things worse. The detent socket (the small cup that holds the bearing) can also wear down. When both surfaces deteriorate together, the slider becomes nearly impossible to center accurately.
To diagnose this issue, move your slider slowly through the center position. Pay attention to whether it catches smoothly or feels sluggish. A healthy detent creates a distinct click or snap feeling. A worn one feels vague or sticky.
Don’t force your slider through a worn detent. This common mistake damages the mechanism further and can crack surrounding components. Instead, work gently and observe how the slider behaves.
The good news is that this problem has clear solutions. You can replace the ball bearing entirely, clean and lubricate the existing bearing, or adjust detent tension if your turntable allows it. Each approach requires careful work, but none demands special skills. The key is proceeding methodically and testing frequently as you work through each step.
Final Thoughts
Fixing a worn center detent takes patience, not force. Your turntable’s pitch slider depends on a tiny ball bearing to find its true center. When that bearing wears down, the whole mechanism suffers.
Remember this simple rule: work slowly and check your progress often. Rushing leads to mistakes that cost you more time later.
Most repairs succeed when you follow the right order. Remove the turntable carefully. Access the slider mechanism without forcing anything. Clean each part before you judge whether it needs replacing.
The ball bearing itself often tells you what’s wrong. A dull or pitted surface means it’s time for a replacement. A bearing that still looks smooth might just need cleaning and fresh lubrication.
Testing matters more than speed. Move the slider through its full range several times before you close up your turntable. This step catches problems early, before they become permanent.
Many DJs skip inspection steps because they want quick results. This approach backfires. A few extra minutes checking the socket and bearing saves you from repeating the whole process.
Your turntable will reward careful work with years of reliable pitch control. The center detent might seem like a small part, but it affects every mix you play.
If your repair doesn’t fix the issue completely, don’t panic. Sometimes a second attempt with fresh lubricant solves what the first pass missed.
Trust the process. Clean thoroughly, lubricate lightly, and test constantly. Your pitch slider will find its center again, and your mixes will sound smooth once more.
Frequently Asked Questions
What exactly is a center detent on a DJ turntable?
The center detent is a small mechanism inside your pitch slider. It uses a ball bearing to hold the slider at the 0% pitch position. When you move the slider, the bearing catches and locks it at center, keeping your track at its original speed.
This mechanism ensures pitch accuracy. Without it, your slider would drift randomly during playback.
Why does the center detent wear out over time?
Constant slider movement causes the ball bearing to lose its grip. The socket that holds the bearing gets compressed and damaged. Years of pushing the slider back and forth creates friction and wear.
Heat and dust also speed up the deterioration. Regular use eventually weakens the detent’s ability to hold position.
How do I know if my center detent is worn?
Your slider will feel loose or sticky around the center point. It may not catch firmly at 0% pitch anymore. You might notice the pitch drifts slightly even when the slider appears centered.
Some sliders catch inconsistently, sometimes gripping and sometimes sliding freely. This unpredictable behavior signals a worn bearing.
Can I fix a worn center detent myself?
Yes, but it requires patience and care. You can clean and lubricate the mechanism, or replace the ball bearing assembly entirely. The process involves removing the turntable feet and accessing the internal slider mechanism.
Success depends on following steps slowly and testing frequently. Rushing or forcing the slider causes additional damage.
What’s the biggest mistake people make during this repair?
Forcing the slider through the worn detent is the most common error. This damages the socket further and can crack surrounding parts. Work slowly instead and let the mechanism guide you.

Hi, I’m Pearl Standen, the voice behind The Web Utility. I’m a passionate tech enthusiast who loves exploring the latest gadgets, smart devices, and electronics that make everyday life easier. Through my website, I share honest, well-researched reviews of trending Amazon products to help you make smarter buying decisions.