How To Fix Microphone Shock Mount Elastic Band Snapping?
Your microphone shock mount keeps your sound clean. But that rubbery elastic band can snap or sag over time. This leaves your mic wobbling or falling flat.
This is a common problem for podcasters, streamers, and musicians alike. The good news? You do not need to buy a whole new shock mount. Many fixes are simple and fast.
In this guide, we will show you exactly how to fix a snapped or sagging elastic band. You will learn quick tricks like knotted loops for minor slack. You will also learn when a full band replacement is the smarter choice.
In a Nutshell
- Snapped or sagging bands cause your microphone to sink or wobble. This happens when elastic loses its stretch over time.
- For minor sagging, try a knotted loop fix. Tie small knots in the band to remove extra slack.
- Knots only work for small problems. If the slack is too big, this fix will not hold your mic steady.
- Severe damage needs full replacement. Snapped bands or major sagging cannot be patched with knots.
- To replace a band, place your shock mount on a flat surface first. Find the metal sleeves sitting in the notches.
- Remove the old band from these sleeves. Slide the new elastic band into place the same way.
- Always check why the band sagged before fixing it. Sun exposure or old age often causes this issue.
- You can also explore other support materials besides rubber bands. Some options may last longer for boom mic setups.
Why Shock Mount Elastic Bands Snap or Sag
Elastic bands in shock mounts fail for specific reasons. Understanding these causes helps you prevent future problems and choose the right fix.
Constant tension wears bands down over time. Your microphone weight pulls on the elastic continuously. This stretching weakens the material gradually. After months or years, the band loses its grip and starts to sag.
Heat speeds up this breakdown. Studio lights, summer humidity, and direct sunlight all damage rubber. Extreme temperatures make elastic brittle and less flexible. If your shock mount sits near heat sources, the band deteriorates faster.
Material quality matters significantly. Lower quality rubber breaks down quicker than premium options. Some bands use thinner material that cannot handle daily use. Budget shock mounts often include weaker elastics that fail sooner.
Improper installation creates problems too. If you stretch the band too tight during setup, it weakens immediately. Conversely, loose installation causes excessive sagging from the start. Either mistake accelerates failure.
Dust and debris accumulate on bands. Particles stick to the elastic surface. Over time, this buildup causes friction and wear. Dirt also traps moisture, which rots the rubber material.
Incorrect microphone placement adds stress. If your mic sits off center in the mount, one band bears more weight. This uneven pressure causes that single band to snap first. The other bands then overcompensate and fail quickly.
Age is inevitable. Even unused shock mounts degrade. Rubber oxidizes naturally over years. Elastic loses its bounce whether you use it or not.
Identifying your specific cause matters. If the band snapped suddenly, check for improper weight distribution. If it sagged slowly, heat or age likely caused it. If multiple bands failed at once, the original material quality was probably low. Knowing the root cause helps you prevent the same issue next time.
Signs Your Microphone Support Is Failing
Your shock mount shows clear warning signs before complete failure. Catching these early helps you avoid losing microphone stability during important recordings.
The most obvious sign is visible sagging. Your microphone sits lower than it did before, even when you haven’t adjusted anything. The elastic band stretches out and no longer holds the mic at the correct height. This happens gradually, so compare your current setup to photos from weeks ago if you’re unsure.
Listen for wobbling or movement. Tap your microphone gently with your finger. A healthy shock mount keeps it still. If your mic moves around easily or takes time to settle, the elastic has lost its tension. This is especially noticeable during recording when you move or adjust your boom arm.
Check for visible damage on the band itself. Look for cracks, splits, or discoloration. Elastic bands turn darker or brittle when they’re failing. Some bands develop a sticky feeling or lose their flexibility entirely. Run your finger along the surface to feel for rough spots or tears.
Watch for uneven support. Your microphone should sit centered in the shock mount. If it leans to one side or sits at an angle, one elastic band may be failing while others still work. This creates imbalanced tension and poor sound isolation.
Notice squeaking or creaking sounds. When you move your boom arm, listen carefully. Stressed elastic bands sometimes make noise as they struggle to support weight. This indicates they’re near their breaking point.
Finally, check if your microphone feels heavier. This sounds strange, but failing elastic bands can’t distribute weight properly. Your arm or stand feels more strain than before. This is your signal that replacement is coming soon.
These signs tell you exactly when action is needed.
Quick Temporary Fix: Knotted Loop Method
The knotted loop method works when your elastic band has minor slack or loose areas. This approach takes up extra space without replacing the entire band. It’s useful for temporary fixes when you notice slight sagging but the band itself isn’t torn or severely damaged.
Start by examining your shock mount carefully. Look at where the elastic band sits in the metal sleeves. If you see loose sections or the band hangs lower than before, this method may help. The goal is to create knots that shorten the effective length of the band.
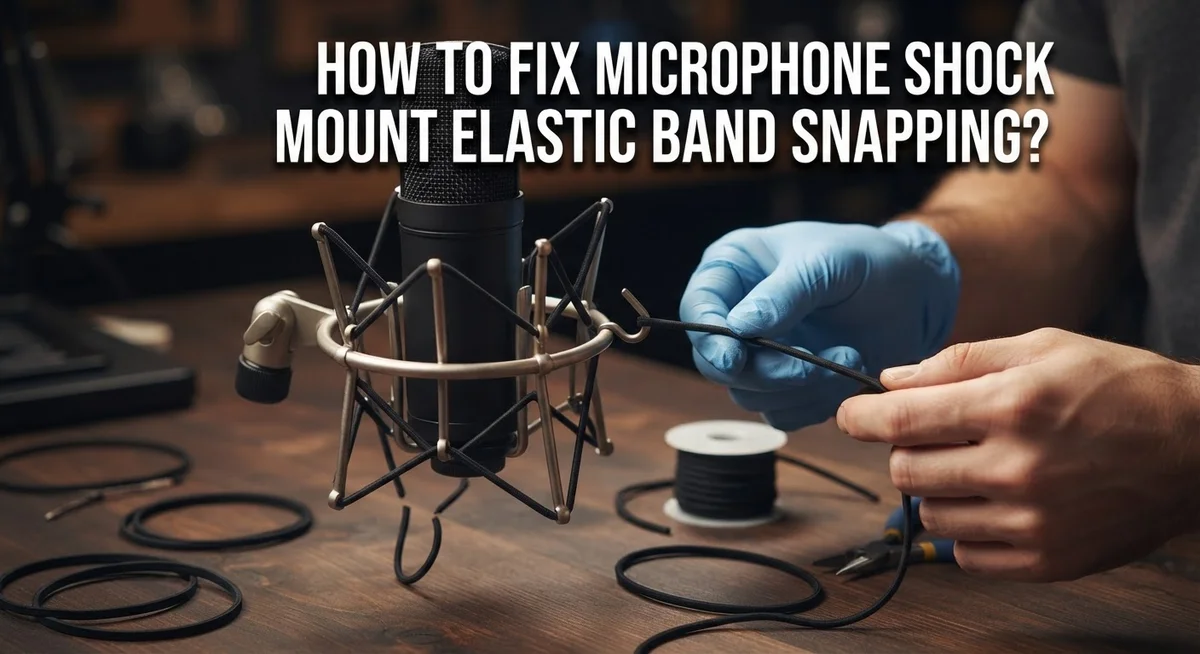
Here’s how to apply the knotted loop method: First, locate the area where slack appears most obvious. Gently pull the elastic band to find the loose section. Tie a simple overhand knot in the band itself. Position the knot so it rests against one of the metal sleeves or mounting points. This knot acts as a stopper that prevents the band from sagging further.
You can tie multiple knots if needed. Space them evenly along the band length. Each knot takes up a small amount of slack. Test your microphone support after each knot to see if movement improves.
Important limitation: This method only works for minor slack situations. If your band has excessive sagging or the microphone drops significantly, knots won’t solve the problem. Severe sagging means you need full band replacement instead.
Also consider why the band sagged in the first place. Check if your microphone weight increased or if the mounting position changed. Look for dust accumulation on the band surface. Address these root causes before tying knots. Otherwise, the problem returns quickly.
The knotted loop method buys you time. Use it as a quick fix while you plan for proper band replacement if needed. This approach keeps your microphone stable enough for immediate use.
Step-by-Step Guide to Replacing an Elastic Band (H84 Model)
Replacing an elastic band on your H84 shock mount takes just a few minutes. Start by placing your shock mount on a flat, clean surface where you can see all the components clearly.
Look for the metal sleeves positioned in the notches around your shock mount. These sleeves hold the elastic band in place. Gently remove the old elastic band by sliding it out from these metal sleeves. If the band is damaged or brittle, it should come out easily.
Before installing a new band, inspect those metal sleeves for any dirt or debris. Wipe them clean with a dry cloth. This ensures your new band will sit properly and last longer.
Now select your replacement elastic band. Make sure it matches the original size and thickness for your H84 model. Slide the new band into the first metal sleeve carefully, working your way around the shock mount.
Continue threading the band through all the metal sleeves in sequence. Take your time here. Rushing this step can cause the band to twist or sit unevenly. The band should sit flat and centered in each notch.
Once the band is fully threaded through all sleeves, check that it’s evenly positioned around the entire shock mount. The tension should feel consistent all the way around. If one side feels looser than another, remove the band and reinstall it.
Test your microphone support by gently placing your microphone in the shock mount. It should feel stable and centered. The microphone should not tilt or sag to one side.
This replacement process prevents future sagging issues. A properly installed elastic band distributes your microphone’s weight evenly. Regular checks every few months help you catch wear early before problems develop.
Tools and Preparation Needed Before Replacement
Before you start fixing your microphone shock mount, gather the right tools. Having everything ready makes the job faster and prevents frustration.
You’ll need a flat, clean work surface. A desk or table works perfectly. Make sure the surface has enough space for your shock mount and all small parts. You don’t want metal sleeves rolling away while you work.
Get a flashlight or work light ready. You need to see inside the metal sleeves clearly. Good lighting helps you spot dirt or damage that could cause problems later. Your phone’s flashlight works in a pinch.
Grab a soft cloth or brush for cleaning. Dust and debris collect inside the sleeves over time. A microfiber cloth or old toothbrush removes particles gently without scratching. Avoid paper towels since they can leave fibers behind.
You’ll need the replacement elastic band itself. Make sure you have the correct size for your specific shock mount model. Check your original documentation or measure the old band’s length and width before replacement. Having the right size prevents installation problems.
Consider having tweezers on hand. They help you guide the elastic band through tight metal sleeves. Tweezers give you better control than your fingers, especially in narrow spaces.
Keep a small container nearby for organizing metal sleeves and any hardware you remove. This prevents losing tiny parts during the replacement process. A cup or small bowl works well.
Wear comfortable clothing that allows free arm movement. You’ll be reaching and positioning your hands in different angles. Avoid loose sleeves that might get caught.
Finally, have your microphone nearby but not in the way. You’ll need it later to test your work. Proper preparation takes just five minutes but saves you time during actual replacement. When everything sits within arm’s reach, the entire process becomes smooth and straightforward.
Common Mistakes to Avoid When Repairing Shock Mounts
When you repair a microphone shock mount, certain mistakes can make your problem worse instead of better. Understanding these errors helps you avoid frustration and wasted time.
The biggest mistake is attempting knot solutions when slack is too large. Many people think tying knots will fix any sagging band. This only works for minor slack situations. If your elastic band has excessive slack, knots won’t provide enough tension. You’ll end up with an unstable microphone that still moves around. The band needs full replacement in these cases.
Another common error is not addressing the root cause of sagging. Before you fix anything, ask yourself why the band sagged in the first place. Did you apply too much weight to the mount? Did you store it improperly? Did heat or UV light damage the material? If you don’t fix the underlying problem, your new band will sag again quickly.
People also rush the replacement process without proper inspection. They don’t check the metal sleeves for dirt or debris before installing a new band. Dirty sleeves can cause uneven tension and premature failure. Always clean these components first.
Another mistake involves using the wrong replacement material. Not all elastic bands work the same way. Some stretch too easily while others are too stiff. Research what specifications your specific shock mount needs.
Don’t skip the testing phase after repair. Many people install a new band and immediately place their microphone in the mount without checking stability. Test the support gently first. Make sure the band is evenly positioned around the entire mount. This simple step catches problems before they affect your recording quality.
Finally, avoid forcing metal sleeves or bands into position. Gentle, steady pressure works better than aggressive tugging. Forcing components can damage them permanently and create new problems you didn’t have before.
Troubleshooting Persistent Sagging After Repair
When your elastic band keeps sagging after you’ve already tried a fix, the problem usually runs deeper than just the band itself. Your shock mount may have underlying issues that cause repeated failure.
First, inspect the metal sleeves carefully. These sleeves hold the elastic band in place around your shock mount. If they’re bent, cracked, or misaligned, they won’t grip the new band properly. A bent sleeve creates gaps where the band can slip and sag again. Use a flashlight to examine each sleeve from different angles. Look for visible damage or deformation.
Next, check if the band you installed is the correct size. An undersized band won’t stretch enough to maintain tension. An oversized band won’t pull tight enough to support your microphone. The band should sit snugly with moderate tension, not loose or overly strained.
Consider whether your shock mount frame itself is damaged. If the plastic or metal frame is cracked, warped, or broken, no elastic band will solve the problem. A compromised frame can’t hold the band securely no matter how new it is.
Clean the entire shock mount thoroughly. Dust, debris, and residue can prevent the band from sitting properly in the sleeves. Use a soft cloth to wipe down all surfaces and grooves.
Test the band tension by hand before installing your microphone. The band should resist your fingers with steady pressure. If it feels loose or overly tight, something is wrong.
If sagging persists after checking these factors, your shock mount may need complete replacement rather than band repair alone. Repeated sagging indicates structural failure that temporary fixes cannot address. Investing in a new shock mount prevents ongoing microphone instability and audio problems during your recording sessions.
Final Thoughts
Fixing a snapped shock mount elastic band does not need to be hard. You now know when a simple knot can save the day. You also know when a full replacement is the smarter choice.
Small slack usually means you can knot the band and keep using your mount. Large slack or a snapped band means it is time to swap in a new one. Trying to force a bad fix will only waste your time and stress your gear.
Think of your shock mount as a support system for your microphone. It needs even tension to work well. A saggy or snapped band breaks that balance and puts your mic at risk.
Regular checks help you catch problems early. Look at your bands before every big recording session. This simple habit prevents surprise failures during important takes.
Remember the replacement steps too. Place your shock mount on a flat surface. Find the metal sleeves in their notches. Remove the old band with care. Slide the new one into place the same way.
Patience matters during this process. Rushing can damage the sleeves or the frame itself. A slow, careful approach gives you better results every time.
If you keep facing sagging issues, look past the band itself. Check your sleeves, your frame, and your cleaning habits. Sometimes the real problem hides in a spot you have not checked yet.
Your microphone deserves steady, reliable support. A well maintained shock mount protects your gear and improves your sound quality. It also saves you money since you avoid buying a whole new unit.
Take these tips with you the next time your band starts to fail. With the right steps and a bit of care, you can fix the issue quickly. Your setup will stay ready for your next recording session.
Frequently Asked Questions
Why did my shock mount elastic band snap in the first place?
Elastic bands snap due to age, repeated stretching, and exposure to heat or sunlight. Over time, rubber loses its flexibility and becomes brittle. If your microphone sits in direct sunlight or near heat sources, the material degrades faster. Heavy microphones also put extra strain on the band, causing it to fail sooner.
Can I fix a snapped band with just a knot?
A knotted loop works only for minor slack. If the band snapped completely or has excessive slack, knotting won’t provide enough support. Your microphone will still sag or move around. A full replacement is the better solution when damage is severe.
How do I know if I need a full replacement?
Check how much slack exists in the band. Gently pull the elastic to see if it still has tension. If the band feels loose, stretched out, or shows visible tears, replacement is necessary. Test by holding your microphone in the mount. If it doesn’t stay steady, the band has failed.
What’s the correct way to replace an elastic band?
Place your shock mount on a flat surface. Locate the metal sleeves positioned in the notches around the frame. Remove the old band carefully. Insert the new band through the metal sleeves, making sure it sits properly in each notch. The band should feel snug but not overly tight.
Should I replace the band before it breaks?
Yes. Regular inspection helps you catch problems early. If you notice sagging or the band feels less springy, replace it soon. This prevents your microphone from dropping during recordings or live sessions.

Hi, I’m Pearl Standen, the voice behind The Web Utility. I’m a passionate tech enthusiast who loves exploring the latest gadgets, smart devices, and electronics that make everyday life easier. Through my website, I share honest, well-researched reviews of trending Amazon products to help you make smarter buying decisions.