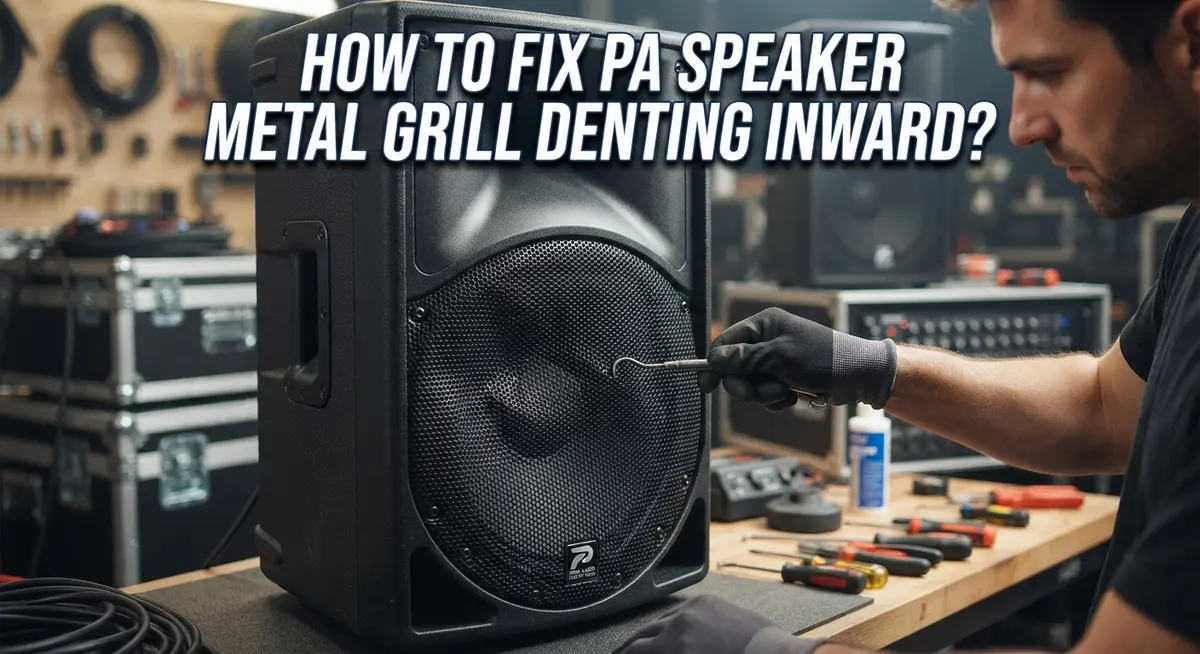
How To Fix PA Speaker Metal Grill Denting Inward?
Your PA speaker looks great until you spot that ugly dent on the metal grill. It happens to everyone. A stray bump, a rough load in, or a fall during transport can leave your speaker with an unwanted dimple.
The good news? You do not need to buy a new grill. Most dents can be fixed right at home with tools you already own.
This guide walks you through simple, safe methods to push that metal back into shape. We cover the fishing string technique for hard to reach dents. You will also learn how to use a hammer and flat backing for deeper damage.
In a Nutshell
- Check the dent first. Shallow dents need light pressure. Deep dents need more careful work.
- Try finger pressure for small dents. Push gently from behind the grill. This often flattens light dents fast.
- Use the fishing string method for tricky spots. Thread it through the grill holes. Pull slowly and steadily to avoid new damage.
- Grab a flat faced hammer for stubborn dents. Always place solid backing behind the grill first. Tap softly and check often.
- Roll it out with a clothes roller. This works well for wider, shallow dents. It spreads pressure evenly across the metal.
- Go slow and stay patient. Rushing causes extra dents or bends. Small, steady movements give the best results.
Why PA Speaker Grills Dent Inward
PA speaker grills dent inward for several straightforward reasons. Understanding why helps you prevent future damage and fix current problems more effectively.
Pressure from speaker mounting matters most. When you mount a speaker to a wall or stand, the grill faces outward. If the mounting bracket pushes unevenly or if you overtighten fasteners, the grill flexes inward. The metal simply cannot resist that concentrated force.
Accidental impacts cause immediate dents. Bumping the speaker during setup, transport, or performance creates sudden pressure. A hand, equipment case, or cable can press the grill inward in seconds. The thinner the metal, the easier it dents.
Vibration and resonance play a role too. Speakers produce powerful sound waves. Over time, constant vibration can loosen the grill or cause it to flex repeatedly. This flexing weakens the metal and creates small dents that grow larger.
Humidity and temperature changes affect metal. Metal expands when warm and contracts when cold. If your speaker sits in a humid environment, moisture can weaken the grill’s structural integrity. The metal becomes more prone to denting.
Poor grill support during storage matters. Stacking speakers incorrectly or storing them without padding puts pressure on the grill. The weight of other equipment pressing down creates permanent inward dents.
Manufacturing defects happen occasionally. Some grills leave the factory with slight imperfections or weak spots. These areas dent more easily than properly manufactured sections.
Knowing these causes helps you protect your speaker. You can adjust mounting pressure, handle equipment carefully, and store speakers properly. Prevention always beats repair.
Assessing the Damage Before You Start
Before you start fixing that dent, take a few minutes to understand what you are dealing with. This step saves you time and helps you pick the right repair method.
Look at the dent size first. Measure it with your fingers or a ruler. Shallow dents (less than a quarter inch deep) respond well to gentle finger pressure. Deep dents (half inch or more) need stronger techniques like a hammer or fishing string method.
Check the dent location next. Can you reach it easily from behind the grill? If yes, manual pressure works great. If the dent sits in a tight corner or hard to reach spot, the fishing string method becomes your best choice.
Feel the metal around the damaged area. Run your hand across the grill to spot any sharp bends or creases. These need extra care because aggressive pressure can crack the metal or create new dents nearby.
Inspect for multiple dents. One dent is simple. Multiple dents scattered across the grill require a different approach. You may need to work on them one at a time or use a roller tool to address several shallow dents at once.
Test the grill’s flexibility. Gently push on undamaged areas to feel how the metal responds. Stiffer metal needs slower, gentler pressure. Flexible metal allows slightly more force.
Look for rust or corrosion. Damaged metal sometimes shows discoloration. Corroded areas break easier, so handle them with extra caution.
This quick assessment takes two minutes but prevents mistakes. You now know your dent’s personality and can choose the safest, most effective repair method for your specific situation.
Tools and Materials You’ll Need
Before you start the repair, gather the right items. You will need basic tools and protective gear to work safely and effectively.
Protective equipment comes first. Wear work gloves to protect your hands from sharp metal edges. The grill can have rough spots or burrs that cut skin easily. Safety glasses help too, especially if you use a hammer or pull hard on fishing string.
For manual pressure work, you need minimal items. Your hands and fingers do most of the job for shallow dents. A soft cloth or towel protects the metal finish while you push. This method costs almost nothing and works well for small damage.
The fishing string method requires specific supplies. Get sturdy fishing line or strong string that won’t snap under pressure. You will thread it through the grill holes and pull steadily. A pair of work gloves prevents the string from cutting your hands during the pull.
For hammer work, choose the right tool. A flat faced hammer works best because it spreads force evenly. Avoid pointed or rounded hammer heads, which create new dents. You also need solid backing material like wood blocks or a thick board. Place this behind the grill to support it while you tap.
A clothes roller or similar tool helps with wider dents. This spreads pressure across a larger area gently. It works best on shallow, broad damage rather than deep spots.
Keep a measuring tool nearby. A ruler or tape measure lets you track progress as you work. Check the dent depth before and after each session to avoid over correcting.
Step-by-Step: Fixing Shallow Dents with Manual Pressure
Start by examining your dent closely. Shallow dents work best with manual pressure because they haven’t creased the metal permanently. Deep dents with sharp folds need different methods, so know what you are working with first.
Position yourself behind the speaker grill where the dent exists. This is crucial because you’ll push from the back side outward. Working from behind gives you better control and prevents making the dent worse.
Put on your work gloves before starting. Your hands need protection from sharp metal edges. Gloves also give you better grip when applying steady pressure.
Use your thumb or fingers to press gently against the dented area. Start with light pressure and gradually increase it over several minutes. Patience matters more than force here. Rushing causes new dents or over corrects the damage.
Check your progress every 30 seconds. Look at the grill from the front to see if the dent is rising back out. Small improvements mean your method is working.
If one finger isn’t enough, use your whole hand to spread the pressure across a wider area. This prevents creating new small dents while fixing the original one.
Work slowly and consistently. Apply pressure for 2 to 3 minutes, then rest. Repeat this cycle several times if needed.
Stop immediately if you feel resistance or hear creaking sounds. These signs mean the metal has reached its limit. Continuing could cause permanent damage or cracks.
For stubborn shallow dents, try working from slightly different angles. Shift your hand position around the dent’s edges. This helps the metal gradually return to its original shape without sudden movements.
Step-by-Step: Using the Fishing String Technique for Deeper Dents
The fishing string technique works well for dents located near or directly over the grill’s holes. This method lets you apply steady, controlled pressure without needing access from behind the speaker.
Start by selecting your string. You need something strong enough to handle tension without breaking. Fishing line works perfectly because it resists fraying and holds knots securely. Regular string or twine can work too if it’s sturdy enough.
Thread the string through one of the grill holes closest to the dent. Push it completely through so you have equal lengths on both sides. If the dent spans multiple holes, thread string through two or three nearby openings for better coverage.
Wrap the string around your gloved hand. Make sure you wear work gloves to protect your skin from the string cutting into your palm. Wrap it several times around your hand or fingers, depending on how much surface area you need to cover.
Pull the string slowly and steadily outward. This creates gradual pressure that pushes the dent back toward its original shape. The key here is patience. Sudden jerking motions can damage the grill further or snap the string.
Check your progress every few seconds as you pull. Stop pulling once you feel significant resistance. Never force the string or yank it aggressively.
If the dent doesn’t fully pop out on the first attempt, let the grill rest for a moment. Then repeat the process from a slightly different angle. Sometimes working the dent from multiple directions gives better results than pulling straight outward.
This technique works best on dents that are moderate in depth and accessible through the grill holes.
Step-by-Step: Hammer and Backing Support Method
This method works best for dents you can access from behind the grill. Start by gathering your flat faced hammer and a solid backing object like a wooden block or sturdy piece of metal.
Position your speaker grill so the dented area faces you. Place your backing support directly behind the dent on the inside of the grill. Press it firmly against the metal to create a solid surface. This backing prevents the grill from flexing backward when you strike it.
Put on your work gloves to protect your hands from any sharp edges. Hold the hammer with a relaxed grip. Tap the dent gently with the flat face of the hammer. Use light, controlled strikes rather than heavy blows. Heavy force causes additional damage and can create new dents.
Tap in a pattern around the dent’s edges first. Work your way toward the center gradually. After every 3 to 5 taps, stop and inspect your progress. This prevents over correction and helps you avoid flattening the grill unevenly.
Flip the grill regularly to access the dent from different angles. Sometimes working from the opposite side helps. Alternate between tapping and checking to monitor your results carefully.
If the dent resists, let the grill rest for a few minutes. Metal sometimes needs time to relax between work sessions. Resume with gentle taps after the break.
Watch for any creaking or bending sounds. These sounds mean you should stop immediately and reassess your technique. Continue this process until the dent flattens to your satisfaction. This method takes patience but produces reliable results without special tools.
Common Mistakes That Make Dents Worse
Many people damage their PA speaker grills further while trying to fix dents. Understanding these mistakes helps you avoid making the problem worse.
Applying too much force is the biggest error. People assume harder pressure fixes dents faster. This actually creates new dents or warps the metal permanently. Your grill may bend in unexpected directions. Start with gentle pressure and increase it slowly over time.
Using the wrong tool causes serious problems. Pointed hammer faces concentrate force on tiny areas. This punches holes instead of smoothing dents. Rounded hammer heads roll force unevenly across the surface. Always choose flat faced tools that distribute pressure evenly.
Working without backing support lets the metal flex backward. When you tap or pull without something solid behind the grill, the opposite side bends inward. This creates a second dent while you fix the first one. Always position solid backing material directly behind your work area.
Rushing the repair process damages the metal structure. The metal needs time to respond gradually to pressure. Sudden jerking motions or aggressive strikes can crack the grill. Slow, consistent pressure works much better than quick movements.
Not checking your progress frequently leads to over correction. You pull or tap too long and bend the grill outward. Now you have an outward bulge instead of an inward dent. Stop every 30 seconds to inspect your work.
Working from only one angle limits your success. Flipping the grill lets you access the dent from multiple directions. Different angles help the metal relax and return to its original shape. Rotate your grill regularly during the repair process.
Troubleshooting Stubborn or Recurring Dents
When a dent keeps coming back or refuses to budge, you need a different approach. Stubborn dents often require patience and multiple techniques working together. The metal may have memory, meaning it wants to return to its original shape but needs help getting there.
Start by identifying why the dent resists repair. Deep dents compress the metal more severely than shallow ones. The deeper the dent, the more the metal fights back. You may need to combine methods instead of relying on just one technique.
Try alternating between the fishing string method and manual pressure. Pull with the string for ten seconds, then rest the grill for a minute. This gives the metal time to adjust gradually. When you restart, the dent may respond better to the next pull.
For recurring dents that pop back out, work from multiple angles. Access the grill from behind, then from the side, then from another angle. Each direction applies pressure differently to the metal structure.
Apply heat carefully if the grill material allows it. Warm metal becomes more flexible and responds better to gentle pressure. Let it cool slowly after each session. Never use extreme heat, as this damages the grill permanently.
Consistency matters more than force. Light taps with a flat hammer, repeated many times, often work better than hard strikes. The same applies to string pulling. Gentle, steady tension beats sudden jerking.
If a dent truly refuses to budge after multiple sessions, the metal may have permanent damage. In this case, accept that some dents become part of your speaker’s character. Focus your energy on preventing new dents instead through protective measures and careful handling.
Final Thoughts
Fixing a dented PA speaker grill is easier than most people think. You don’t need special skills or expensive tools. You just need patience and the right technique.
Start with the gentlest method first. Manual pressure works well for shallow dents. Save the hammer and backing support method for deeper dents that need more force.
Slow and steady wins every time. Rushing causes more damage than the original dent. Take breaks between attempts and let the metal settle.
Always support the grill from behind. This simple step prevents new dents from forming. Skipping this support is one of the most common mistakes people make.
Check your progress often. Small adjustments add up over time. Stopping every few taps or pulls helps you avoid pushing the dent too far outward.
Remember that every grill is different. Some metals respond fast to pressure. Others need multiple sessions before you see real change. Don’t get discouraged if results take time.
If one method doesn’t work, try another. The fishing string technique and hammer method often work well together. Switching approaches can help with stubborn dents that resist a single fix.
Your speaker grill can look good again with the right care. Gentle, consistent effort beats aggressive force every single time.
Keep your tools simple. A flat hammer, some gloves, and a steady hand are often all you need.
With practice, you’ll get better at spotting the right method for each dent. Fixing your PA speaker grill at home saves money and keeps your gear looking sharp for years to come.
Frequently Asked Questions
Can I fix a dent without removing the grill from the speaker?
Yes, you can repair many dents while the grill stays attached. The fishing string method works well for this. Thread string through the grill holes, wrap it around your gloved hand, and pull gently outward. This approach lets you access dents from the front without disconnecting anything.
Manual pressure also works on attached grills. Push from behind the dent with your thumb or fingers. For shallow dents, this simple method often succeeds. Just move slowly and check your progress frequently.
Which method works best for shallow versus deep dents?
Shallow dents respond best to manual finger pressure. Your thumb or hand can gently coax the metal back into shape. This takes patience but causes minimal additional stress to the grill.
Deep dents need a different approach. Use the flat-faced hammer with solid backing support. Tap gently and repeatedly. The key is working gradually rather than striking hard once. Flip the grill often to access the dent from multiple angles.
How long should I spend on one dent?
Work in short sessions. Spend 5 to 10 minutes, then let the metal rest. The grill material needs time to respond to pressure. Rushing causes over correction and new damage.
If a dent resists after several sessions, try a different method. Consistency beats force every time. Light taps repeated many times outperform aggressive striking.
What if the dent keeps returning after I fix it?
Recurring dents mean the metal needs reinforcement from multiple angles. Work on the dent from the front, back, and sides. Apply gentle pressure from each direction.
Let the grill rest between sessions. Sometimes the metal needs time to settle into its new shape. If it still pops back, the metal may have permanent structural damage.

Hi, I’m Pearl Standen, the voice behind The Web Utility. I’m a passionate tech enthusiast who loves exploring the latest gadgets, smart devices, and electronics that make everyday life easier. Through my website, I share honest, well-researched reviews of trending Amazon products to help you make smarter buying decisions.