How To Fix Automated Pet Feeder Auger Jamming With Kibble?
Your automated pet feeder makes life easier. But then the auger jams, and your pet misses a meal.
This is a common problem for many pet owners. Kibble gets stuck, the motor whines, and nothing comes out.
Auger jamming happens for several reasons. Sometimes kibble pieces bridge together and create air pockets. Other times, humidity makes the food sticky and clumpy.
Mixing freeze dried toppers with regular kibble is another major cause. These different textures do not move through the auger the same way.
In a Nutshell
- Kibble bridging is a top cause. Odd shaped pieces create air pockets that block smooth flow.
- Humidity makes kibble sticky. This “glue effect” causes clumps that jam the auger.
- Always remove the bottom cover and counter pin to reach the auger. This helps you clear stuck food safely.
- Check that all parts are put back correctly. Improper assembly is a frequent reason jams keep coming back.
- Keep kibble dry and sealed. Moist food is much more likely to cause blockages.
- Never mix freeze dried toppers with regular kibble in one tank. This combo is a leading cause of jams.
- If jams happen often, try a different kibble size or shape. Your feeder may work better with a different type.
- Watch for error messages like “rotor stuck.” These often point straight to the jam location.
Why Automated Pet Feeder Augers Jam With Kibble
Kibble gets stuck in your feeder’s auger for several clear reasons. Understanding these causes helps you fix jams faster and prevent them from happening again.
Kibble bridging occurs when irregular kibble shapes create air pockets inside the feeder tank. These pockets trap food and stop the auger from turning smoothly. Round kibble flows better than angular pieces, so shape matters more than you might think.
Moisture is a major culprit. Kibble absorbs humidity from the air and becomes sticky. This “humidity glue” effect causes kibble to clump together and bind to the auger blades. Even small amounts of moisture can trigger jams within days.
Freeze dried toppers mixed with regular kibble is one of the top jam causes. These toppers are lighter and harder than standard kibble. They don’t flow with regular food and often wedge into the auger mechanism. Always store toppers separately from kibble.
Rigid mechanical parts sometimes clash with certain kibble shapes. If your feeder was designed for small, round kibble but you use large, square pieces, jams become inevitable. The auger simply cannot push incompatible food through the system.
Foreign objects also jam the auger. Small stones, packaging bits, or debris accidentally mixed into kibble will stop the mechanism instantly. Always inspect kibble before filling the tank.
Improper assembly after cleaning causes jams too. If the counter pin or bottom cover isn’t secured correctly, the auger won’t align properly. Misalignment forces the auger to bind against kibble instead of rotating freely.
Each of these causes points to a specific solution. Identifying which cause affects your feeder helps you choose the right fix and prevent future jams.
Signs Your Feeder Has a Kibble Jam
Your automated pet feeder will show you clear signs when the auger gets jammed. Learning to spot these warnings helps you fix the problem before it gets worse.
The most obvious sign is silence. Your feeder should make a quiet whirring sound when it dispenses food. If you hear nothing, the auger is likely stuck. Press the dispense button and listen carefully. No noise means trouble.
Another key sign is incomplete dispensing. The feeder starts but stops before dropping the full portion. You might hear grinding sounds or clicking noises. These sounds tell you the auger is struggling against resistance.
Pay attention to error messages on the display screen. Messages like “rotor stuck” or “foreign object detected” point directly to a jam. Some feeders flash warning lights instead of text. These alerts are your feeder’s way of asking for help.
Watch for slow dispensing too. Food comes out much more slowly than normal. The motor is working hard but the auger moves with difficulty. This sluggish performance means something blocks the mechanism.
Check the feeder bowl for clues. If it’s empty when it should have food, the jam happened before food reached the bowl. If the bowl has a small amount, the jam started mid cycle.
Unusual vibration is another warning sign. The feeder shakes or rattles more than it normally does. This happens when the auger hits resistance repeatedly.
You might also notice food backing up in the tank. Kibble piles near the auger opening instead of flowing smoothly downward. This buildup shows the auger cannot pull food through.
These signs appear quickly. Act fast when you notice them. Early action prevents damage to your feeder’s motor and keeps your pet fed on schedule.
Step-by-Step: How to Clear a Jammed Auger
Start by unplugging your feeder from the power source. This keeps you and your pet safe while you work.
Next, locate the bottom cover of your feeder. Most models use screws or clips to hold it in place. Remove these fasteners carefully and set them aside in a small container so you don’t lose them.
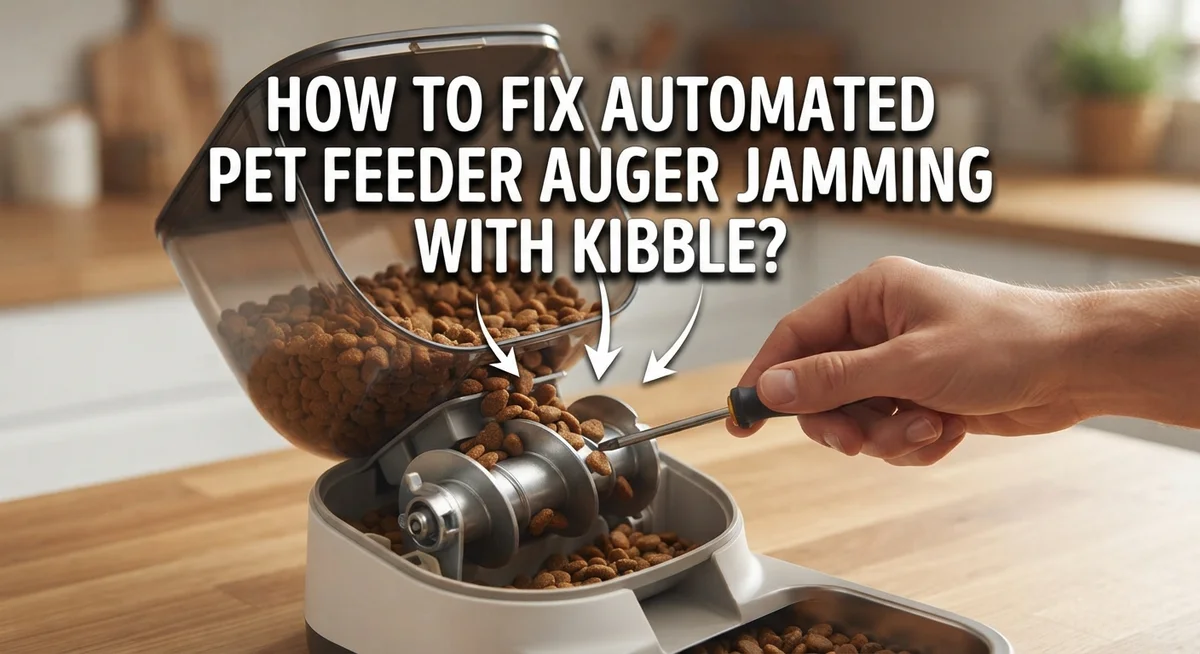
Once the bottom cover is off, you’ll see the auger mechanism. Look for the counter pin that holds the auger in position. This pin usually slides out easily by hand or with gentle pressure. Remove it and set it down safely.
Now gently pull the auger out of the feeder housing. Move slowly to avoid damaging the motor shaft or other internal parts. Inspect the auger carefully for stuck kibble, moisture buildup, or debris wrapped around the spiral blade.
Use your fingers or a soft brush to remove jammed material. For sticky kibble caused by humidity, soak the auger in warm water for a few minutes. This softens the material and makes it easier to clean. Wipe everything dry with a clean cloth before reassembly.
Check inside the feeder tank and hopper for any remaining blockages. Clear the path where kibble flows down to the auger.
Slide the auger back into position and reinsert the counter pin. Make sure it sits flush and secure. Replace the bottom cover and tighten all screws or clips firmly.
Plug the feeder back in and run a test cycle without kibble. Listen for smooth motor sounds. If it runs quietly, add kibble slowly and watch the first few dispensing cycles.
This process usually takes 10 to 15 minutes. Take your time to avoid reassembly mistakes that cause future jams.
Reassembling the Feeder Correctly After Clearing a Jam
After you clear the jam, putting your feeder back together correctly is essential. A misaligned auger or loose counter pin will cause the same problem to happen again.
Start by checking that the auger sits properly in its housing. The auger shaft should slide smoothly into the motor connector without force. If you feel resistance, stop and inspect for any remaining kibble pieces or debris. Even small fragments can cause future jams.
Next, reinsert the counter pin carefully. This small pin holds the auger in the correct position. Make sure it clicks into both the auger and the housing. A loose counter pin means the auger won’t turn at the right angle, and kibble will jam immediately.
Slide the bottom cover back on and secure all screws or clips firmly. Check that the cover sits flat against the feeder body. Gaps or misalignment here allow kibble dust to enter the motor area.
Before you load kibble, run a test cycle without any food. Plug the feeder back in and press the dispense button. Listen for smooth, consistent rotation sounds. The auger should turn freely for several seconds. If you hear grinding, clicking, or stuttering, unplug immediately and recheck your assembly.
Once the test cycle completes successfully, you can refill the tank with fresh kibble. Pour slowly and watch the first few dispensing cycles. The feeder should work normally without hesitation or unusual sounds.
Proper reassembly prevents frustration and keeps your pet’s feeding schedule on track. Take your time with each step, and you’ll avoid repeat jams.
Choosing Kibble That Prevents Future Jams
Kibble shape and size matter far more than most pet owners realize. When you choose the right kibble, you prevent most auger jams before they start.
Uniform kibble shapes work best with automated feeders. Look for kibble that is roughly the same size throughout the bag. Irregular or mixed sizes create air pockets inside the tank. These pockets let kibble settle unevenly and cause bridging, where pieces lock together above the auger opening.
Moisture content is critical too. Kibble that absorbs humidity becomes sticky and clumps inside the tank. This “humidity glue” effect stops the auger dead. Store your kibble in airtight containers in a cool, dry place. Never leave bags open or store them in damp areas like basements or garages.
Avoid mixing freeze-dried toppers with regular kibble in the same tank. This is the number one cause of recurring jams. Freeze-dried pieces are brittle and fragment easily. These fragments wedge between the auger blades and jam the mechanism. Keep toppers separate and add them to the bowl by hand if your feeder allows it.
Check your feeder’s manual for recommended kibble sizes. Some feeders work best with small kibble, while others handle medium or large pieces. Using kibble that matches your feeder’s design prevents mechanical stress on the auger.
When you switch to a new kibble brand, watch your feeder closely for the first week. If jams return quickly, that kibble type may not be compatible with your specific machine. Return to your previous brand or try a different one.
These simple choices keep your feeder running smoothly and your pet fed on schedule.
Preventing Humidity and Bridging Issues
Humidity and bridging are two separate problems that often work together to jam your feeder. Understanding each one helps you stop jams before they start.
Humidity creates a “glue” effect on kibble. When moisture in the air touches dry food, the outer layer becomes sticky. This sticky coating makes pieces clump together inside your tank. The kibble then forms a solid mass instead of flowing freely down to the auger.
Bridging happens when irregular kibble shapes create air pockets. Picture an arch forming inside your tank. The food pieces lean against each other and stop moving downward. This leaves empty space below the arch, so the auger spins without pushing any kibble into the bowl.
To prevent humidity issues, store your kibble in airtight containers away from bathrooms and kitchens. These areas have high moisture levels. Keep containers in cool, dry spaces. If you live in a humid climate, consider using food grade desiccant packets inside storage containers. Check kibble regularly for clumping before it reaches your feeder.
For bridging prevention, choose kibble with uniform, round shapes. Irregular or flat pieces jam more easily. Avoid mixing freeze-dried toppers with regular kibble in your feeder tank. Toppers have different moisture levels and shapes, which causes bridging quickly.
Test new kibble brands carefully during the first week. Watch your feeder for unusual sounds or slow dispensing. These signs show bridging is starting.
You should also check your feeder’s manual for recommended kibble sizes. Using the wrong size makes both humidity and bridging worse. Small adjustments to storage and kibble choice prevent most jams from ever happening.
Common Mistakes That Cause Repeat Jamming
Many pet owners repeat the same mistakes that cause their feeders to jam over and over. Understanding these errors helps you break the cycle.
Mixing incompatible foods in one tank is the biggest culprit. Freeze-dried toppers, treats, and regular kibble have different shapes and moisture levels. When you combine them, the auger struggles to push material consistently. This creates pressure points where jamming happens repeatedly. Use separate tanks or dispense toppers by hand instead.
Ignoring humidity exposure causes serious problems. Kibble absorbs moisture from the air, especially in bathrooms and kitchens. This moisture creates a sticky coating on each piece. The auger then has to push heavier, clumpy material. Jams return within days because the root cause remains unaddressed. Store kibble in airtight containers in dry locations away from steam and moisture.
Improper reassembly after cleaning leads to recurring jams. Many owners don’t reinsert the counter pin correctly or leave the auger slightly misaligned. This creates friction that catches kibble immediately. Always verify the auger sits straight in its housing before securing the bottom cover.
Choosing the wrong kibble size for your specific feeder model causes consistent problems. Some feeders work best with small, round kibble. Others handle larger pieces better. If you keep experiencing jams with the same brand, the kibble shape may not match your feeder’s design.
Not testing your feeder before adding kibble after repairs is another common mistake. Jams often leave small debris inside the mechanism. Running an empty test cycle clears this debris and reveals if the jam truly resolved. Skip this step and you’ll likely jam again within hours.
Troubleshooting Error Messages and Persistent Jams
When your feeder displays error messages like “foreign object stuck” or “rotor stuck,” the auger is likely jammed. These messages tell you exactly where the problem lives. Your feeder’s sensors detected resistance in the mechanical system.
Start by powering off your feeder completely. This protects both you and the device. Remove the bottom cover by unscrewing the bolts or clips that hold it in place. Look for a counter pin or release mechanism that holds the auger shaft. Push or pull this pin according to your manual’s instructions.
Once you access the auger, you’ll see the jammed material. Use your fingers or a small tool to gently remove kibble, moisture buildup, or debris. Don’t force anything. Gentle removal prevents damage to the spiral mechanism inside.
Check if the auger rotates freely by hand after clearing the jam. It should spin smoothly without grinding sounds. If it still feels stuck, debris remains inside the tube.
Persistent jams mean your current kibble isn’t compatible with your feeder. The problem isn’t mechanical failure. Your feeder is rejecting food that doesn’t work with its design. Irregular kibble shapes or moisture content cause recurring jams even after cleaning.
After clearing the jam, reassemble everything carefully. Align the counter pin correctly. Tighten all bolts securely. Run a test cycle without food before refilling.
If error messages return within days, switch to different kibble. Round, uniform kibble prevents future jams. Your feeder works best with specific food types, and finding the right match solves most persistent problems.
Final Thoughts
Auger jams feel frustrating, but most fixes are simple. You now know the main causes behind this problem.
Humidity, bridging, and mismatched kibble create most jams. Foreign objects and poor reassembly cause the rest.
Fixing a jam takes just minutes. Power off your feeder first. Remove the bottom cover, clear the blockage, and check the auger’s movement.
Prevention matters more than repeated fixes. Store kibble properly and avoid mixing food types in one tank.
Choose kibble shapes that match your feeder’s design. Round, uniform pieces move through augers much easier than irregular shapes.
Watch your feeder after any change. New kibble brands need a testing period before you trust them fully.
Small adjustments prevent big headaches. Dry storage conditions stop the humidity glue effect before it starts.
Correct assembly after cleaning also matters. Loose parts or misaligned pieces cause jams even with perfect kibble.
If jams keep happening, don’t just keep clearing them. Switch kibble types instead of repeating the same cycle.
Your feeder’s manual holds useful clues too. It often lists compatible kibble sizes for your specific model.
Persistent problems point to compatibility issues, not mechanical failure. This distinction saves you time and frustration.
Regular maintenance keeps everything running well. Check your feeder monthly, even without visible problems.
Simple habits prevent most jamming issues. Dry storage, compatible kibble, and careful reassembly work together.
Your pet depends on this device for regular meals. A well maintained feeder means consistent feeding, no missed schedules, and less stress for you.
Take these steps seriously, and your automated feeder will serve you reliably for years. Small efforts now prevent bigger problems later.
Frequently Asked Questions
Why does my feeder jam even after I clean it?
Your feeder likely jams again because you’re using incompatible kibble. Cleaning removes the immediate blockage, but if the kibble shape doesn’t fit your feeder’s auger design, jamming will return. The mechanical parts work fine, but the food itself causes the problem.
Check your feeder’s manual for recommended kibble sizes and shapes. Different feeders work best with different kibble types. Switching to a compatible brand often solves recurring jams permanently.
Can freeze-dried toppers cause jamming?
Yes. Freeze-dried toppers are the leading cause of auger jams when mixed with kibble in a single tank. These toppers are rigid and brittle. They don’t flow like regular kibble, so they wedge into the auger mechanism.
Store toppers separately and add them after the feeder dispenses regular kibble. This simple step prevents most jams from starting.
What should I do if my feeder shows a “rotor stuck” error?
Power off your feeder immediately. This protects both you and the device. Remove the bottom cover by locating and removing the counter pin. You’ll then access the auger directly.
Clear any jammed material by hand. Rotate the auger gently to confirm it moves freely. Reassemble everything carefully and test the feeder before adding kibble back in.
How does humidity cause jamming?
Kibble absorbs moisture from humid air, creating a “humidity glue” effect. Damp kibble sticks together and forms bridges inside the tank. These bridges block the auger from rotating.
Store kibble in dry containers with sealed lids. Keep your feeder in a cool, dry location away from steam and moisture sources.

Hi, I’m Pearl Standen, the voice behind The Web Utility. I’m a passionate tech enthusiast who loves exploring the latest gadgets, smart devices, and electronics that make everyday life easier. Through my website, I share honest, well-researched reviews of trending Amazon products to help you make smarter buying decisions.