How To Fix Bluetooth Speaker Carabiner Loop Snapping?
Your Bluetooth speaker hangs from your backpack. You take one step, and snap. The little carabiner loop breaks off, and your speaker almost hits the ground.
This is one of the most common problems with portable speakers. The loop feels sturdy at first. But after months of clipping and unclipping, it wears down and gives up.
The good news? You don’t need a new speaker. This tiny fix does not mean the end of your favorite device.
In a Nutshell
- The fix is simple. Use a strong adhesive like JB Weld or superglue to attach a new loop to your speaker.
- Find a replacement loop. A keyring or a sturdy metal ring works well as a new attachment point.
- Prep the surface first. Clean the spot where the old loop broke off before you apply any glue.
- Apply enough adhesive. Do not be shy with it. A thin layer will not hold under weight or movement.
- Let it cure fully. Give the glue time to set before you clip anything to it. Rushing this step causes most repair failures.
- Handle the carabiner gently. Avoid yanking or jerking it when you clip and unclip your speaker. This simple habit prevents future snaps.
Why Carabiner Loops Snap on Bluetooth Speakers
Carabiner loops snap for several clear reasons. The main culprit is repeated stress and strain. Every time you clip and unclip your speaker, the loop experiences tension. Over months of use, this weakens the plastic or metal attachment point.
Most loops break because of sudden jerking motions. You grab your backpack quickly, and the carabiner yanks hard against the loop. The loop was not designed to handle that kind of force all at once. One hard pull can snap it completely.
Poor manufacturing quality plays a role too. Some speakers use thin plastic loops that cannot support the speaker’s weight for long. These loops fail faster than reinforced ones. The attachment point may also be glued poorly from the factory, making it vulnerable to breaking.
Overloading the carabiner causes problems as well. If you hang multiple items from one loop, the weight adds up quickly. The loop bears more stress than it should. This accelerates wear and tear significantly.
Environmental factors matter here. Heat and cold make plastic brittle. Moisture can weaken adhesive bonds. Sun exposure degrades materials over time. A speaker left in harsh conditions will have a weaker loop.
Incorrect carabiner use damages loops too. Twisting the carabiner while it hangs from the loop creates rotational stress. Slamming the carabiner gate shut roughly can transmit shock to the attachment point. These habits wear down the loop faster.
Finally, age and fatigue take their toll. Plastic becomes tired after thousands of clip cycles. Metal can develop micro cracks you cannot see. Eventually, one normal use causes failure. Understanding these causes helps you prevent future breaks and fix your current problem correctly.
What You’ll Need Before Starting the Repair
Before you start fixing that snapped carabiner loop, gather the right materials. Having everything ready means your repair goes smoothly and holds up over time.
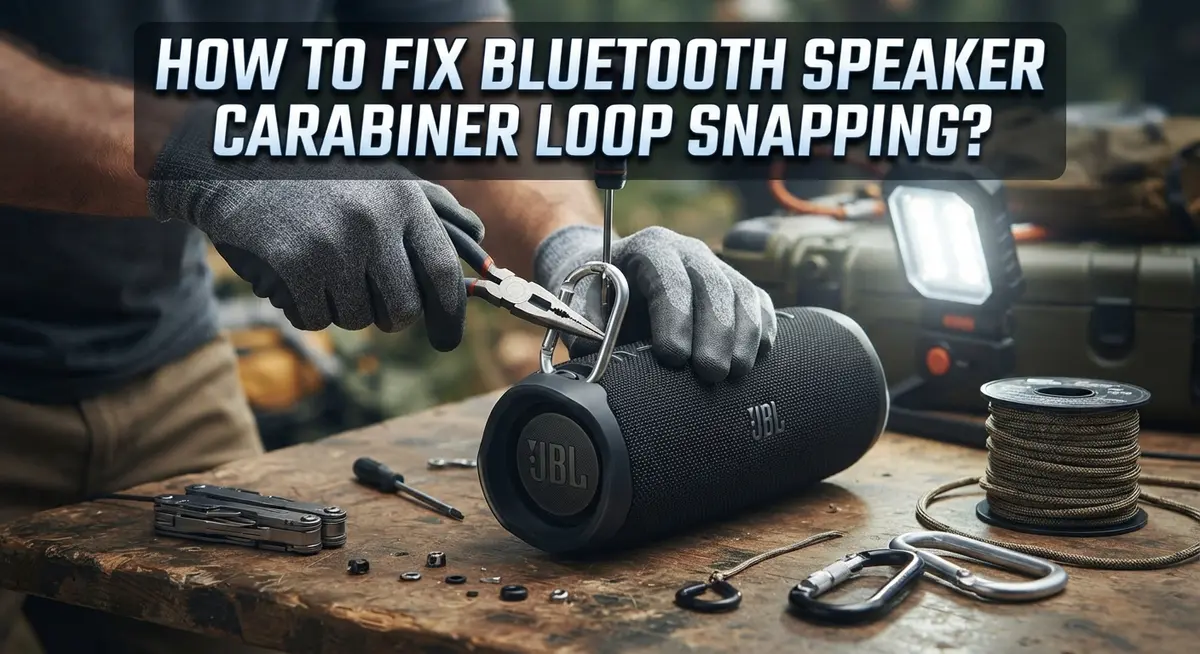
Strong adhesive is your first essential item. Two-part epoxy putty works well for this job. Superglue also bonds replacement loops effectively. Pick whichever you feel comfortable using. Both options create durable connections when applied correctly.
Find a replacement loop next. Old keyrings work great for this purpose. Metal rings from household items serve the same function. You can also use sturdy plastic loops if metal isn’t available. The loop just needs to be strong enough to hold your speaker’s weight without bending.
Cleaning supplies matter more than people think. Grab a soft cloth or paper towel to wipe the attachment point. Rubbing alcohol helps remove dirt and old adhesive residue. A clean surface lets the new glue bond properly. Skip this step and your repair may fail quickly.
Prepare a small workspace. You need a flat, stable surface where your speaker can sit undisturbed. The glue needs time to cure without movement or vibration. A table or workbench works perfectly.
Consider having a clamp or rubber band nearby. These tools hold your replacement loop in place while the adhesive sets. They prevent the loop from shifting as the glue hardens. This step makes a real difference in repair strength.
Finally, gather protective items. Wear gloves to keep adhesive off your hands. Have paper towels ready for cleanup. These simple preparations protect you and your workspace. With these materials assembled, you’re ready to begin the actual repair work.
Step-by-Step: Repairing a Broken Carabiner Loop with JB Weld
JB Weld is a two part epoxy that bonds metal, plastic, and rubber together. It creates a permanent seal when mixed and applied correctly. This adhesive works well for reattaching broken carabiner loops to your speaker.
Start by cleaning the broken attachment point. Use a dry cloth to remove dust, dirt, and old adhesive residue. A clean surface helps the new bond stick properly. Let the area dry completely before moving forward.
Next, prepare your replacement loop. A sturdy keyring or metal ring serves this purpose well. Make sure the loop is strong enough to support your speaker’s weight without bending.
Mix the JB Weld according to package instructions. Combine equal parts of the two components. Stir them together until the color looks uniform and consistent. You should have a putty like texture that’s easy to work with.
Apply the mixed epoxy generously to both the speaker attachment point and the replacement loop. Do not skimp on the adhesive. A thin layer will fail when you clip your carabiner to it. Press the loop firmly onto the speaker and hold it in place.
Use a clamp, rubber band, or your hand to keep pressure on the joint. This prevents the loop from shifting while the epoxy sets. Check your product instructions for exact curing time, which typically ranges from one to twenty four hours.
Avoid using your speaker during the entire curing period. Moving it or stressing the new bond will compromise the repair. Once fully cured, test the connection gently before clipping your carabiner on with full force. Your speaker is now ready for portable use again.
Step-by-Step: Using Superglue for a Quick Fix
Superglue offers a fast bonding solution for your broken carabiner loop. This method works well for speakers with plastic or rubber attachment points. The process is straightforward and requires just a few minutes of your time.
Start by cleaning the broken attachment area on your speaker. Use a dry cloth or paper towel to remove all dust, dirt, and debris. A clean surface helps the adhesive bond much more effectively. Wipe away any old glue or residue from previous repairs.
Next, find a replacement loop. Old keyrings work perfectly for this purpose. Large rings from household items also function well. Make sure your chosen replacement loop is sturdy enough to support your speaker’s weight.
Apply superglue to both surfaces. Put a thin, even coat on the speaker’s attachment point. Then coat the replacement loop in the same way. Press the two pieces together firmly and hold them in place for the time specified on your adhesive bottle. Most superglues set in 30 seconds to 2 minutes.
Use a rubber band or small clamp to maintain steady pressure while the glue dries. This prevents the loop from shifting or falling off. Keep your hands steady and avoid moving the speaker during this time.
Allow the adhesive full curing time before using your speaker. Even though superglue sets quickly, it needs extra hours to reach maximum strength. Wait at least 24 hours before attaching a carabiner or hanging your speaker.
Test the bond gently before regular use. Clip your carabiner slowly and carefully. If the repair holds firm, your speaker is ready for normal operation. Handle the carabiner gently going forward to prevent future snapping.
Repurposing Household Items as a Replacement Loop
Your home contains many items perfect for replacing a broken carabiner loop. Look around your drawers and you’ll find practical solutions that work just as well as factory parts.
Old keyrings are your best option. They already have loops designed to hold weight. A sturdy metal or plastic keyring provides the exact structure your speaker needs. Simply detach it from your keys and prepare it for bonding.
Large metal rings from kitchen drawers work wonderfully too. Check your junk drawer for shower curtain rings, towel rings, or curtain rod rings. These items are thicker and stronger than many commercial loops. They handle carabiner clips without breaking easily.
Paracord or rope offers another creative solution. You can tie a simple loop knot at one end. This creates a soft attachment point that distributes pressure evenly. The flexibility of rope actually reduces stress on the speaker body.
Sturdy fabric loops from old bags or straps make excellent replacements. Cut a piece about two inches long and fold it into a loop shape. Fabric distributes the weight of your carabiner more gently than rigid materials.
Even chain links work in a pinch. A few links connected together create a flexible loop. Thread a carabiner directly through the chain for instant attachment.
Before bonding any household item, make sure it’s clean and dry. Wipe away dust and oils with a cloth. Choose materials that feel sturdy when you bend them. Test the weight capacity by gently pulling on it before you permanently attach it to your speaker. This quick check prevents future disappointment and keeps your speaker safe during use.
Best Practices for Attaching and Using the Carabiner Safely
Attaching your carabiner safely starts with understanding the limits of your speaker’s attachment point. The loop can only handle so much force before it breaks. Treat the connection gently during every clip and unclip motion.
When you attach your carabiner, avoid jerking or yanking motions. Smooth, controlled movements protect the bond between the loop and speaker body. Don’t twist the carabiner while it’s clipped on. Twisting creates stress that weakens even brand new attachment points.
Check your carabiner’s weight capacity before use. A heavy carabiner can damage a small speaker’s loop over time. Match the carabiner size to your speaker size for the best results.
Distribute weight evenly when carrying your speaker. If you’re clipping it to a backpack strap, make sure the strap itself can handle the speaker’s weight. Don’t let the speaker dangle or swing freely. This creates sudden jerking forces that snap the loop.
Allow any adhesive to cure completely before attaching your carabiner. This is critical. Using your speaker too soon causes the new bond to fail immediately. Follow the adhesive’s curing time exactly as instructed.
When carrying your speaker outdoors, avoid rough handling. Don’t drop it or bang it against hard surfaces. The impact can crack the newly repaired attachment point from the inside out.
Store your speaker in a safe place when not in use. Don’t leave it clipped to bags or straps for extended periods. This constant tension weakens the repair over time.
Inspect your attachment point regularly. Look for cracks, bending, or signs of stress before problems occur. Catching issues early prevents complete failure during use.
Common Mistakes That Cause Repairs to Fail
Many people rush through carabiner loop repairs and end up with the same problem again. Understanding what goes wrong helps you succeed the first time.
Insufficient adhesive application is the biggest mistake. People use just a tiny dab of glue, thinking “less is more.” This doesn’t work. You need a generous amount covering both surfaces completely. The adhesive must fill any gaps between the loop and speaker attachment point. Skimping on glue means the bond fails under normal use.
Using your speaker too soon causes most repair failures. Adhesives need full curing time to reach maximum strength. Impatience leads people to attach their carabiner or use the speaker before the glue sets. This stress breaks the fresh bond immediately. Read the curing instructions carefully and wait the full recommended time, even if it seems like forever.
Over tightening the carabiner connection puts excessive strain on your new loop. People clip the carabiner too forcefully or yank it during attachment and removal. This aggressive handling stresses the repair before it’s even tested properly. Gentle, smooth motions protect your newly bonded loop.
Failing to prepare surfaces properly also causes problems. Dirt, dust, or moisture on the attachment point prevents good adhesive contact. Always clean both the speaker’s attachment area and your replacement loop thoroughly before gluing. Let everything dry completely.
Choosing weak replacement materials sets you up for failure too. Not all household items can handle regular carabiner use. Your replacement loop must be sturdy and durable. Test the strength of any item before bonding it to your speaker.
Preventing Future Loop Damage
Your speaker’s carabiner loop can last much longer with smart prevention habits. The key is treating your attachment point gently every single day.
Handle your carabiner with care when clipping and unclipping it from your speaker. Quick jerking motions create stress that weakens even strong loops over time. Instead, use slow, controlled movements when attaching or removing your carabiner.
Check your carabiner’s weight limit before you use it. Most speakers are lightweight, but adding extra gear to your carabiner increases strain. Distribute weight evenly if you’re carrying multiple items on the same loop.
Store your speaker properly when you’re not using it. Avoid tossing it into bags where the carabiner gets bent or twisted. Keep it in a padded case or soft pouch instead.
Inspect your attachment point regularly for early signs of wear. Look for small cracks, loose edges, or material separation around the loop. Catching problems early prevents complete failure.
Avoid extreme temperature changes. Heat and cold can weaken adhesive bonds and make plastic or rubber loops brittle. Store your speaker in a climate controlled environment when possible.
Reduce the load on your carabiner loop. If you attach heavy items, consider using a separate carrying strap instead. This keeps all the stress off your speaker’s attachment point.
Clean the area around your loop monthly. Dirt and debris can trap moisture that damages adhesive bonds. Use a dry cloth to wipe away dust and grime.
Rotate your carabiner position occasionally. Clipping it to the same spot repeatedly creates wear patterns. Changing where you attach it distributes stress more evenly across the loop material.
Final Thoughts
A snapped carabiner loop doesn’t mean your speaker is done for. With the right glue and a bit of patience, you can fix it yourself.
JB Weld and superglue both work well for this repair. They create a bond strong enough to hold your carabiner securely.
The key to success lies in preparation. Clean the attachment area first. Let the adhesive cure fully before you test it.
Rushing the process leads to failure. Give your repair time to set properly, even if it takes a full day.
Once your loop is fixed, treat it with care. Avoid yanking or jerking your speaker when you clip and unclip the carabiner.
Check the weight limit of your carabiner regularly. This simple habit prevents future breaks.
If your loop snaps again, don’t get discouraged. Sometimes it takes a second attempt to get the bond right.
Consider trying a different repair material if your first fix doesn’t hold. Sturdy household items often work as well as store bought parts.
Remember that prevention matters just as much as repair. Handle your speaker gently and store it properly when not in use.
Your Bluetooth speaker can serve you well for years with proper care. A broken carabiner loop is just a small setback, not the end of the road.
With these repair techniques, you can keep enjoying your music on the go. Don’t let a snapped loop stop your outdoor adventures.
Take your time with each repair step. Your patience will pay off with a lasting fix that holds strong through daily use.
Frequently Asked Questions
Why does my carabiner loop snap off in the first place?
Carabiner loops snap due to repeated stress and strain. Each time you clip and unclip your carabiner, the attachment point weakens slightly. Over time, the material fatigues and breaks. Excessive force during clipping accelerates this damage. Material quality also plays a role. Cheaper speakers often use weaker plastic or rubber for their loops.
Can I replace a broken carabiner loop myself?
Yes, you can absolutely replace it yourself. The process is straightforward and requires basic materials you likely have at home. You’ll need a replacement loop (like a keyring or large ring) and an adhesive. Apply the adhesive generously to bond your new loop to the speaker’s attachment point. Let it cure fully before using your speaker again.
What’s the best adhesive for this repair?
Two adhesives work exceptionally well for this job. JB Weld creates a strong, durable bond that handles outdoor use. Superglue also works well for quick repairs. Both require proper surface preparation. Clean the attachment area thoroughly before applying adhesive. Remove any debris or old glue residue. The cleaner the surface, the stronger your bond will be.
How long should I wait before using my speaker after repair?
Patience is critical here. Most adhesives need 24 hours to cure completely. Some products cure faster, but don’t rush this step. Using your speaker too soon causes repairs to fail. Check your adhesive’s instructions for exact cure times. Mark your calendar so you remember when it’s safe to use again.
What replacement loops work best?
Household items with loops work great as replacements. Keyrings, large metal rings, and sturdy fabric loops all function well. Choose materials that match your speaker’s weight. Heavier speakers need stronger replacement loops. Test the loop’s durability before permanently attaching it to your speaker.

Hi, I’m Pearl Standen, the voice behind The Web Utility. I’m a passionate tech enthusiast who loves exploring the latest gadgets, smart devices, and electronics that make everyday life easier. Through my website, I share honest, well-researched reviews of trending Amazon products to help you make smarter buying decisions.