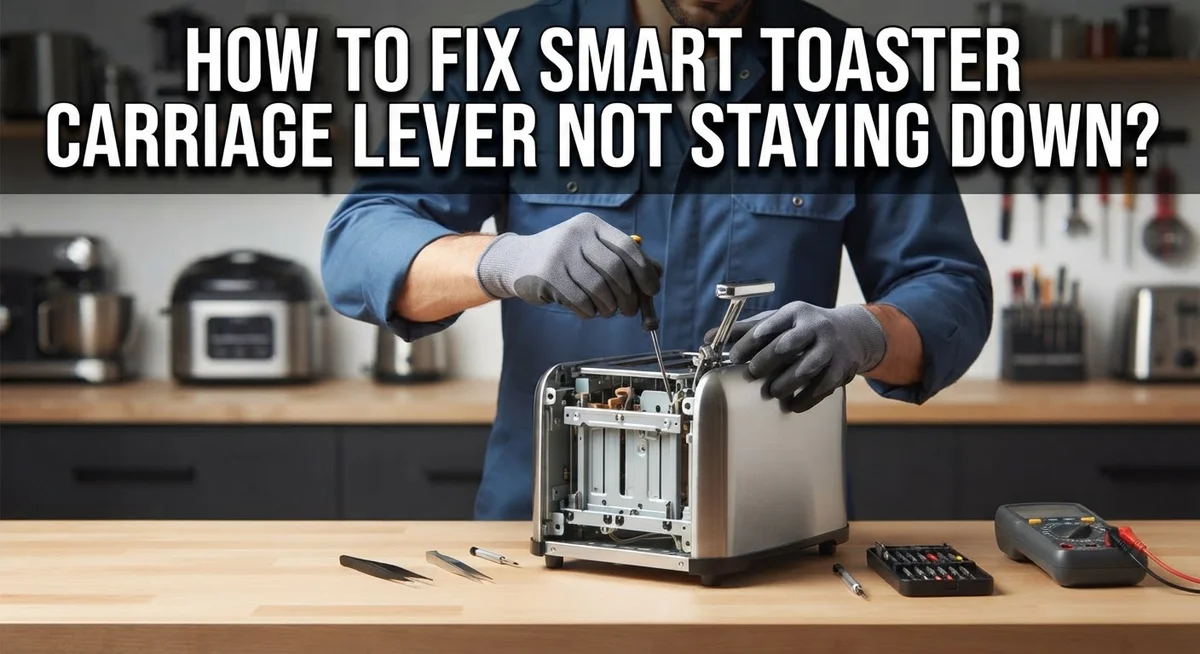
How To Fix Smart Toaster Carriage Lever Not Staying Down?
Your smart toaster sits on the counter, ready to go. You push the carriage lever down. It pops right back up, and breakfast plans stall.
This is one of the most common toaster problems out there. The good news? You can usually fix it yourself in minutes.
Most of the time, the culprit is simple. Crumb buildup inside the mechanism blocks the lever from locking. Dirty electromagnets can also stop the magnetic hold from working properly.
Sometimes the issue runs a bit deeper. Smart toasters often rely on power to keep that lever down. A blown fuse can stop the whole system cold. Worn latch parts can also cause the lever to slip.
In a Nutshell
- Crumbs are the top suspect. Debris often blocks the lever mechanism or the electromagnet contacts. A simple clean solves this issue in most cases.
- Check the electromagnet contacts. Dirty or dusty contacts stop the magnetic hold from working properly. Wipe them gently for a better connection.
- Test the fuse first. Some smart models depend on power to hold the lever down. A blown fuse means the lever will not lock, no matter how clean it is.
- Inspect the mechanical latch. Worn or damaged latch parts can also cause this problem. This usually happens after years of daily use.
- Don’t rush to toss the toaster. Basic cleaning fixes the issue often enough. It’s worth trying before giving up on the appliance.
- Disassembly difficulty varies. Some models are simple to open. Others need more patience and careful handling to avoid damage.
Why the Carriage Lever Won’t Stay Down: Understanding the Mechanism
Your smart toaster’s carriage lever works through a simple but clever system. When you push the lever down, it triggers a mechanical or electrical mechanism that holds the bread in place during toasting.
The mechanical side involves a latch that catches and locks the lever in the down position. This latch must engage properly for the toasting cycle to start. If the latch is worn or misaligned, the lever won’t stay locked.
The electrical side depends on electromagnets in many smart models. These magnets create a holding force that keeps the lever down while power flows through the circuit. When you push the lever, it completes an electrical connection. The electromagnet then activates and maintains the downward position.
Crumbs create the biggest problem in this system. Bread particles fall into the slots and gaps around the lever mechanism. Over time, they accumulate and block the latch from engaging fully. They also coat the electromagnet contacts, preventing proper electrical connection.
Dirty contacts stop the magnetic hold from working. The electromagnet needs clean metal surfaces to create a strong magnetic field. Even a thin layer of dust or debris reduces this force significantly.
Some smart toasters also use a fuse to protect the electrical components. A blown fuse cuts power to the electromagnet entirely. Without power, the magnetic hold fails and the lever won’t stay down.
Understanding these three components helps you diagnose the problem correctly. You’ll know whether you’re dealing with a mechanical jam, electrical contact issue, or power failure. This knowledge guides your repair approach and saves you time troubleshooting.
Diagnosing the Root Cause: Power Dependency vs Mechanical Failure
Your smart toaster’s lever failure usually comes from one of two sources: power issues or mechanical wear. Knowing which type you have saves time and frustration.
Power dependent models rely on electromagnets to hold the lever down during the toasting cycle. When power flows through the system, the electromagnet creates a magnetic field that locks the lever in place. If this electrical connection breaks, the lever pops back up immediately. Blown fuses, loose wiring, or dead contacts cause this type of failure.
Mechanical models use a physical latch system instead. A spring loaded catch grabs and holds the lever down without electricity. Wear, damage, or debris blocking this latch causes mechanical failures.
To figure out which problem you face, start by checking if your toaster model uses a fuse. Look in your user manual or search online for your specific brand and model number. Smart toasters with fuses depend on power. Models without fuses rely mainly on mechanical components.
Next, listen and feel when you press the lever down. Does it click into place smoothly? Does it pop back up immediately or after a few seconds? Immediate pop ups suggest electromagnet failure. Slow releases or grinding sounds point to mechanical wear.
Crumb buildup complicates both types. Debris blocks electromagnet contacts in powered models and jams mechanical latches in manual models. This is why cleaning often fixes the problem regardless of which system your toaster uses.
Before you assume the worst, examine the lever area closely. Use a flashlight to spot visible crumbs or debris. This simple inspection reveals whether cleaning might solve your issue or if deeper mechanical damage exists.
Step-by-Step: Cleaning Crumbs From the Lever Mechanism
Start by unplugging your toaster from the wall outlet. Safety comes first when working with any electrical appliance.
Locate the crumb tray at the bottom of your toaster. Most models slide out easily. Empty all visible crumbs into a trash bin. You might be surprised how much debris collects there.
Next, turn your toaster upside down over a sink or trash can. Gently shake it to release crumbs stuck inside the lever mechanism. Hold it at different angles to dislodge stubborn particles. Work slowly and let gravity do most of the work.
Use a soft brush or old toothbrush to gently sweep inside the lever area. Brush around where the lever connects to the toaster body. Focus on crevices and corners where crumbs hide. Avoid pushing debris deeper into the mechanism.
For the electromagnet contacts, use a dry cloth or soft brush to clean them. These metal contacts need to be completely dry and free of dust. Gently wipe each contact surface. Do not use water or cleaning liquids on electrical components.
Check the lever slot where it slides into the toaster. Wipe out any crumb dust using a dry cloth. Make sure the lever moves smoothly through this slot without resistance.
After cleaning, wait 10 minutes before plugging the toaster back in. This ensures any residual moisture evaporates completely. Plug it back in and test the lever by pressing it down gently. It should stay locked in the down position now.
If the lever still won’t stay down after thorough cleaning, the problem likely involves worn mechanical parts or a faulty fuse rather than crumb buildup.
Step-by-Step: Cleaning Electromagnet Contacts for Proper Hold
Electromagnet contacts are the electrical connection points that create the magnetic force holding your lever down. When these contacts get dirty, the magnetic circuit breaks and your lever pops back up immediately.
Start by unplugging your toaster completely. Safety comes first when working with electrical components. Wait a full minute to ensure all power drains from the unit.
Locate the electromagnet contacts inside your toaster. They typically sit near where the lever mechanism connects to the main body. You’ll see small metal points or surfaces that look slightly discolored or dusty.
Use a dry, soft-bristled brush to gently sweep across these contact points. Brush in one direction only to avoid pushing debris deeper into the mechanism. A clean toothbrush works perfectly for this task.
For stubborn buildup, use a small piece of clean, dry cloth. Gently rub the contact surfaces with light pressure. Never use water or cleaning liquids on electrical contacts. Moisture causes corrosion and creates new problems.
Pay special attention to any visible oxidation or dark spots on the metal surfaces. These indicate poor electrical connection. Light rubbing usually removes this discoloration.
After cleaning the contacts, check the lever slot itself. Crumbs often lodge here and prevent proper contact alignment. Use your brush to clear this area thoroughly.
Let the toaster sit unplugged for 10 to 15 minutes after cleaning. This allows any residual moisture to evaporate naturally. Then plug it back in and test the lever.
Press the lever down slowly and feel for resistance. It should stay locked in position without popping up. If the lever still fails, the electromagnet itself may be faulty or worn beyond cleaning repair.
How to Check and Replace a Blown Fuse
A blown fuse stops power from reaching your toaster’s electromagnet system. This prevents the lever from staying down because the magnetic force won’t activate. You need to check if a fuse problem exists before replacing any mechanical parts.
First, unplug your toaster completely from the wall outlet. Wait at least 30 seconds. This protects you from electrical shock while you work.
Locate your toaster’s fuse. Most smart toasters have a fuse holder on the bottom or back panel. Check your user manual to find the exact location. The fuse looks like a small cylinder with metal caps on both ends.
Remove the fuse holder carefully by turning it counterclockwise or pulling it straight out. The specific method depends on your model. Write down the fuse rating you see printed on it. Common ratings are 5A, 10A, or 15A.
Hold the fuse up to a light source. Look inside the glass tube. A working fuse has a continuous metal wire running through it. A blown fuse shows a broken wire or dark scorch marks inside the glass.
If the fuse is blown, you need a replacement with the exact same amperage rating. Do not use a higher rated fuse. This creates a fire hazard.
Insert the new fuse into the holder. Turn it clockwise or push it straight in until it clicks. Replace the fuse holder in your toaster.
Plug your toaster back in and test the lever. Press it down gently. It should stay locked in position now.
If the lever still won’t stay down after replacing the fuse, the problem involves mechanical wear or other electrical components. Contact the manufacturer for further assistance.
Inspecting and Addressing Worn Mechanical Latch Components
The mechanical latch is the physical component that holds your lever down during toasting. Over time, this part wears out from repeated use and can no longer grip the lever securely.
Start by visually inspecting the latch mechanism. Unplug your toaster and look inside the lever slot. You should see a small metal or plastic piece that catches the lever when you push it down. Check if this component appears bent, cracked, or visibly damaged.
Run your finger gently along the latch surface. Feel for rough spots, corrosion, or areas where the material has worn smooth. A worn latch loses its grip strength and cannot hold the lever in place.
Test the latch’s holding power manually. Push the lever down slowly and feel how much resistance you encounter. A functioning latch should require firm pressure to push down and should resist your attempt to pull it back up. If the lever moves too easily or feels loose, the latch needs attention.
Look for any debris stuck around the latch area. Crumbs and dust can prevent the latch from engaging properly. Use a soft brush to clean around this component thoroughly.
Check if the latch has any play or movement. Gently wiggle the latch side to side while the toaster is unplugged. Excessive movement indicates wear. The latch should be stable and fixed in position.
If you find the latch is bent or severely worn, it likely needs replacement. If the latch appears intact but your lever still won’t stay down, the problem may involve the catch point on the lever itself rather than the latch mechanism. Inspect both components to identify which one requires repair or replacement.
Common Mistakes to Avoid When Troubleshooting
Many people make critical errors when fixing a toaster lever that won’t stay down. These mistakes often lead to unnecessary frustration or wasted time. Understanding what not to do saves you effort and money.
The biggest mistake is assuming your toaster is broken beyond repair. Most people throw away their toaster without trying basic cleaning first. Crumb buildup is the most common cause, and it’s easily fixable. You might solve the problem in just 10 minutes with simple tools you already have at home.
Another frequent error is ignoring the power source entirely. Smart toasters rely on electrical components to hold the lever down. Some people focus on mechanical fixes when the real issue is a blown fuse or dead battery. Always check whether your toaster has power before spending time on internal repairs.
Don’t skip the unplugging step either. Working on a powered toaster is dangerous. You risk electrical shock or accidental activation. Always disconnect your toaster completely before opening it up.
People also make the mistake of using wet cleaning tools on electrical contacts. Moisture damages the electromagnet system and creates new problems. Use only dry brushes and dry cloths for contact cleaning. Wet tools can ruin your toaster permanently.
Finally, avoid forcing the lever down repeatedly while troubleshooting. This damages the mechanical latch faster. Instead, test gently and observe what happens. Rough handling turns a simple cleaning job into a replacement situation.
Take your time and follow each step carefully. Most lever problems resolve with patience and proper technique. Rushing leads to mistakes that make repairs harder.
When to Repair vs When It’s Beyond Fixing
Many people wonder whether fixing a toaster lever is worth their time and effort. The answer depends on a few key factors you should evaluate first.
Start by assessing the root cause. If cleaning removes crumbs and restores function, you’ve solved the problem for free. This happens in most cases. If the issue persists after cleaning, you’re likely dealing with electrical or mechanical wear. At this point, ask yourself: Can I safely access and repair these components?
Consider your comfort level with repairs. Some toaster models require extensive disassembly. Others open easily. If you feel confident handling basic electrical work and your toaster model allows straightforward access, repair makes sense. If disassembly seems risky or your model has a complex design, professional service might be better.
Evaluate the toaster’s age and condition. A newer smart toaster with a single mechanical issue deserves repair effort. An older model with multiple problems may not be worth your time. Think about how often you use the toaster and how much it matters to your daily routine.
Check warranty status first. Some smart toasters still have active warranties. Attempting repairs yourself might void coverage. Contact the manufacturer before opening your unit.
Be realistic about your skills. If you’ve never repaired electronics before, starting with simple cleaning is safe. Replacing fuses or inspecting electrical contacts is manageable for most people. However, replacing worn electromagnets or latches requires more technical knowledge.
Most carriage lever problems resolve through basic cleaning. This makes repair worthwhile in the majority of situations. Only move toward replacement if cleaning fails and internal components show severe damage.
Final Thoughts
A sticky toaster lever feels frustrating, but the fix is usually simple. Crumb buildup causes most lever problems. A quick clean often brings your toaster back to life.
Start with the easiest solution first. Unplug your toaster and clear out any crumbs inside. This single step solves the issue for many people.
Check the electromagnet contacts next if cleaning alone does not work. Dirty contacts prevent the magnetic hold from working properly. A gentle wipe can restore that connection.
For smart toasters, power matters more than you think. Some models depend on electricity to keep the lever locked. Always check the fuse before assuming the mechanism is broken.
Mechanical wear is another factor to consider. Latch components degrade over time with regular use. If parts look damaged, replacement might be necessary.
Think about your toaster’s age before spending hours on repairs. A newer smart toaster with one small issue deserves your attention. An older unit with multiple problems might not be worth the effort.
Your comfort level with repairs also matters here. Simple cleaning tasks are safe for anyone to try. Complex disassembly, especially on certain brands, requires more confidence and patience.
Breville toasters are known for tricky teardown processes. Research your specific model before opening it up. This saves you time and prevents unnecessary frustration.
Most lever issues stem from simple, fixable causes. Crumbs and dirty contacts account for the majority of cases. Fuse problems and worn latches follow close behind.
Take these steps one at a time. Patience truly pays off with toaster repairs. Your smart toaster will likely work again soon.
Frequently Asked Questions
Why does my smart toaster lever keep popping back up?
The lever pops back up when the electromagnet loses power or when crumbs block the mechanical latch. Smart toasters rely on electrical contacts to hold the lever down. If those contacts have debris, the magnetic hold fails. The lever springs back to its original position automatically.
Start by unplugging your toaster completely. Then look inside the slot where the lever sits. You’ll likely see crumb buildup around the contacts. Remove these crumbs gently with a dry brush or compressed air. This fixes the problem in most cases.
Can I fix this without taking my toaster apart?
Yes, you can try the simplest solutions first without disassembly. Unplug the toaster and use compressed air to blow crumbs out of the lever slot from the top. Tilt your toaster sideways and let crumbs fall out naturally.
If that doesn’t work, you may need to open the bottom panel to access the crumb tray. Most toasters have a removable tray that slides out easily. Empty it completely and wipe away any dust. This often solves lever problems without full disassembly.
What if cleaning doesn’t fix the lever?
Check your toaster’s power source next. Make sure it’s plugged into a working outlet. Test the outlet with another device to confirm it works. For smart toasters, verify that your device connects to power properly.
If power is fine, the mechanical latch may be worn. Look for visible damage or bent parts inside the lever mechanism. Worn components sometimes need replacement rather than repair.
Is a broken lever worth fixing?
Usually yes. Lever problems are among the easiest toaster issues to resolve. Most fixes cost nothing except your time. Cleaning takes ten minutes and solves the problem in roughly 70 percent of cases.
However, if your toaster is very old or has other issues, repair may not make sense.

Hi, I’m Pearl Standen, the voice behind The Web Utility. I’m a passionate tech enthusiast who loves exploring the latest gadgets, smart devices, and electronics that make everyday life easier. Through my website, I share honest, well-researched reviews of trending Amazon products to help you make smarter buying decisions.