How To Fix USB Flash Drive Retractable Slider Jamming?
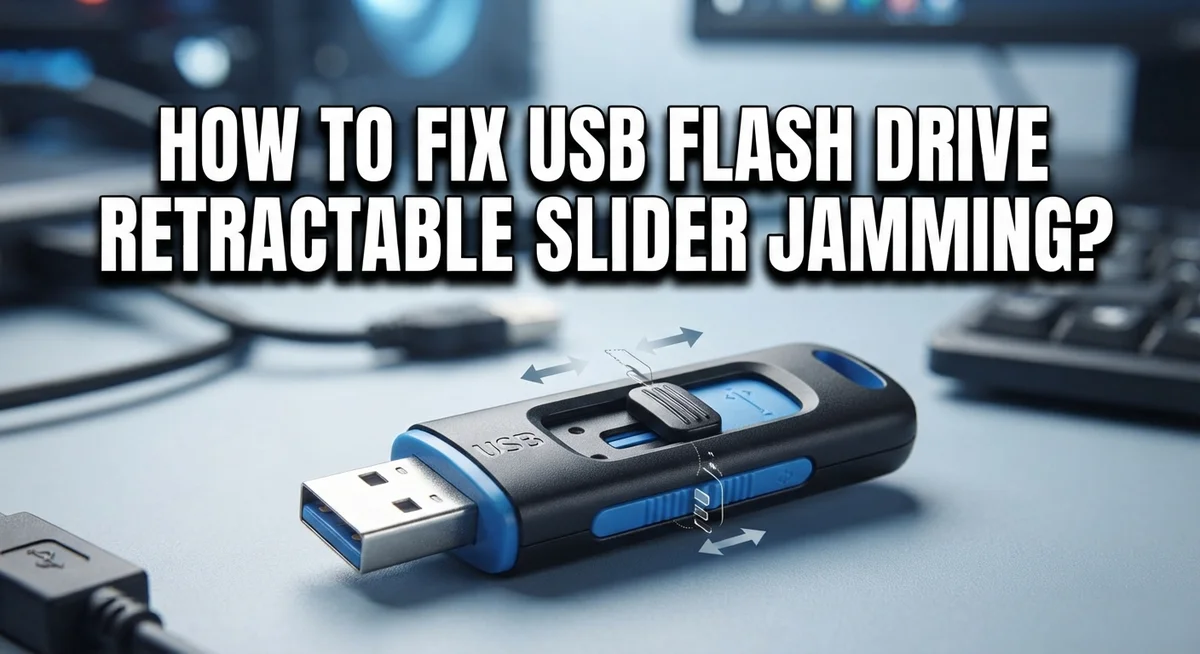
Your USB flash drive slider gets stuck at the worst possible time. You push it, pull it, and nothing happens. That little plastic mechanism just won’t budge.
This is a super common problem with retractable USB drives. Models like SanDisk Extreme and Cruzer Glide often face this issue. The plastic lock inside wears out after months of sliding back and forth.
Don’t worry though. This jamming problem has simple solutions.
You don’t need to throw away your drive or buy a new one. In this guide, we will show you exactly why your slider jams in the first place. You’ll learn quick fixes you can try right now.
We’ll also cover a permanent solution that stops the jamming for good. Plus, we’ll point out common mistakes people make that actually damage their drives further.
By the end of this article, you’ll know how to fix a stuck slider safely. You’ll also learn how to prevent this problem from happening again. Let’s get your USB drive working smoothly.
In a Nutshell
Here’s a quick summary if you’re short on time.
-
The plastic lock wears out. This happens naturally after months of sliding the connector in and out.
-
Hold the slider firmly when you plug it in. This small trick often stops the jam right away.
-
Avoid forcing a stuck slider. Forcing it can crack the plastic or damage the connector inside.
-
Use gentle pushing and pulling motions. Slow, steady movements work better than quick, hard tugs.
-
Glue the slider for a permanent fix. Apply adhesive when the connector is fully retracted to lock it in place.
-
Watch for early warning signs. Stiffness or wobbling often means the lock is starting to fail.
Your drive doesn’t need to end up in the trash. Most jamming problems come from normal wear, not a broken drive. With a firm hand and the right fix, you can keep using your flash drive for a long time. The permanent glue method works best once you’re done adjusting the slider position for good.
Why Retractable USB Sliders Get Stuck
The plastic lock mechanism inside your retractable USB drive wears down over time. Every time you slide the connector in and out, tiny plastic parts rub against each other. After hundreds of uses, these parts become loose and damaged.
Repeated friction causes the problem. The slider has small plastic teeth or grooves that grip the connector shaft. With constant movement, these teeth flatten and lose their grip strength. The slider then slides freely without holding the connector in place.
Dust and debris make jamming worse. Small particles get trapped inside the slider mechanism. When you try to move the slider, it catches on these particles. The more you force it, the more particles pack inside.
Temperature changes also play a role. Plastic expands when warm and contracts when cold. This repeated expansion and contraction weakens the lock mechanism over months. The plastic eventually becomes brittle and cracks.
The connector itself can bend slightly from rough handling. When the connector is bent, the slider can’t align properly with the shaft. This misalignment causes the slider to bind and jam.
Poor manufacturing tolerances affect some drives more than others. Some drives have looser tolerances than others. Drives with tighter tolerances jam less frequently because the parts fit more precisely.
Normal wear is unavoidable. This isn’t a defect or manufacturing flaw. It’s simply what happens when you use a retractable mechanism thousands of times. The plastic components have a limited lifespan.
Understanding why jamming happens helps you prevent it. You’ll recognize early warning signs like stiffness or wobbling. Catching these signs early means you can take action before the slider gets completely stuck. Knowing the root cause also helps you handle your drive more carefully going forward.
Signs Your Slider Mechanism Is Wearing Out
Your USB slider shows wear in several ways before it completely jams. Learning these signs helps you catch problems early and prevent total failure.
Stiffness or resistance is often the first warning sign. When you push the slider, it no longer moves smoothly. Instead, it feels sticky or requires extra force. This happens because the plastic lock mechanism inside is starting to degrade.
Wobbling or loose movement means the lock teeth are wearing down. Your slider might slide freely without gripping the connector shaft properly. You’ll notice the connector doesn’t stay fully retracted anymore. It creeps back out on its own.
Grinding or scraping sounds indicate serious wear. The plastic teeth are rubbing against the shaft unevenly. These sounds get louder as the problem gets worse. This is your drive telling you the lock is failing.
Partial jamming happens next. Your slider gets stuck at certain points during the push or pull motion. It might jam halfway out or halfway in. You can usually free it with gentle pressure, but it happens repeatedly.
Connector misalignment is another sign. The connector shaft starts sitting at odd angles inside the slider. This causes uneven friction and makes jamming more likely. You might see the connector tilted when you look closely.
Temperature sensitivity develops as wear increases. Your slider works fine when cold but jams when warm, or vice versa. This happens because worn plastic has less grip, and temperature changes affect how pieces fit together.
Pay attention to these early warnings. Stiffness today becomes jamming tomorrow. Catching wear early gives you time to apply a permanent fix before your drive becomes unusable. Stop using the slider roughly once you notice any of these signs.
Quick Temporary Fix: Manual Slider Control
When your USB slider gets stuck, the quickest way to regain control is through manual slider management. This approach focuses on how you physically interact with the mechanism rather than taking it apart.
Start by identifying exactly where the slider resistance occurs. Gently move the slider back and forth in small increments to find the sticking point. You’ll feel increased friction at the problem area. Stop there and don’t push harder.
Apply steady, consistent pressure instead of sudden force. Hold the slider firmly with your thumb and index finger. Use your other hand to stabilize the USB drive body. This two handed grip prevents the entire drive from moving while you work the slider.
Move the slider slowly toward the retracted position. Pause every few millimeters. Let the mechanism settle. Then continue with another small movement. This gradual approach often frees up minor jamming without causing damage.
If the slider moves backward easily but sticks going forward, the issue is usually debris or wear on one side of the lock mechanism. Try moving it backward completely first. Then attempt the forward motion again with fresh positioning.
Temperature can help temporarily. Holding the drive in your hand for a minute warms the plastic slightly. Warm plastic becomes slightly more flexible, which sometimes eases the stiffness. Don’t use heat sources like hairdryers, as excessive heat can damage internal components.
Keep the slider moving regularly during use. Inactivity allows friction and debris to settle. Each time you insert or remove the drive, work the slider through its full range of motion several times.
This manual control method works best when jamming is mild to moderate. It buys you time while you decide on a permanent solution. Most importantly, it prevents the panic response of forcing the slider, which causes real damage that can’t be undone.
Step-by-Step: Permanently Fixing a Jammed Slider With Glue
Gluing your USB slider in place is a permanent solution when the plastic lock mechanism fails completely. This method works best when you no longer need the retractable feature and want to prevent further jamming.
Start by retracting the connector fully into the drive body. Make sure the slider sits all the way back in its locked position. This is your target state. You want the connector protected inside the housing, just as it would be during normal storage.
Clean the slider area thoroughly before applying any adhesive. Use a dry cloth to remove dust, debris, and any residue. A clean surface helps the glue bond properly and prevents particles from interfering with your work.
Apply a small amount of epoxy or plastic adhesive to the slider’s locking points. Focus on the grooves or teeth where the slider grips the connector shaft. You only need a thin layer. Too much glue can seep into unwanted areas and damage the drive’s internal components.
Press the slider firmly into the retracted position and hold it steady for the time recommended by your adhesive instructions. Most epoxy requires 5 to 10 minutes of pressure. Some formulas need 24 hours to cure fully before you use the drive again.
Check that the connector stays fully retracted after the glue dries. Gently try to slide it forward to confirm it won’t move. If it’s stuck solid, the fix worked.
This permanent solution means you can no longer retract the connector. The drive will always have the connector exposed when plugged in. Use this method only when you’ve accepted this trade off or when the slider has failed completely. For drives you still use frequently, this approach eliminates future jamming issues entirely.
Common Mistakes That Make Jamming Worse
Forcing a stuck slider is the biggest mistake you can make. When you push hard on a jammed mechanism, you break the plastic teeth inside even more. This turns a fixable problem into permanent damage.
Repeated insertion without holding the slider down causes continuous wear. Each time you plug in your USB drive, the slider moves slightly. If you don’t hold it steady, the lock mechanism grinds against itself. This speeds up the deterioration process dramatically.
Many people ignore early warning signs. A stiff slider or slight wobbling means wear is starting. If you keep using the drive normally without adjusting your habits, the jamming gets worse quickly. Catching these signs early saves you from total failure.
Yanking the slider back and forth aggressively damages the locking grooves. The plastic isn’t designed for rough handling. Gentle, steady pressure works much better than sudden jerking motions.
Applying heat to loosen a stuck slider can backfire. While warmth sometimes helps temporarily, it can also warp the plastic housing. The connector may not retract properly afterward, creating new problems.
Ignoring partial jamming is another common error. When your slider moves but feels rough, many people just keep using it. This continues the damage until the slider locks completely.
Not cleaning debris from the slider area makes jamming worse. Dust and dirt particles get trapped in the locking mechanism. This adds friction and accelerates wear on the plastic teeth.
Storing your USB drive with the slider partially extended causes unnecessary stress. The mechanism stays under tension, wearing out faster. Always fully retract the connector before storage.
Mixing different lubrication products on the slider creates buildup. This sticky residue traps more dirt and worsens jamming. If you use any lubricant, stick with one type and use it sparingly.
Understanding these mistakes helps you prevent slider jamming before it starts.
Troubleshooting Persistent or Severe Jams
When your USB slider jams severely and won’t budge no matter what you try, you need a different approach. Persistent jamming means the plastic lock mechanism has degraded beyond simple fixes. The slider may feel completely stuck or move only slightly before hitting resistance.
Start by stopping all force immediately. Yanking or pushing harder will only crack the plastic lock teeth. Instead, assess whether the connector is partially or fully extended. If it’s stuck halfway, the internal locking pins have likely misaligned.
Try this diagnostic method: gently wiggle the slider side to side while applying minimal forward or backward pressure. Sometimes the lock pins need to reset their position. Move slowly and pause between attempts. If the slider shifts even slightly, you’re making progress. If nothing happens after several gentle tries, the mechanism is damaged beyond temporary repair.
Heat can provide temporary relief in severe cases. Hold the drive near (not directly against) a warm surface for 30 seconds. Plastic expands slightly when warm, which may free a stuck slider. Let it cool naturally before attempting movement. This method works occasionally but isn’t reliable for permanent solutions.
Once you confirm the slider won’t move, permanent gluing becomes your best option. This locks the connector in its retracted position, preventing further jamming. The drive remains fully functional because you only need the connector extended during actual use.
Severe jamming also signals that repeated use has worn the drive’s locking system completely. If you haven’t already, back up any files on the drive before attempting repairs. A severely jammed slider sometimes indicates the drive is nearing the end of its reliable lifespan.
Document the jam’s behavior before proceeding. Note whether the slider moves at all, makes grinding sounds, or feels completely locked. This information helps you decide whether gluing or replacement makes more sense for your situation.
Preventing Future Slider Jamming
The best way to stop slider jamming is to change how you use your USB drive every day. Start with proper insertion technique. Hold the slider down firmly whenever you push the drive into a port. This single habit prevents most jamming problems before they start.
Keep your slider clean at all times. Dust and debris build up inside the locking grooves over weeks or months. Wipe the slider area with a dry cloth every few weeks. Remove any visible particles around the connector and slider edges.
Avoid storing your drive with the slider partially extended. Always retract it fully when you’re done using the device. Partial extension puts stress on the locking mechanism and speeds up wear. The slider should sit completely back in its locked position.
Use gentle movements only. Don’t yank the slider back and forth aggressively. Push and pull with steady, controlled pressure. Aggressive motions damage the locking grooves faster than normal use does.
Watch for early warning signs of trouble. If the slider feels stiff or doesn’t move smoothly, slow down immediately. Partial jamming is your signal to change your habits now. Ignoring these signs leads to complete jamming later.
Limit how often you insert and remove the drive if possible. Every insertion and retraction puts wear on the plastic lock. Consider using the same port consistently rather than switching between multiple computers.
Store your USB drive in a protective case or pouch. This keeps it safe from impacts that can misalign the slider. Proper storage also prevents dust from entering the slider mechanism.
These prevention steps work together. Clean regularly, insert carefully, store properly, and watch for warning signs. Following these practices adds years to your device’s life and keeps jamming from becoming a problem you need to fix later.
Final Thoughts
A jammed USB flash drive slider is a common problem. It happens because the plastic lock mechanism wears down after months or years of daily use. This is normal wear, not a defect in most cases.
The good news is that you have options. A temporary fix works well if you need your drive right away. Simply hold the slider firmly in place while you insert or remove the connector.
This quick trick buys you time. But it does not solve the root cause. The plastic lock will keep degrading with each use.
For a lasting solution, glue is your best friend. Apply it when the connector plug sits fully retracted inside the drive.
This step locks the slider in one position forever. You lose the retractable feature, but you gain reliability. Your data stays protected without daily struggle.
Think about how you use your drive. If you plug it in constantly, the sliding mechanism faces more stress. Gluing it down early can save you frustration later.
Remember this simple truth: plastic parts wear out. This applies to phone cases, chargers, and yes, USB drive sliders too.
Your best strategy combines both fixes. Use the manual hold method now. Plan for the permanent glue fix when you have time to do it properly.
Do not wait until your slider completely fails. A drive stuck in the retracted position becomes useless. You cannot access your files at all.
Take action today. Check your slider’s condition. Notice if it feels loose or sticky.
Small problems become big problems when ignored. A five minute glue job now saves you from losing important files later.
Your USB drive still works great even with a permanent slider fix. You simply trade flexibility for peace of mind. That trade is worth making.
Frequently Asked Questions
Why does my USB slider keep getting stuck?
The plastic lock mechanism inside your retractable USB drive wears down with repeated use. Each time you slide the connector in and out, the plastic parts rub against each other. Over time, this friction causes the locking tabs to degrade. The slider then catches on worn edges instead of moving smoothly.
This is completely normal wear and tear. It happens to most retractable drives eventually. The good news is you can fix it.
Can I use lubricant to unstick my slider?
Lubricants seem like a quick fix, but they actually make things worse. Oil and grease attract dust and dirt particles. These particles stick to the slider and create a thick buildup. The slider becomes even more jammed than before.
Avoid lubrication products entirely. Stick with dry solutions instead. Gentle wiggling and careful pressure work much better than any liquid.
What’s the difference between a temporary fix and a permanent one?
A temporary fix keeps your drive working while you decide what to do next. Hold the slider down firmly when inserting your USB drive. Apply gentle pressure without forcing it. This workaround buys you time.
A permanent fix locks the slider in place using adhesive. Once glued, the slider never moves again. Your drive still works perfectly because the connector stays retracted. This solution prevents all future jamming.
How do I know if my slider damage is permanent?
Test your slider with minimal pressure. Gently wiggle it side to side. If it moves slightly but catches, you still have options. If it won’t budge at all, permanent gluing is your best choice.
Document how the jam behaves before making your decision. This helps you choose the right solution.

Hi, I’m Pearl Standen, the voice behind The Web Utility. I’m a passionate tech enthusiast who loves exploring the latest gadgets, smart devices, and electronics that make everyday life easier. Through my website, I share honest, well-researched reviews of trending Amazon products to help you make smarter buying decisions.